Pipe Mud and Pipe Cement (WARNING: GIANT POST)

Log in

SmokingPipes.com Updates

Watch for Updates Twice a Week

PipesMagazine Approved Sponsor

PipesMagazine Approved Sponsor

PipesMagazine Approved Sponsor

PipesMagazine Approved Sponsor

PipesMagazine Approved Sponsor

Status
Not open for further replies.

patbom

Lurker
Oct 16, 2016
2
1
Wood Peeling Machine
In the link above you will see a a machine that peels the surface of the wood planes. If we can find the wood waste of this machine, we can produce easily very good quality of hardwood ash. Because as you see the machine produce very very thin layer of hard wood as a waste. That thin layers will burn very easily and equally.

And another way may be to use some sawdust from carpenters.


skeauxsha

Lurker
Sep 17, 2017
1
0
I wood have never thought of this.

Dimm, this technique has just saved one of my favorite pipes, a Peterson Dublin Smooth Church Warden.

I have been a pipe enthusiast now for a little over one year. Like all things in life I'm still learning as I go. Reading tips about details surrounding this lost art, and of course my own experience.
Anyways, the Pipe has burned all the way through which surprised me, because it is relatively new. I don't smoke hot, I sip to watch the heat. So, after reading all the way through this thread, then once again just to make sure I got it all, it was time to try it out.

Out in the garage I use a drill press on the slowest speed and chucked up a small drill bit. I did this to gently clear away the entire burned area. The pipe had already burned all the way through so no harm, no foul. Once that was done I chucked up a small bronze round brush that fit just tight in the bowl of the pipe, and reamed the burn side to give the cement a clean-ish surface to adhere to. Once that was done I used a wadded paper towel to remove any residual dust in the bowl. Now the pipe is prepped and ready for the 1st time pipe cement experiment.
Luckily I do have a wood-burning stove, and burn seasoned Almond wood, so I thought "Why Not?

I was deliberate to use much of the remaining white ash. This white ash had also sat since last year (I haven't swept the stove yet for this years burning season)

This gave me about 1/4 cup of white ash. Putting it in a dish, at first I thought this would be waaaay too much material but went with the amount anyway (first time and all that)

I began to add water only drops at a time as I was mixing with a little wooden spoon, and was amazed to see the ash reduce with each drop of water added.

When I was satisfied with the consistency (like play dough just as described by Dimm's post).

I then used the spoon end of a Peterson Pipe tool like a tiny spatula concentrating on the prepped hole in the side of the pipe. Once that was filled in nicley, I decided to line the entire bowl (except the bottom). Once that was done, I left the pipe on the counter overnight, then set it out in the morning sun.
I started the process around 7:00 pm Saturday, and by 2:00 pm Sunday decided to give it a smoke.

Like always when breaking in a pipe I only half filled the bowl half-way, and as Dimm had described in his post the initial first half of the bowl taste was bitter. Then I kept in mind that I was in essence breaking the pipe in all over again. Ladies and Gentlemen, the process works! Having gone through the first half-bowl I looked in side, and I'll be dipped in pipe mud cement this really freaking works. Once I have smoked a full bowl in the pipe I'll work on the aesthetics and clean up the outside gently with a used toothbrush and a little wood tone.
Until last night I didn't know about these types of pipe repair. I would have thrown the pipe away, and got another one. I am impressed enough that I had to join up and post my findings.
Thanks Dimm! Brilliant! Absolutely Brilliant post!


johnsteam86

Starting to Get Obsessed
Jan 1, 2018
271
0
Well that saved me about $20. I'll go with the cement to use on my cobs from now on.


johnsteam86

Starting to Get Obsessed
Jan 1, 2018
271
0
It really depends on the pipe. Sometimes I get a soft spot kind of like what happens on a briar with a sand pit but its very rare. Most of the pipes I use it don't have a hardwood plug so really just on the bottom for reinforcement and a little on the sides. The only one I have to raise it on right now is the Ozarks I have since they are bored a little to high and one is showing some wear after 2 years of constant smoking while I was getting the rotation setup.

 
Jun 27, 2016
1,280
126
I've tried ash, and have had better luck with un-sanded white grout for filling a couple voids in chamber walls. I've put white grout in the heel of one of my pipes, and it works, but it seals up and moisture sits on it if the smoke is too wet, so maybe ash is better there. But, I want to grind up some meer chips and try to make a slurry out of that, and drop that in the heel of a cob or something to see how that works. Hmm. I actually have a new cheap tester cob that I bought recently, and the heel is all screwed up on that thing out of the box. Hot glue down there, some sort of weird draught-hole stem that sticks into the bowl, I have no idea what is going on with that thing, but I am just realizing that it is actually the perfect candidate to try the meer slurry. :puffpipe:

 
Jun 27, 2016
1,280
126
27975669209_e0607ed905.jpg

It's a small 4"-5" throwaway pipe that I picked up to try some strong tobacco that I might not like. I forgot when I posted earlier that I have actually already drilled and sanded out out the wooden beam and glue, but the draught-hole is riding very high, so still a good opportunity to try out some meer slurry to raise the floor.


workman

Lifer
Jan 5, 2018
2,794
4,230
The Faroe Islands
Has anyone tried this inside the shank? I have a badly drilled pipe where the drilling in shank and stem are not aligned. Pipecleaners will not pass. Is it possible to fill up the cavity and make something like a ramp for pipecleaners, or will they break the cement?

 
Jun 27, 2016
1,280
126
I don't think that I would put these types of materials in the shank. Have you tried putting the cleaner in about 1/4" and then bending it against the side of the slot, and then continuing to move it down while rotating it in some logical directions to try and catch the airway down there? What shape of pipe is it? Filtered? :puffpipe:


johnsteam86

Starting to Get Obsessed
Jan 1, 2018
271
0
Yea if you have already taken the dowel out of the middle I would just raise the floor of it with the mud or cement. Should make it last a couple years to since you will not have to worry about corking the floor with moisture.

 
Jun 27, 2016
1,280
126
I never thought to do it that way because I didn't want to detach the stem, but maybe you are right. I hit it with a 1/2" drill bit to get most of it, and then a circular dowel with rough sandpaper to smooth out everything. The sanding took a little longer than I thought, but I probably spent 20 minutes total doing everything including clean-up.
It's really just a tasting pipe, I don't expect to begin seriously smoking it beyond a couple of blends that I'm concerned about ghosting, but I have been interested in working with some meer powder slurry in the heel of a pipe, just to see how it does.


ben88

Lifer
Jun 5, 2015
1,320
546
Quebec
I'll be doing the mod for the same reason. Shank comes off easy after 20 sec in microwave. I'm not sure yet if I'll mud the pipe or drill out the bottom and glue in hardwood plug all the way to the draft hole. I also found out that MM uses white glue for shanks, so I'd prefer to replace it with quality carpenters glue anyway. Might even make a new shank with narrowed draft channel, make it a bit longer, not sure yet...
meer powder slurry
have you tried making it to see if it's even possible?

I think you'll need more than just water to hold it together

 
Jun 27, 2016
1,280
126
I have not tried making it yet, but I have found people referring to making "meer glue" from powdered meer and egg-whites in order to re-attach broken shanks etc., and I also found an old patent online for making pressed meerschaum shapes, which calls for meer powder and egg-white, and it gives the ratios. Maybe "3" powder to "1" egg whites, I would have to find it again. So I will try to make some and see how it sets up on its own without being pressed first, and then maybe try to press it somehow if necessary, and then ultimately decide if or how I want to apply it to the pipe. :puffpipe:

 
S

sunriseboy

Guest
Mike at Canerod Pipes sent me a YT link with what I think was BadgerPiper. He drilled out the bottom plug, made new hardwood plug, used a chamber bit to make a concave bowl in the plug, drilled a hole two or three mls down from the lip for the draught hole, glued it, inserted it back into the bowl. Great. The only real detail that has to be watched is lining up the hole in the new plug with the draught hole and the shank.

Tried it, and it works brilliantly. Just like the bottom of a briar bowl.


JimmiGee

Lurker
Dec 30, 2019
1
1
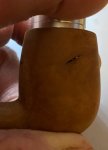
I have a briar block I have been working into my first homemade pipe. All was going well until I discovered a small fissure in the side of the bowl. From a cosmetics point of view, it is just some character added to the briar. From a functional point of view, I'm thinking "What a disaster!"
All that work I spent shaping and sanding only to find my new pipe has a hole in the side of the bowl!
It is a very small passageway that I was not sure even went all the way through the wall. After inspection with an extremely bright LED flashlight aimed into the bowl, I could see a teeny tiny pinhole of light when I turned it to just the right angle.
Being a stubborn mule I set out to google the crap outta my predicament. Not finding very many solutions that sounded like they would provide a lasting solution I stumbled on this Pipe Mud article. I was intrigued. I am going to mix up some pipe cement and fill this little fissure from the inside of the bowl. Next, I'm going to mix some briar dust and glue to fill in the outside of the fissure.
Why am I spending so much effort on this?
  1. See "stubborn mule" above.
  2. Because I can.
Thanks for the article!
I am inspired and ready to make this work.

14065
 
  • Like
Reactions: aspiring_sage
Status
Not open for further replies.