Incredible details, that is some really impressive work!
A Cosmic Windcap
- Thread starter cosmicfolklore
- Start date
You are using an out of date browser. It may not display this or other websites correctly.
You should upgrade or use an alternative browser.
You should upgrade or use an alternative browser.
SmokingPipes.com Updates
Watch for Updates Twice a Week
Thanks guys! You’re all way too kind.
It is, but I’ve also added a tad bit of a heat tolerant epoxy. I did consider making some sterling screws that I tap myself or small nails, like Peterson does, but they’re just ornamental. And, the time and effort didn’t seem to add much to the design, IMO.Nice work Michael. Kudos to you and Mark.
Is the whole assembly press fit onto the Briar?
That is nothing short of beautiful! Well done!
Outstanding job sir! I'd say you hit the nail on the head on this job! Nice job man...I've been working with Mark Tinsky lately. I have posted a few hints in the WAYS threads, with my pipes set up next to piles of those tiny stars that I make for Mark, that he uses as his logo. But, I've just really been busy and didn't want to jinx it. I know, I know, silly superstitious artist guy. I've also been making bands for Mark and a few other pipemakers, along with a ton of repair bands coming in from pipeshops. It really has been keeping me busy, Resizing diamond rings in the mornings and repairing pipe stems in the evenings. But, a few weeks ago, Mark gave me a new challenge.
A customer of his wanted a windcap, with a flyfishing theme, which is ironic, because I don't know diddly about flyfishing, nor have I ever had a windcap. Is ironic the right word? So, I had to come up with an idea... and buy a few pipes with windcaps.
First off, I assumed that windcaps had to have a screen for the lid, but apparently Peterson and a few other pipe companies didn't.
I guess I could go on and on about how I came up with the idea, but... this is what I made.
View attachment 140049
The lid has an overlay with the fisherman on it, and then treated with a Japanese patina to oxidize and carbonize the shadow to give it contrast and make it look like clouds. Also, knowing that the heat will rise up and heat the lid a bit, it should keep adding color to the design, except for the overlay, which has been surface guilded to bring up a fine silver layer over the design, making it impervious to oxidation... somewhat.
View attachment 140052
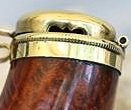
The air holes under the lid were carved to sorta look like the waves on the surface of water, and the hook... well, that was supposed to look like a small fishing hook.
View attachment 140053
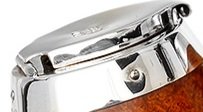
Hinges... about the hardest damned thing to make, for me. And, that's my makers mark under the lid.
View attachment 140054
Another pic, yaddi yaddi... oh yeh, I forgot to say that I had to get Mark to cut me a dado around the surface or the rim for attaching the cap. It was quite amusing, because I think of things in gauges and mm's, and while discussing things like bands, and the cap, we were both constantly translating mm's and gauges into inches... 20 gauge is 3/80"... I guess lathes are set in inch incrimates, or that is just what he is more comfortable with. Anyways, trade humor, ha ha.
View attachment 140055
View attachment 140056
Anyways... I am not making windcaps for the general public. It really is impossible, because I need the rim and top cut for a dado to hold the cap on. But, you should hit up Mark for a pipe with one made for it, if this is something that interests you, then contact Mark.
Anyways, back to the bench. Busy busy busy...
Does this make you want to go fishing? It does me... if I had time... and if I knew how to flyfish...
This is fantastic. Glad to finally see the finished project. That's some serious skill there my friend. Even better than I imagined!
Thank you, and thanks for keeping it schtum till I got it posted.This is fantastic. Glad to finally see the finished project. That's some serious skill there my friend. Even better than I imagined!
That came out beautiful, Michael! I love the detail, down to the fish hook clasp. Very well done, sir! Dare I ask how long it took?
That is absolutely beautiful craftsmanship, Cosmic! The pipe is beautiful in its own right, but the detail on the wind cap is astounding. It really does make me want to go fishing! I love the waves detail in addition to the fishing hook latch!
I truly appreciate the talent. I do a lot of woodwork and leatherwork but this is on another level for me!
I truly appreciate the talent. I do a lot of woodwork and leatherwork but this is on another level for me!
Wow! That's amazing. Well done.
I would love to see a pic after being smoked...the added color to the design.Also, knowing that the heat will rise up and heat the lid a bit, it should keep adding color to the design, except for the overlay,
Sure, I can’t give a totally accurate time, because I am working on it, as I also shoot waxes for clients, and also prep other work, but there is about 18 hours in it. But, some of this time includes pouring sterling billets and milling it into sheet and wire as I work, because all of my metal comes from the refinery in grain form.Dare I ask how long it took?
Each one will get a tad faster. And, Mark wants more of these made.
Thanks again!
On a factory cap, they do not have vents. But, even though the client didn’t care for vents, I just HAD to makes some. Look at the pic of the hook clasp to see the vents made in the wave on water design.Does it have ventilation holes?
No. Good story regardless! And a great illustration. The whip shape of the line gives it motion.Is ironic the right word?
The details on the cap are fantstic, but no ventilation?
The venitlation is provided by the ridges (waves) around the rim, just beneath the lid.The details on the cap are fantstic, but no ventilation?
Lovely stuff Cosmic.. I always enjoy seeing your silverwork when you post it.
Fantastic job!I've been working with Mark Tinsky lately. I have posted a few hints in the WAYS threads, with my pipes set up next to piles of those tiny stars that I make for Mark, that he uses as his logo. But, I've just really been busy and didn't want to jinx it. I know, I know, silly superstitious artist guy. I've also been making bands for Mark and a few other pipemakers, along with a ton of repair bands coming in from pipeshops. It really has been keeping me busy, Resizing diamond rings in the mornings and repairing pipe stems in the evenings. But, a few weeks ago, Mark gave me a new challenge.
A customer of his wanted a windcap, with a flyfishing theme, which is ironic, because I don't know diddly about flyfishing, nor have I ever had a windcap. Is ironic the right word? So, I had to come up with an idea... and buy a few pipes with windcaps.
First off, I assumed that windcaps had to have a screen for the lid, but apparently Peterson and a few other pipe companies didn't.
I guess I could go on and on about how I came up with the idea, but... this is what I made.
View attachment 140049
The lid has an overlay with the fisherman on it, and then treated with a Japanese patina to oxidize and carbonize the shadow to give it contrast and make it look like clouds. Also, knowing that the heat will rise up and heat the lid a bit, it should keep adding color to the design, except for the overlay, which has been surface guilded to bring up a fine silver layer over the design, making it impervious to oxidation... somewhat.
View attachment 140052
The air holes under the lid were carved to sorta look like the waves on the surface of water, and the hook... well, that was supposed to look like a small fishing hook.
View attachment 140053
Hinges... about the hardest damned thing to make, for me. And, that's my makers mark under the lid.
View attachment 140054
Another pic, yaddi yaddi... oh yeh, I forgot to say that I had to get Mark to cut me a dado around the surface or the rim for attaching the cap. It was quite amusing, because I think of things in gauges and mm's, and while discussing things like bands, and the cap, we were both constantly translating mm's and gauges into inches... 20 gauge is 3/80"... I guess lathes are set in inch incrimates, or that is just what he is more comfortable with. Anyways, trade humor, ha ha.
View attachment 140055
View attachment 140056
Anyways... I am not making windcaps for the general public. It really is impossible, because I need the rim and top cut for a dado to hold the cap on. But, you should hit up Mark for a pipe with one made for it, if this is something that interests you, then contact Mark.
Anyways, back to the bench. Busy busy busy...
Does this make you want to go fishing? It does me... if I had time... and if I knew how to flyfish...


