Repair Help - Request for Advice (Pics)

Log in

SmokingPipes.com Updates

Watch for Updates Twice a Week

PipesMagazine Approved Sponsor

PipesMagazine Approved Sponsor

PipesMagazine Approved Sponsor

PipesMagazine Approved Sponsor

PipesMagazine Approved Sponsor

Status
Not open for further replies.

pruss

Lifer
Feb 6, 2013
3,558
370
Mytown
Quick update. Soaking the bowl overnight in isopropyl really helped loosen the accrued crud from the draught hole and I was able to clean it out. I'm going to let it dry totally before boring out the hole in the bottom of the bowl in advance of prepping the plug.
Thanks again for the advice and encouragement gang.
More anon,
-- Pat


ejames

Lifer
Oct 6, 2009
3,916
22
WOW! Never know the plug was put into the bowl. How long was plug that was used? Did the chamber have to be bored to accommodate it?
The plug ended up about 1/4-3/8" long when done. Didn't have to do any work to chamber. I did do some reshaping of the plug once it was installed to make it fit the contour of the bowl bottom better.


pruss

Lifer
Feb 6, 2013
3,558
370
Mytown
Didn't have to do any work to chamber.
I'm in the same boat here. I'm hopeful that after drilling out the hole in the photos above, all I'll have to do is backfill with a little fireplace cement and then add the briar plug. The chamber itself looks to be in great condition.
-- Pat


pruss

Lifer
Feb 6, 2013
3,558
370
Mytown
Alrighty... it has been a while since I updated you guys on this pipe. My apologies.
I just managed to track down some high temperature silica based fireplace cement, and upgraded my drill bits with plug borers.
I'm not thrilled, but I have at least solved the problem of an unwanted carburetor on the bottom of the pipe.
Here is what I did:
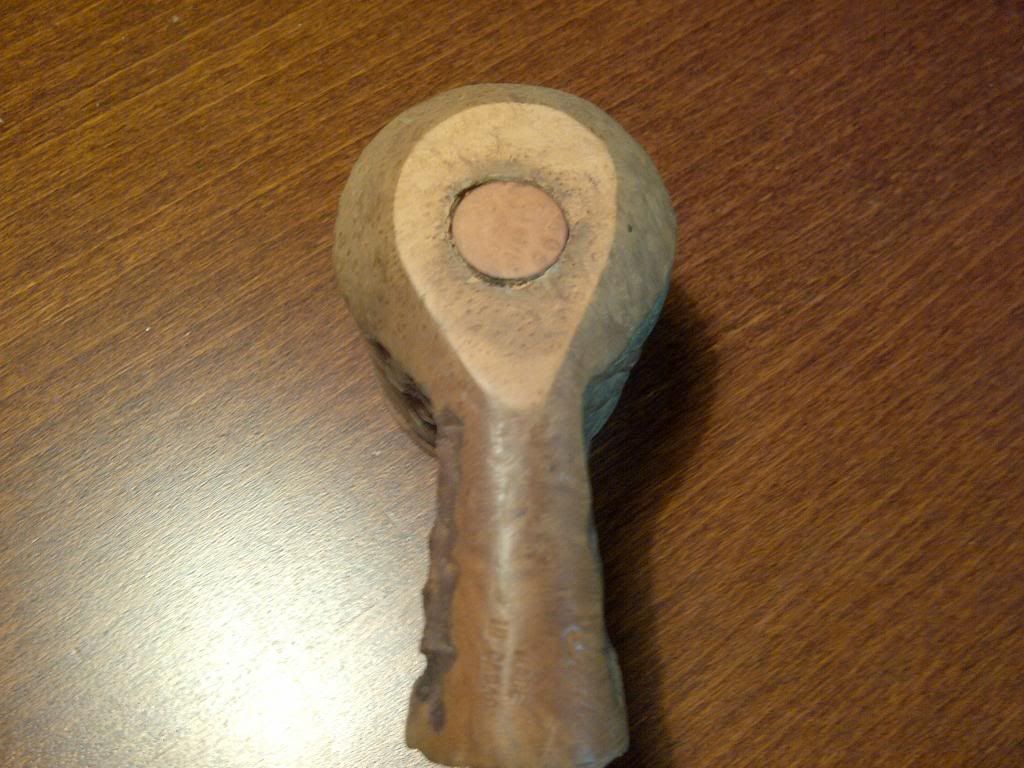
I bored out a plug of briar from a sacrificial lamb:


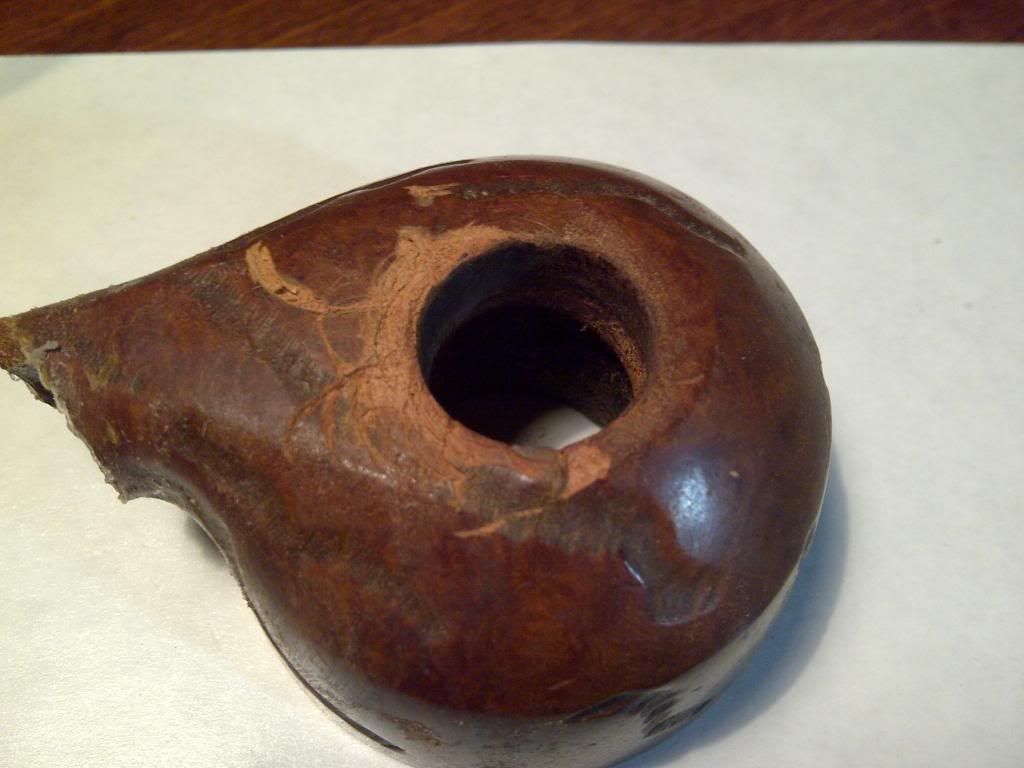
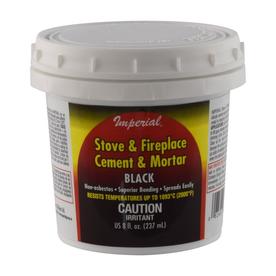
I then drilled a hole of a matching diameter into the pipe (no pic here folks, my bad). Here is where I learned how difficult it is to drill a straight hole into briar, at the right speed, with a hand-drill. So as you'll see in a second, I buggered the hole a bit. I then plugged the badly drilled hole that the previous owner put into the bottom of the pipe with fireplace cement, and then tapped the briar plug into place. Lastly, I sanded the plug down to flush with the bottom of the bowl.


Next, I'll fill around the plug with briar dust and superglue. I think I'll likely rusticate the whole area, or just go with a darker stain.
While I'm sorry that it's not as neat as I'd like, I am THRILLED that I'll have a functional pipe at the end of the work here.
Thanks for all the advice friends. It's fun learning how to do this stuff with you all.
Cheers,
-- Pat


ejames

Lifer
Oct 6, 2009
3,916
22
When I drilled that Nording I wrapped the bowl with a few wraps of masking tape and clamped it in the vice of my drill press. I used a Forstner bit.They don't dig into the wood like a twist drill and make a nice cut. Whatever you drill it with your bits need to be very sharp.


pruss

Lifer
Feb 6, 2013
3,558
370
Mytown
While were on the topic of repair help, how does one rusticate a pipe?
Good evening Ron, as I understand it, rustication is effectively "distressing" and the options are limited to any thing sharp/blunt/edged/toothed to cut/scrape/gouge/grate a pattern into the briar.
I'll let you know how it goes with pics and update here.
-- Pat


pruss

Lifer
Feb 6, 2013
3,558
370
Mytown
Hey Al. I finally found it in a "Home Hardware" which is a franchised version of a mom & pop hardware store, it's not commonly stocked in the big-box hardware places in my 'hood. I'll snap a picture and post it later.
-- Pat


ssjones

Moderator
Staff member
May 11, 2011
18,447
11,355
Maryland
postimg.cc
Lowe carried this "Imperial Black Stove & Fireplace Mortar" in an 8 oz tub. It is silica based and is already mixed, ready to apply. It dries fast and hard. I tried it in one of my pipes. It is drying now, but I believe one could even sand the bowl interior smooth with this stuff.
http://www.lowes.com/pd_64843-85334-GA0188_4294856693_4294937087?productId=1191571
The MSDS Sheet is here:

http://www.greentek.ca/userfiles/file/GA0188%20Stove%20&%20FP%20Mortar.pdf
063467845973lg.jpg


pruss

Lifer
Feb 6, 2013
3,558
370
Mytown
Thanks for posting this Al. This is EXACTLY the same stuff that I picked up. Bradley recommends firing it to aid in curing. I noticed, in the small danish-esque pipe I'm working on in another thread, that the false bottom I put into the pipe in this cement shrank during drying. So I'm going to pull it out, reapply more cement, and then pop it into the oven at about 350F to try and cure it.
-- Pat


ssjones

Moderator
Staff member
May 11, 2011
18,447
11,355
Maryland
postimg.cc
Cool! I noticed it sets up very quickly. I was worried about smoking the pipe with that coating before a cake develops. I posted this to the "Pipe Mud & Cement" thread as well.


tbradsim1

Lifer
Jan 14, 2012
9,105
11,068
Southwest Louisiana
Al & Pruss as soon as it skins i load up and smoke the crap out of the pipe, down to ash, load up on top of ash and smoke it again. I fixed a Pepino Ascorti Freehand someone had dug wih a pipe tool about a 1/4 inch hole , retorted pipe , cleaned btm as best as I could, mixed up the mortar, applied with pipe tool, when skin appeared Smoke City, it's a big pipe light as hell and now one of my best smokers.

 
Status
Not open for further replies.