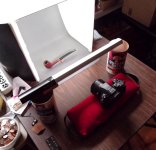
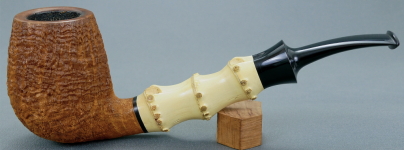
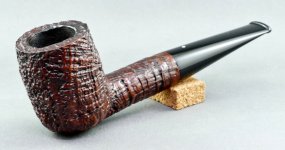
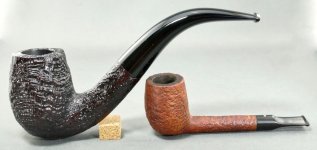
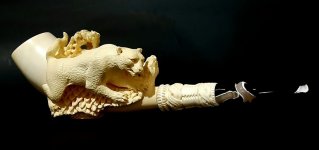
Your pictures are definitely better than 98% of all eBay pictures of pipes. In rereading my response, I didn't mean to disparage what you had... but as Someone with more art education than common sense, my critique skills just immediately jump to making improvements.
Photographing Pipes in a Light Box.
- Thread starter RustiePyles CPG
- Start date
You are using an out of date browser. It may not display this or other websites correctly.
You should upgrade or use an alternative browser.
You should upgrade or use an alternative browser.
SmokingPipes.com Updates
Watch for Updates Twice a Week
If warm, natural colors are what you are going for. Light changes "temperature" dependant on many things, overcast, angle of the light, reflection from trees, buildings and so forth. A photographer controls light temp with reflectors and the temperature of the light sources. Most products are shot under conditions and light sources, including reflectors/umbrellas, to insure "neutral" lighting and no shifting of the product's "true" color.have you tried photography at twilight or "magic/hour"
It all depends on the result desired. I love the so-called "magic hour" for wildlife, most of the time. Products, which I did a lot of wife, I strove for neutral.
For me, editing on the iPhone is more difficult than on computer, so I rarely do it.
As to exposure, take a reading on the pipe itself.
As to exposure, take a reading on the pipe itself.
Ok, there are all kinds of complicated tricks to take good photos of small items like pipes. But simple is better, so just wait for an overcast day where you can't see your own shadow. Lay your items outside and shoot away. You should get good pics to use here or elsewhere. 

Not at all, I didn't take it that way anyway. I welcome all input, thats why I asked. I know there are lot of people here with extensive experience and training in artistic imagery like yourself, @sablebrush52, @Ironmonkey, @JimInks, and I'm sure many others.Your pictures are definitely better than 98% of all eBay pictures of pipes. In rereading my response, I didn't mean to disparage what you had... but as Someone with more art education than common sense, my critique skills just immediately jump to making improvements.
Lightboxes are about the worst thing for product photography. I too bought one and I never used it after the results I got.
But, since once we buy something we normally insist on using it so as not to feel the guilt of wastefulness... I'll bite.
You need to lose the lights on both sides. You'll get crossed shadows which are bad. Even though they be softened by the diffusing material of the box, crossed shadows are still a sign of pedestrian photography.
Now, your lights allow you to control the intensity. If so, you can use ratios to add some fill on one side, and let your main light dominate.
You want to get the best photo you can "in camera" so that your post-processing is minimal, especially if you're editing on a phone.
OK, so, a couple of things, and I'll try to be more careful with my typing. Double shadows are going to happen when the light sources are set too far toward the sides. The lightbox is supposed to be a diffuser that would essentially eliminate that issue, which comes with "hard" source point lighting. If you have any other options to move the position of the lights, or the subject, so that the lights are a bit more "in front" and less "to the side" of the subject that issue may be resolved. When I'm shooting something my sources are placed at an angle of between 30˚ and 45˚ and outward and in front from the plane of the subject, pretty standard set up.Here you go, external lighting will not work with this setup. I have a set of stand lights with filters, but they wouldn't do much good with this box.
Thanks @sablebrush52 I agree about the shadow and thats not really my primary problem. I find that with some of my photos I'm having to turn up the brightness in editing so far that I'm getting washout. I would like to eliminate the double shadowing from having two light sources though. The interior of the light box is reflective and I think its supposed to act as a light bounce but its also textured to diffuse bounce, I'm not really sure exactly how effective it is though.
There are better tools for editing than using brightness, which is occasionally the right move, but more often is a blunt instrument. Try adjusting contrast using white point, black point, and gray point sliders, if you have them, the equivalent of a levels adjustment in Photoshop, and if not available in your kit of tools you can cheat a similar result by adjusting using both contrast and brightness, but less reliance on brightness. If you have a curve function, use that first. Much more control of how you adjust tonal levels in your image.
Last edited:
Here, someone from elsewhere was having the same conundrum years ago: it's an interesting read:

 leatherworker.net
He too got a lite-box and was using a phone.
Whilst what he was shooting weren't pipes, his items had similar features pipes do: surfaces that are textured and/or smooth.
Smooth spots like pipes' stems need to have a nice highlight running along their shape. You get that with white cards and reflectors.
Textured surfaces like sandblasted/rusticated finishes AND the maker's stamp, need to stand out and for that you need to rake them with your light. Your third photo did this.
Alas, smooth surfaces are a pain because they will reflect and show the shape of the light source. Your smooth pipe has two highlights for this reason. Normally, only one highlight is desired.
One of the most useful things for product photos is a small double-sided makeup mirror. Dirt cheap. Priceless.

Light box? Please help!
I am on a mission to improve my photo quality for my website, social media and other advertising. I am currently using an iPhone and outdoor props, which is all bad in the winter in Northern Idaho. Lol. I am new to photography, but will be purchasing a DSLR and a good 50mm prime lense. My main qu...
He too got a lite-box and was using a phone.
Whilst what he was shooting weren't pipes, his items had similar features pipes do: surfaces that are textured and/or smooth.
Smooth spots like pipes' stems need to have a nice highlight running along their shape. You get that with white cards and reflectors.
Textured surfaces like sandblasted/rusticated finishes AND the maker's stamp, need to stand out and for that you need to rake them with your light. Your third photo did this.
Alas, smooth surfaces are a pain because they will reflect and show the shape of the light source. Your smooth pipe has two highlights for this reason. Normally, only one highlight is desired.
One of the most useful things for product photos is a small double-sided makeup mirror. Dirt cheap. Priceless.
Last edited:
I should have been a little more specific, I don't only use the brightness. I do adjust my white and black points as well as contrast and exposure. I just seem to have to lean on the brightness heavily on some photos. What I find myself doing often is adjusting my brightness first and then going back and tweaking my B/W points and contrast to make the photo look normal again. I think I may be doing things backwards though. As for Curve, that one I'm not familiar with, I'll have to look into that.OK, so, a couple of things, and I'll try to be more careful with my typing. Double shadows are going to happen when the light sources are set too far toward the sides. The lightbox is supposed to be a diffuser that would essentially eliminate that issue, which comes with "hard" source point lighting. If you have any other options to move the position of the lights, or the subject, so that the lights are a bit more "in front" and less "to the side" of the subject that issue may be resolved. When I'm shooting something my sources are placed at an angle of between 30˚ and 45˚ and outward and in front from the plane of the subject, pretty standard set up.
There are better tools for editing than using brightness, which is occasionally the right move, but more often is a blunt instrument. Try adjusting contrast using white point, black point, and gray point sliders, if you have them, the equivalent of a levels adjustment in Photoshop, and if not available in your kit of tools you can cheat a similar result by adjusting using both contrast and brightness, but less reliance on brightness. If you have a curve function, use that first. Much more control of how you adjust tonal levels in your image.
I really need to play with the position of the lighting in the box, seems that is the source of most of my issues.
It's the only way to learn in my opinion. You can read, watch a master but, there is no substitute for screwing around and very critically assessing your results. And, having others, proficient in photography or, at least lighting, assess your work.I really need to play with the position of the lighting in the box, seems that is the source of most of my issues.
personally i have CARS (chronic Amazon return syndrome) i never used to return things, now I’ll buy something to try and if it doesn’t give me multiple orgasms it goes right back.Lightboxes are about the worst thing for product photography. I too bought one and I never used it after the results I got.
But, since once we buy something we normally insist on using it so as not to feel the guilt of wastefulness... I'll bite.
You need to lose the lights on both sides. You'll get crossed shadows which are bad. Even though they be softened by the diffusing material of the box, crossed shadows are still a sign of pedestrian photography.
Now, your lights allow you to control the intensity. If so, you can use ratios to add some fill on one side, and let your main light dominate.
You want to get the best photo you can "in camera" so that your post-processing is minimal, especially if you're editing on a phone.
Start with only ONE light. And do this in a dark or darkened room, so that ambient light will interfere as little as possible.I really need to play with the position of the lighting in the box, seems that is the source of most of my issues
Hell, take the pipe out of the lightbox and place it on the dining room table. Now, use that ONE light to illuminate the pipe from different angles. The shadow edge will be hard, but who cares, this is an exercise not the final shot. Plus, hard edges also make it easier to teach oneself to "see light" (i.e. how light shapes an object based on the angles it falls on it from).
Position yourself so that your eyes will be where the camera will be: this is the 0-0 position.
Then start moving the light around the pipe/subject in a circle. See what shadows that throws and how the pipe's features change in appearance—lightening or darkening—as the light goes around like a planet round a star.
I'd even start with the light ON the table, at the same level as the object. This is your first angle.
After that exercise then raise the light to approx. 45° and go round the pipe again. Start with the light right above your eyes: this is the 0-45 position.
As an aide, commonly used placements for the main light are the 45-45 or 45-60. If you want split lighting then it's 0-90 or 45-90.
Play with it.
Once you've gotten the interplay of light and shadows down, you can start introducing fill light. Once you've gotten this down too, then and only then start placing diffusers (i.e. your light box) between the light and the object to soften shadows.
And just like that the secret is out!Add an adjustable (brightness and wavelength) bar light across the top-front.
View attachment 200640
View attachment 200642
View attachment 200644
View attachment 200655
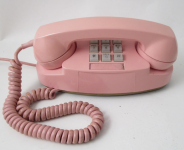
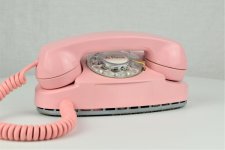
Wait which number do i dial for that? I keep looking and got nothing.My phone's editor with natural light or a black background keeps me happy.
View attachment 200673View attachment 200674
btw these freaking phones now sell for stupid amounts of money.. jesus
Last edited:
He's very exclusive.Wait which number do i dial for that? I keep looking and got nothing.
btw these freaking phones now sell for stupid amounts of money.. jesus
View attachment 200681
Still, not bad for a stock editor on a 7 year old phone.
You do very well. You've got a great eye for seeing the shot before you take it. I'll bet you learned that thtough trial and error. Just like the rest of us. It's more what's between the ears than one's camera. If seen great shots taken with a "pinhole" camera by someone who knew what they wanted and what the possibilities were.My phone's editor with natural light or a black background keeps me happy.
That would be a winning bet.I'll bet you learned that thtough trial and error.


