Care of an Estate Meerschaum

Log in

SmokingPipes.com Updates

Watch for Updates Twice a Week

PipesMagazine Approved Sponsor

PipesMagazine Approved Sponsor

PipesMagazine Approved Sponsor

PipesMagazine Approved Sponsor

PipesMagazine Approved Sponsor

Status
Not open for further replies.

raf66

Might Stick Around
Mar 2, 2010
71
0
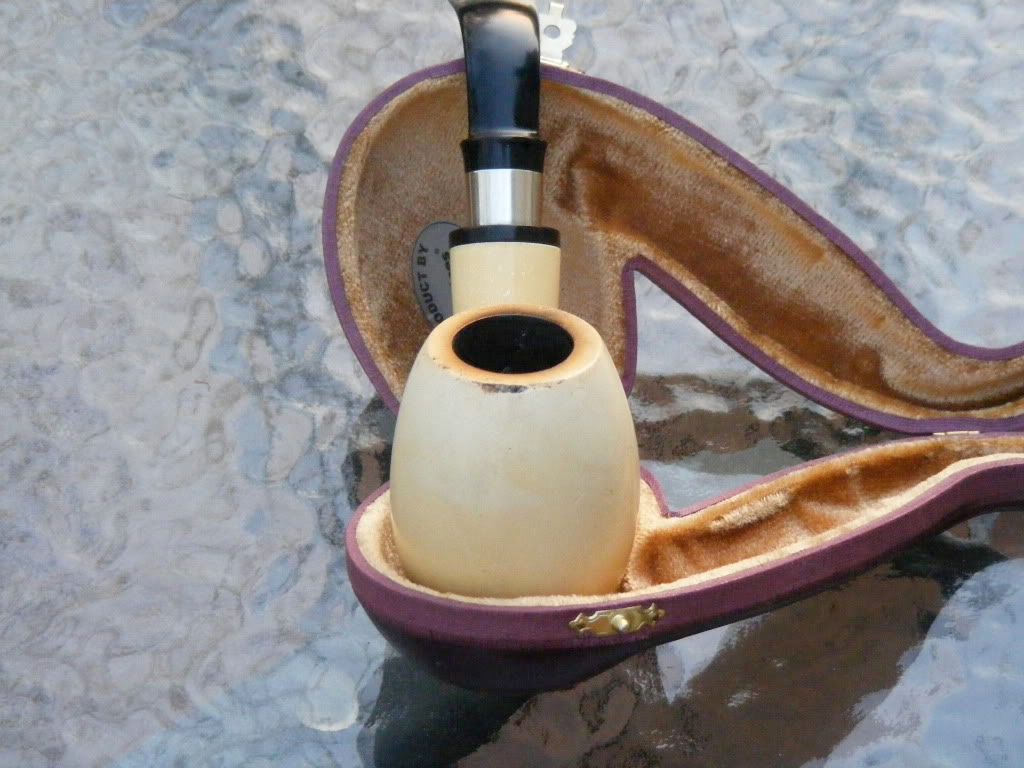
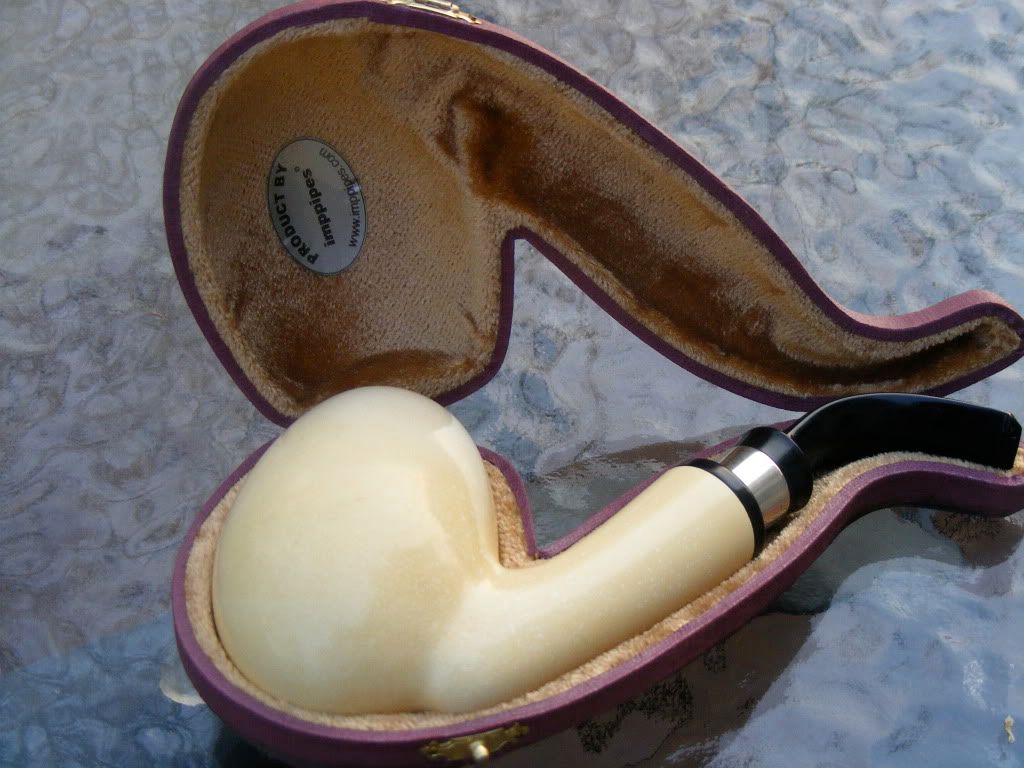
Hi everyone. I just recently purchased an estate IMP meerschaum pipe and it is my first. I'm attaching a couple of photos as I'm trying to get some suggestions as to how to clean/repair the front portion of the bowl as it is a little "chipped". It smokes wonderfully, a completely different experience from my briars, and man can this thing hold a bunch of baccy. I'm just hoping you guys can suggest ways that I can make it look a bit better.
Thanks.
Oops. Sorry, I'm not sure how to post pics.

DSCF1118.jpg


DSCF1120-1.jpg


DSCF1120-1.jpg

(fixed pics)pstlpkr


unclearthur

Lifer
Mar 9, 2010
6,875
6
I have very gently sanded a number of estate meerschaums. I use 1200 and go very slowly then rewaxed and repolished


raf66

Might Stick Around
Mar 2, 2010
71
0
Thanks for the responses guys. And yes, I agree, it's a wonderful shape, albeit a little too big to be a classic "clencher". When you mention wax, unclearthur, what exactly do you mean? A normal briar spray wax? A general carnuba wax? Thanks again for the guidance everyone.


unclearthur

Lifer
Mar 9, 2010
6,875
6
Meerschaums are now finished with bees wax. Many years back they were finished with all kinds of strange things including beef tallow. To re wax I charge a loose buff with bees wax and apply it that way. Of course that assumes that you have a buffer available.


unclearthur

Lifer
Mar 9, 2010
6,875
6
Cortez I am going to completely agree with you. That little ashtray bruise is just too minor to mess with.


raf66

Might Stick Around
Mar 2, 2010
71
0
Thanks guys. You may be right. I guess I could make up a really wild story about how the "ashtray bruise" got there. Really create my own character about the pipe.


louisrmantha

Lurker
Mar 4, 2010
13
1
Just one detail raf66. When cleaning your pipe at the end of smoke, be gentle with your cleaning tool. The button of your pipe will absorb water and will be softer the brier and you might cause internal damage like I did with mine. Also use a folded pipe cleaner to wipe any residue on the inside. Caking is bad for a meerschaum pipe.
Just in case you didn't know.
Enjoy your beautiful pipe!


jonesing

Part of the Furniture Now
Feb 11, 2010
633
2
Raf:
That's a nice looking meer. My tastes don't run to the highly carved meers. I "get it" and understand why many collectors are into them. But they just don't move me. They strike me as somehow cartoonish or gaudy.
But I really like your pipe. It's classic and simple and will look really cool the more it colors.
I don't own a meer so don't know from experience but what unlce suggest in the way of a very careful and subtle reshaping or the bowl/rim to mitigate the chip makes good common sense given the characteristics of meerschaum.
I hope to see the after pics.
RJ


fred

Lifer
Mar 21, 2010
1,509
5
Over time, I've learned that cleaning up estate Meerschaums can be a lesson

in delayed gratification. I used to rush into removing surface blemishes with

Everclear and wet/dry sandpaper, which works well and requires rewaxing. The

drawbacks to this are the adverse results it can have on the Patina, which is

the most time consuming aspect of bringing these Pipes back to their path of

evolution. At present, I'm dealing with this same problem of 'ashtray marks' on

a 24 year old Bekler. My approach to this is less aggressive than my past

actions, as I'm doing the best I can not to disturb the Patina, which is starting

to show more than it did when I first started working on the Pipe. Initially, I

worked on these blemishes with a white cotton rag with Everclear on it, just

enough to remove the surface grime, but not enough to draw the entire spot out

of the Block. Before smoking it for the first time, I cold waxed the entire Pipe,

paying particular attention to these blemishes, As I smoke the Pipe, I rub Beeswax

on it, with attention to these spots. After a half dozen smokes, the Pipe is

starting to show more of it's coloration and these blemishes are becoming diffuse,

so that they are less defined. This technique seems to be better in the long run,

as the Patina continues to develop more than if I'd used sandpaper. This

method of waxing also works well with keeping the bowl plateau of a new Pipe

from getting scorched, as the Beeswax works to spread the smoke marks as

well as aid coloration and provide protection for the Block. On this fine older

IMP, if you sand to cover the dings, you will have to entirely reshape the bowl's

plateau and alter the Pipe's geometry. I've an old Andreas Bauer from my early

years of Pipe smoking and it has a similar problem. With waxing and continued

smoking, the coloration has made the ding difficult to see. You can buy high grade

white refined Beeswax at fabric stores, as quilters use it on their threads. I think that you'll

get a variety of suggestions for this problem. I'm no expert but instead,

consider myself a student in these matters. The better informed you are, the more

likely you'll be to make decisions that you'll like. Let us know how you fare in

this matter.
 

unclearthur

Lifer
Mar 9, 2010
6,875
6
Fred. I agree with your methods. I only use abrasives in the case of a badly scratched up pipe of nominal value. I have quite a few that were pretty scabby looking and not of any special value that I made at least presentable.


raf66

Might Stick Around
Mar 2, 2010
71
0
Thanks again for your learned responses. Right now I'm just taking my time and trying to determine the best course of action. Your replies have certainly helped. I'm going to purchase some beeswax in the next couple of days so I can make sure to start caring for the meer properly on a going forward basis. I'll keep you guys posted and again, thanks a lot for your guidance.


fred

Lifer
Mar 21, 2010
1,509
5
Thanks unclearthur. I found your clarifications on wax application to be a learning experience, as I've not encountered it before. The application of refined Beeswax to

a Meerschaum, using the heat of the smoke is something I learned from the late Sailorman Jack. It's perhaps the simplest method for high grade Turkish Block Pipes that I can recommend. I've also used Beth Simet's method of hot wax application to

Meerschaums, but it's more involved and time consuming. For my more intricate carvings, where buffing isn't a good idea, I use Halcyon II with good results, but this wax will not aid in coloration, but does provide a protected finish for the Block. Your method of buffer application would likely be good with African Block and Calcined Meerschaum, as the stress of the wheel's rotation would present excessive stress to high grade Turkish Block. I did find out that a Seller of an estate Pioneer Black African Block Meerschaum that I'd acquired had used Carnuba & a wheel on the Pipe I purchased. I was able to remove the Carnuba with Everclear and apply candle grade Beeswax to the Pipe with good results, but the Block is hard enough to survive such technique. The care of estate Meerschaums is something that I've only been involved with for a few years now, and I find that my experiences with the care of new Pipes to be an asset in this effort. There's a lot of misinformation around about the care of Meerschaum Pipes. Much of it is based on personal preference and speculation,

as there is a paucity of experience and information commonly available. Like most anything you can think of about Pipe smoking, personal preference has given rise to a wide range of thought. I'm still learning.


raf66

Might Stick Around
Mar 2, 2010
71
0
One other question if I may. How does one apply the beeswax? Do I rub it on using my fingers while smoking the pipe? Afterwards?
Sorry to sound like such a dolt but I've never had a meer so I have no experience in the care/handling of it.


fred

Lifer
Mar 21, 2010
1,509
5
Raf66, your question is a good one. While smoking the Pipe, take the Beeswax and rub it on the Pipe, making use of the heat of the Pipe to melt the wax. The Pipe will absorb what it can and the excess is easily buffed off, using a white cotton cloth at the end of the smoke - preferably while the Pipe's still warm. The more refined Beeswax has a lower melting point than the candle grade and will lend itself to this technique with good results. Most white Beeswax has been bleached and this is what you'll find quilters using to strengthen their threads. For a few months now, I've been using USP Pharmaceutical Grade Beeswax, that has been refined without chemicals or bleaches. This grade of Beeswax, which is used in cosmetics, I bought in granule

form, which I mold into 1/4" slabs in an empty tobacco tin, is a little sticky and adheres to the Block well, in addition to having a low melting point. Is it any better that the stuff I've used from fabric stores...? For one thing, I don't have to cut it into chunks to melt in a form. I like the idea of putting something on my Meerschaums that doesn't have chemicals in it. Again, it's a question of personal preference. Either way, rub the Beeswax on the Pipe as you smoke it. It's also a good thing to use the white cotton cloth to handle the Pipe during this process, as the grime on your hands will find it's way into the Block, along with the Beeswax.

As for the display of Patina..., you will discover that the Muse plays with us all.

 
Status
Not open for further replies.