I spend half an hour or so in my office most days after lunch, listening to music and readying myself for the afternoon and evening shifts. I’ve rusticated, stained, and customized a handful of unnamed and imperfect pipes, but don’t have a workshop or even any power tools with which to make my own pipe. I’ll do with with what I can find around my office, lab, or toolbox in my Jeep.
I got a few blocks of briar off Ebay, and this was my first attempt at making a pipe using files, coping saw, a knife, and other hand tools.
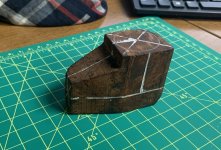
Step 1: I guess I don’t have pencils around my office, so some liquid paper will have to do. Luckily, I do have a ton of calipers and other measurement devices, so at least the lines are approaching straight and true.
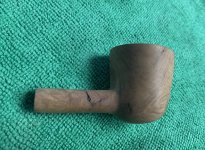 Stage 2: After weeks of lunch-time shaping, chunking out most of the material with a coping saw and a pair of rasps, I have a semblance of a pipe. Not pictured is the only aspect I did using a electric tool, where I used a cordless Dewalt drill to alternate drilling the center of the chamber and the air passage, ending with a mortise to fit a set of cheap stems I ordered. The draft hole (very surprisingly) wasnt far off center and I was able to deepen the chamber for a good junction. I put away the drill before I lost a body part of value. I sanded from 120-600, revealing a handful of the imperfections that you see in the photos, while simultaneously widening the bowl with a blade and a pipe reaming tool. I’m amazed at how well certain medical instruments also help when carving a pipe.
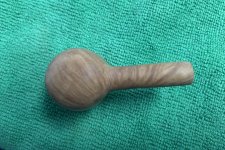
Module 3: I pause sanding, shaping, sanding, fitting, sanding, wondering why I’m using my lunch decompression time to knick my knuckles with a rasp to make something cheap that probably won’t even smoke well, and digest my work. I do very much like the pattern, and consider going with a natural finish, but I think I remember reading somewhere that contrast staining is all the rage with the YOLO Teen White Claw Skateboard Generation.
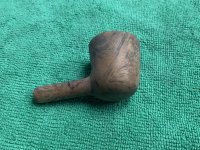 Level 4: I use a black leather dye, and get back to my true Lunchtime Calling: sanding. I take it up to 1200 grit and try to even out edges and some of the heavier aspects of my ham-handed application of black dye. I choose a tan color for the next stain, applying a couple of coats with fine sanding in between. The custodial staff have yet to question the sawdust in my wastebasket every evening, and I’m thinking the holiday gift cards I left them last December continue to pay dividends. They are easily my favorite people in the building.
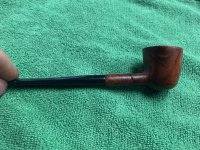
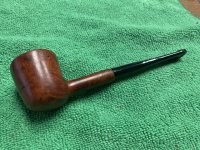
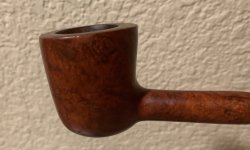
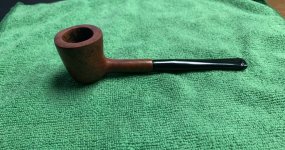
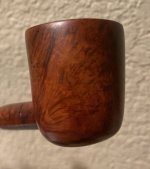
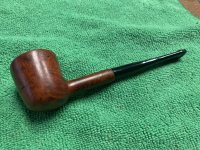
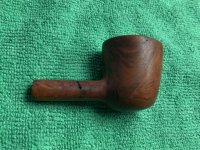 Exhibit E: The contrast turned out alright, and this thing almost resembles a tobacco pipe! I have a handful of stems, near clones of each other, that I’ve used as a guide for the entire shaping process. Now I just need to sand a little more, 2000 grit being the finest I have, and finish this baby with some pipe wax.

I got a few blocks of briar off Ebay, and this was my first attempt at making a pipe using files, coping saw, a knife, and other hand tools.

Step 1: I guess I don’t have pencils around my office, so some liquid paper will have to do. Luckily, I do have a ton of calipers and other measurement devices, so at least the lines are approaching straight and true.
 Stage 2: After weeks of lunch-time shaping, chunking out most of the material with a coping saw and a pair of rasps, I have a semblance of a pipe. Not pictured is the only aspect I did using a electric tool, where I used a cordless Dewalt drill to alternate drilling the center of the chamber and the air passage, ending with a mortise to fit a set of cheap stems I ordered. The draft hole (very surprisingly) wasnt far off center and I was able to deepen the chamber for a good junction. I put away the drill before I lost a body part of value. I sanded from 120-600, revealing a handful of the imperfections that you see in the photos, while simultaneously widening the bowl with a blade and a pipe reaming tool. I’m amazed at how well certain medical instruments also help when carving a pipe.
Module 3: I pause sanding, shaping, sanding, fitting, sanding, wondering why I’m using my lunch decompression time to knick my knuckles with a rasp to make something cheap that probably won’t even smoke well, and digest my work. I do very much like the pattern, and consider going with a natural finish, but I think I remember reading somewhere that contrast staining is all the rage with the YOLO Teen White Claw Skateboard Generation.
 Level 4: I use a black leather dye, and get back to my true Lunchtime Calling: sanding. I take it up to 1200 grit and try to even out edges and some of the heavier aspects of my ham-handed application of black dye. I choose a tan color for the next stain, applying a couple of coats with fine sanding in between. The custodial staff have yet to question the sawdust in my wastebasket every evening, and I’m thinking the holiday gift cards I left them last December continue to pay dividends. They are easily my favorite people in the building.
 Exhibit E: The contrast turned out alright, and this thing almost resembles a tobacco pipe! I have a handful of stems, near clones of each other, that I’ve used as a guide for the entire shaping process. Now I just need to sand a little more, 2000 grit being the finest I have, and finish this baby with some pipe wax.


