Tobacco Pipe Packing Methods – Part 1

-
 Bob
Bob - Jul 20, 2009
- 6 min read

By Bob Tate
[Editors Note: Be sure to read Part Two of this article, Tobacco Pipe Packing Methods – Part 2 (With Videos), to see instructional videos on how to perform these methods.]
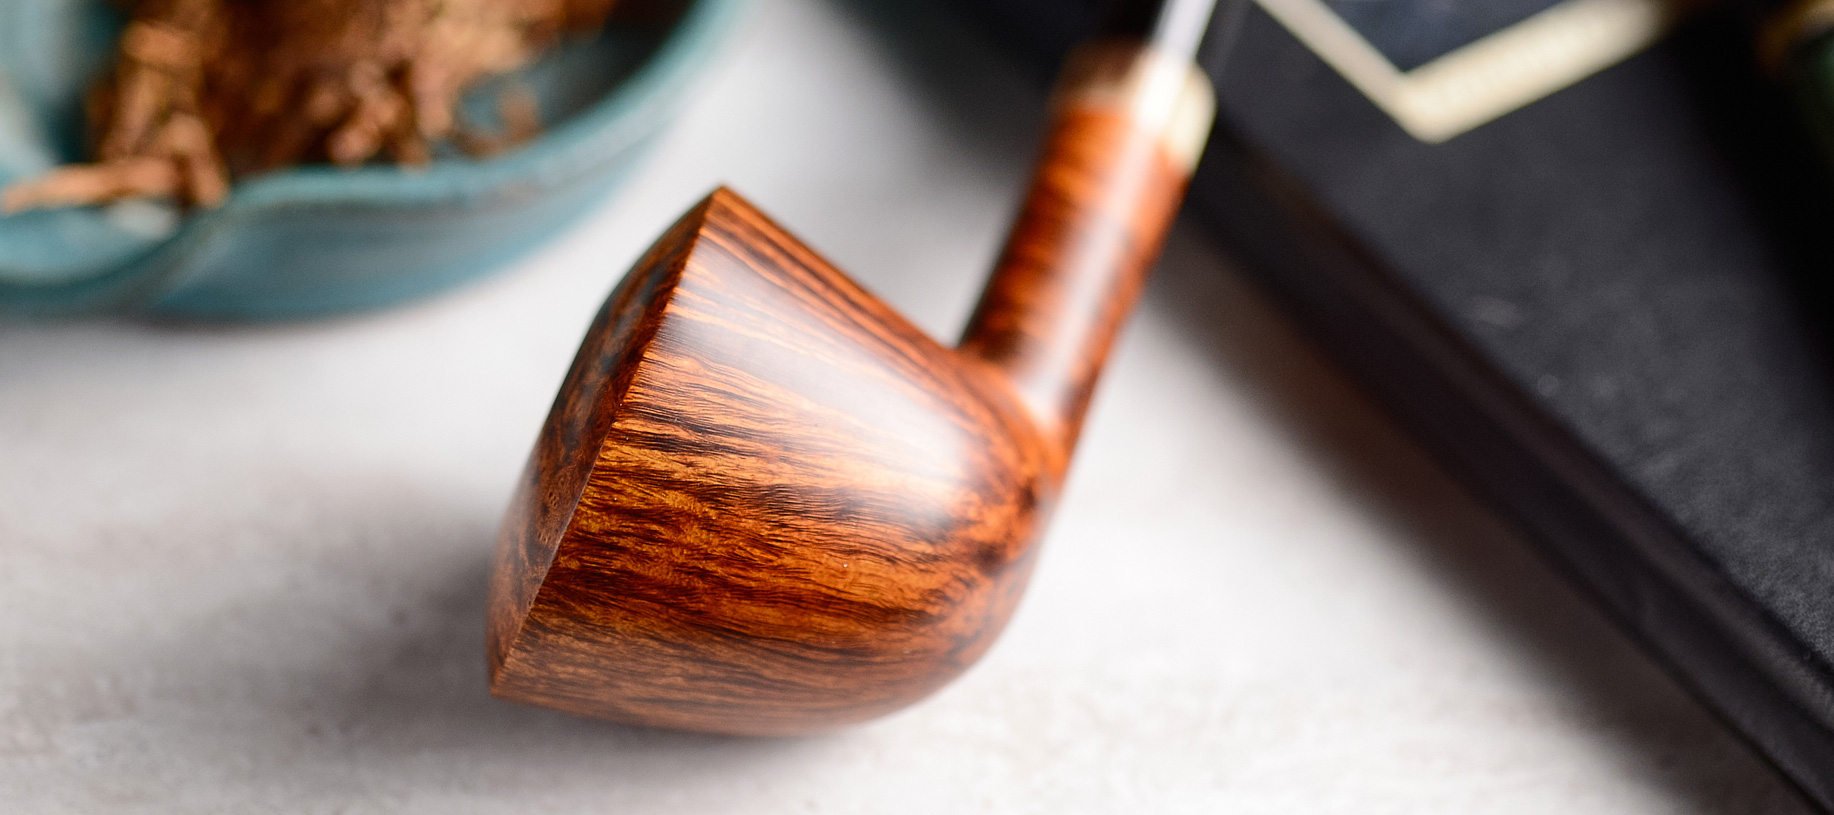
There are a lot of different ways to load your pipe for smoking. Here I will list a few different methods that I know of and give a brief description of them. Remember that there is no exact set of rules for packing your bowl. The goal in packing your pipe is to get a proper draw, it doesn’t matter how or which method you use to do it. The most commonly accepted draw should feel like you are drinking through a straw. When it feels like that, you should not have any problems. I prefer my draw to be a little looser than that.
I don’t use any one method exclusively and quite often, I hybridize the methods that I know to create ones that work for me at a particular time, situation, or certain pipe. Another thing to remember is that it is easier to tighten up the tobacco while smoking than it is to loosen it up. That is why I always tend to pack looser and adjust the tightness of the tobacco, if needed, by tamping during the smoke. Now onto the methods!
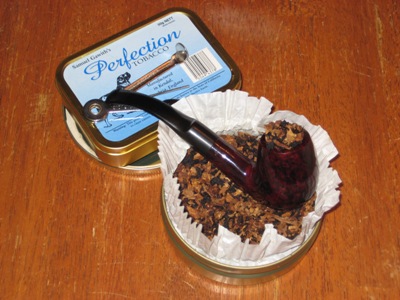
1) The Stuff and Puff Method – The stuff and puff method seems to be used by the older more experienced pipers. After years of experience, they have acquired the ability to stick their pipe into a pouch or jar of tobacco and fill it by scooping the tobacco into the bowl with their finger and knowing when they have the right amount of pressure applied for a proper draw. This is done all in one step. When they pull the pipe out, they light it.

2) The Three Step Method – This method is the most taught to and most used method by beginning pipers. It consists of; you guessed it, three steps. The key to this method is using small pinches of tobacco.
•The first pinch of tobacco should be very small and placed in the heel of the bowl and applied with very little or no pressure at all.
•The second step is a slightly larger pinch of tobacco. The pinch is put into the bowl and a little pressure is applied pushing the tobacco to the half way point in the bowl.
•The third step is placing another pinch of tobacco in the bowl and using a little more pressure, pushing the tobacco down leaving a space of about 1/4 of an inch from the rim.
The amount of pressure used for each step is commonly described as; the first pinch should be done with the pressure of a child, the second pinch with the pressure of a woman, and the third pinch with the pressure of a man.
3) The Frank Method – The Frank method was invented by Mr. Achim Frank and is a very hard method to describe. You want to gravity fill the bowl to the top and the work in a large portion of tobacco on top of it. Kind of like a plug. It is easier to just watch the video to see how this is done and what to do. You can see the video of it here: Tobacco Pipe Packing Methods Part 2 (Videos)
Although Mr. Frank uses a torch lighter and recommends using one, I do not recommend it. The reason why I do not recommend it is that a torch lighter can seriously burn the rim of your pipe beyond repair. If you do use a torch lighter with this method, be careful and be warned of the damage that can occur if you are not careful.
4) The Air Pocket Method – This method was brought to the main stream by Fred Hanna. I read about this method in an article that Mr. Hanna wrote for the 2007 Winter Edition of Pipes and Tobaccos Magazine. This method leaves the bottom of the bowl empty which creates an air pocket, hence the name. I am going to paraphrase the steps from memory.
•Grab a large chunk of tobacco and squeeze it into a clump using your thumb and first three fingers.
•Shove the clump of tobacco into the upper half of the bowl leaving the bottom half of the bowl empty.
•Force the tobacco into the bowl tightly but do not use excessive muscle to do so.
•While you are shoving the tobacco into the bowl, start twisting the chunk of tobacco into the bowl so that you are screwing it into the bowl.
•Screw the clump down deep enough into the bowl so that you will not damage the rim when you light the tobacco.
•Make sure that you do not push on the center of the tobacco.
•Remember that there should be no tobacco in the bottom of the bowl.
•Test the draw. If it is too tight, empty the bowl and start over.
•Light only the center of the tobacco making sure that you get it good and lit. The tobacco will burn outwards towards the walls of the bowl once it is lit.
5) The Two Step Method – This is one of the hybrid methods that I was talking about. I don’t want to say that I created it because I am not sure if others have used it before I started doing it. It is like the three step method but with the first step omitted.
•I gravity fill the bowl and lightly push it to the half way point of the bowl.
•I finish filling the bowl and lightly push it down to about 1/8 to 1/4 inch from the rim.
99% of the time I get a perfect draw on the first try.
6) A Hybrid Method (The Bob Method) – I do not know what to call this method. It is a hybrid method that I started doing a few years ago. I don’t think that anyone uses it. But as in the two step method, I don’t want to say that I created it because I don’t know if anyone has used it before me. I combined parts of the Frank method and parts of the Air Pocket method to create this. This is what I do:
•I skip the first step of the Frank method and leave the bottom of the bowl empty so that there is an air pocket (like in the air pocket method).
•Then I grab a large chunk of tobacco and work it into the bowl exactly like the second step of the Frank method (I do not screw it in like the Air Pocket, I use my thumbs like in the Frank method).
This method works great when smoking a pipe that has a ‘well’ in it. Since there is no tobacco in the bottom of the bowl, it does not allow the moisture to collect in tobacco that is in the ‘well’ causing a large amount of dottle.
You do not have to stick to just one method of packing and as you can see from the last two methods, combining or trying out something of your own can help you out in packing a pipe. Try out new and different ways of packing until you find out some that work easily for you. Remember, what works for some people might not work for others. Keep experimenting and don’t give up. Try all of them to see how they work for you and then start changing things around until you find ‘your’ way of packing.
Happy packing and puffing!
Be sure to see Tobacco Pipe Packing Methods – Part 2. It has the videos to show how each of these methods are done!
Tobacco Pipe Packing Methods – Part 2 (Videos)


Written by Bob


Recent Posts
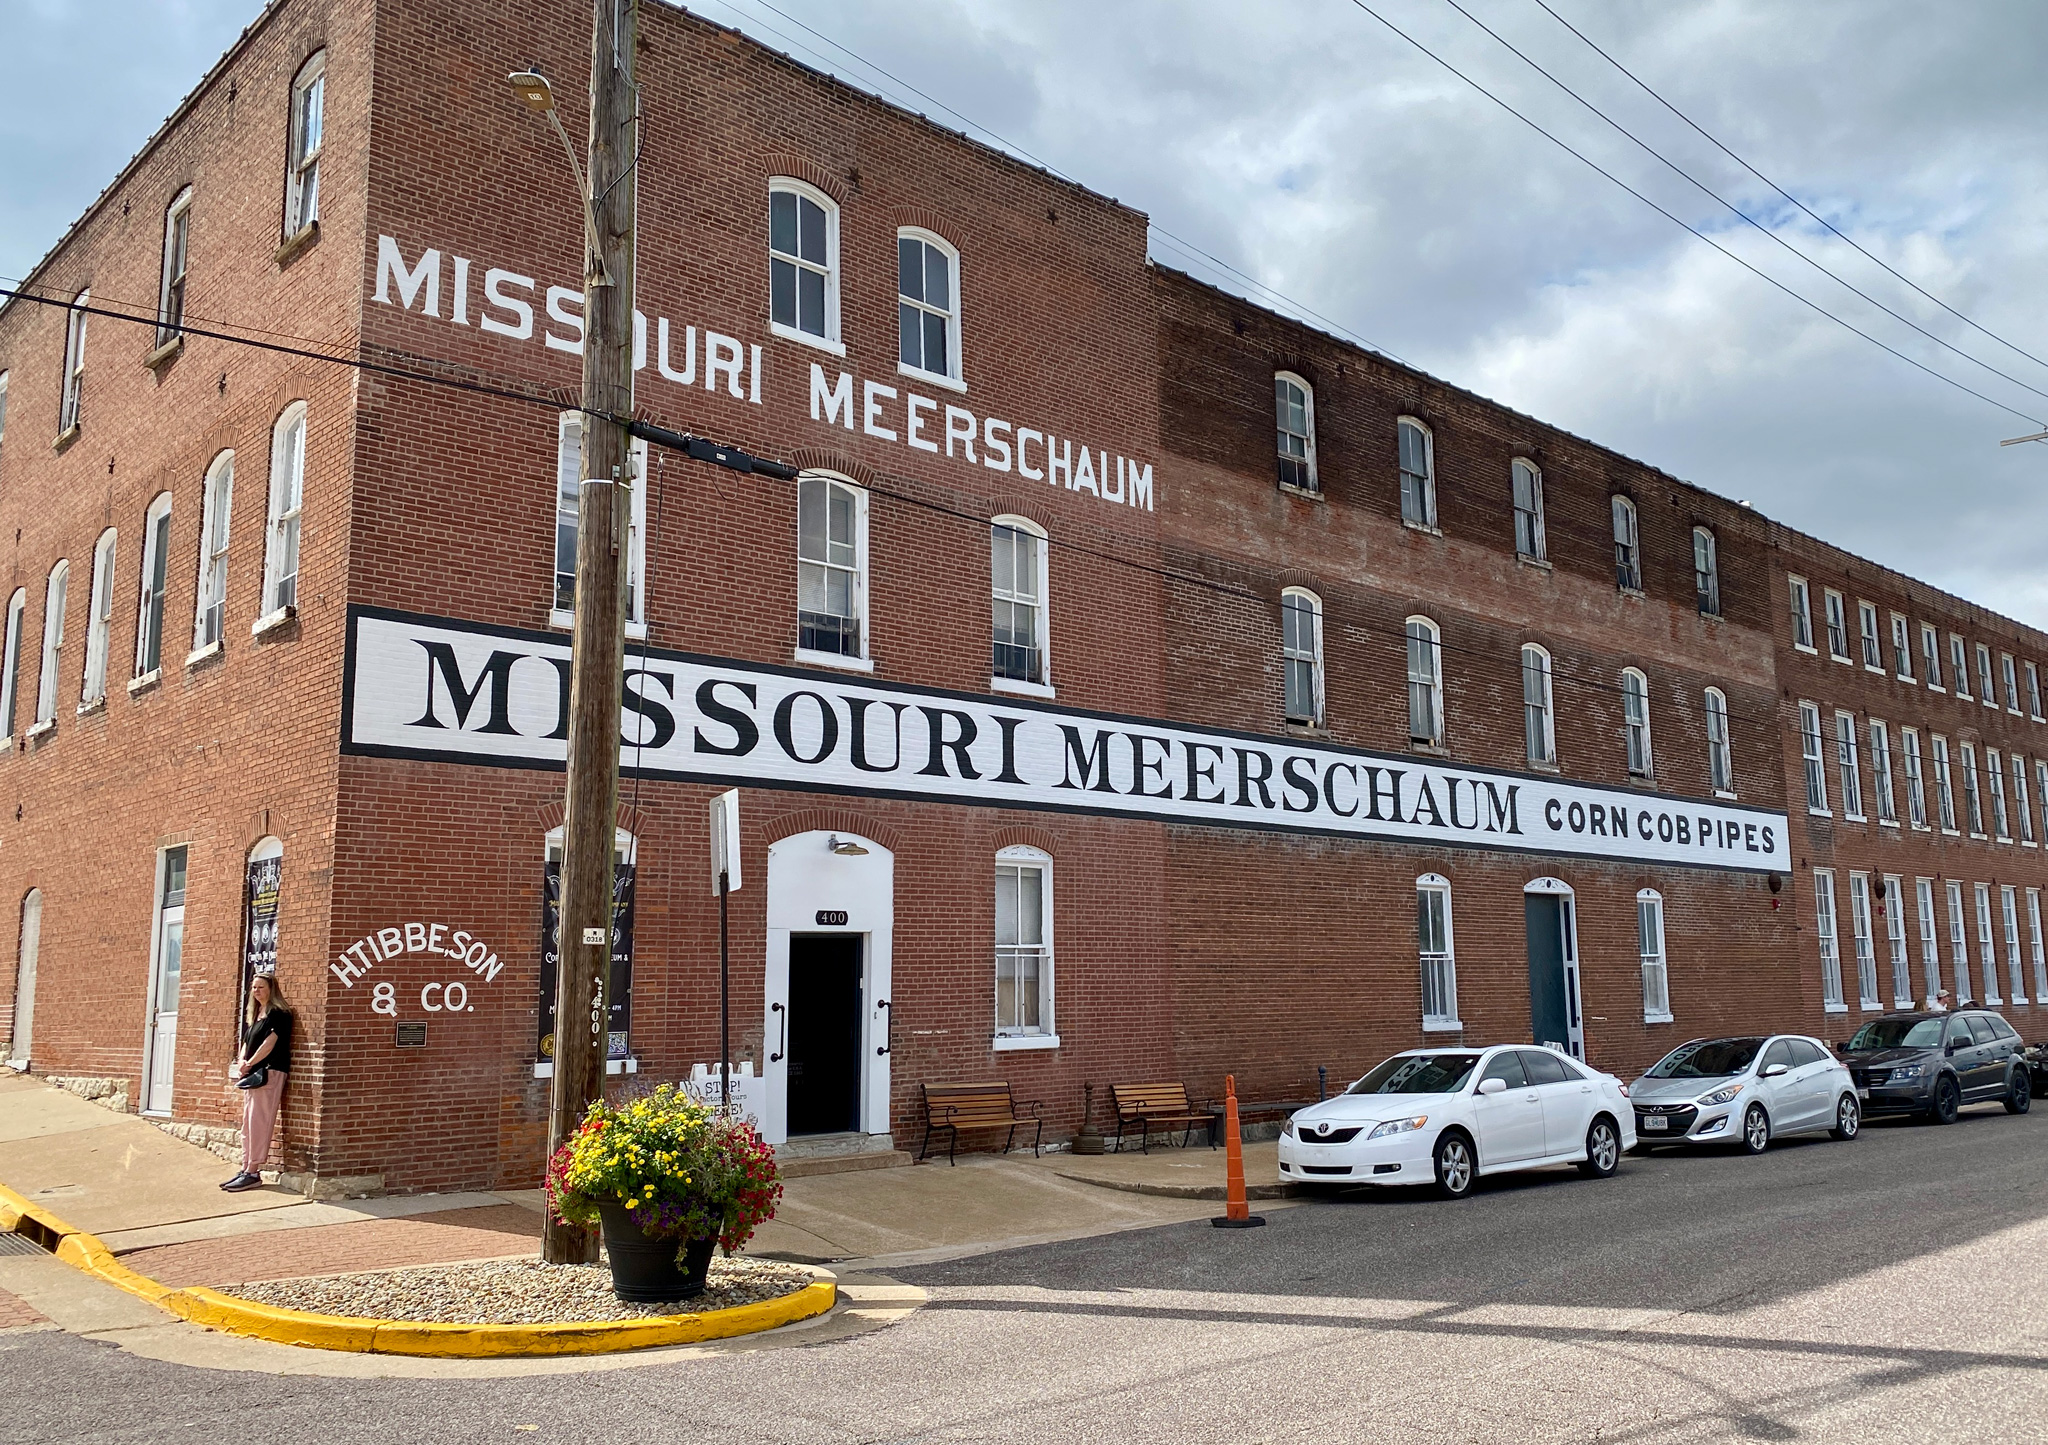
Go back 25- 30 years ago, when Missouri Meerschaum was bought by three gentlemen, Michael, Larry, and Bob. Michael tells the story about one of the reasons they purchased 150 acres of land: to ensure they had enough corn to stay in business. The story goes like this: the local Missouri farmers had lost another crop of corn due to catastrophic weather. Things were getting desperate when it came to keeping the factory running because of the shortage of corn cobs, and Michael looked to California to grow some of the hybrid corn they use for pipes. He found several farmers willing to grow their seed, and once they were done, Michael found a truck driver who agreed to transport the corn from California to Missouri, but with a story like this, there has to be something. In this case, the truck driver only had one arm, his left arm. He drove three back-to-back trips from California to Washington, Missouri, reaching across his body with his left hand to shift gears. With the year’s most recent devastating floods and loss of corn, this was their only solution to keep the doors open, and Michael realized that he and his partners needed to secure their own irrigated land to grow their hybrid seeds. He found 150 acres, but his other co-owners were not entirely convinced it was their best option. Fast forward a year, and another massive flood in the existing fields caused that year’s corn crop to be lost again. The partners were ready this time, but the land price jumped an extra 200k. They finally managed to buy the irrigated property and secured the future of Missouri Meerschaum with those 150 acres. Celebrating 155 Years in Business This year, the 155th anniversary was hosted at the Missouri Meerschaum pipe factory in downtown Washington, Missouri, near where Lewis and Clark stopped and camped in 1804 on their way to Montana. This year’s festivities coincided with Washington’s Fall Festival of the Arts & Crafts, which brought thousands of people downtown to try food, buy arts, crafts, and other assortment of items in the quaint little town, and, of course, get tours of the historic corn cob pipe company. Missouri Meerschaum is a complete Farm-to-Table process You can smoke a corn cob pipe today because of an intense dedication to getting it right, from the non-GMO hybrid seed that the University of Missouri helped Missouri Meerschuam work on in the 1970s and 1980s to the way they harvest and remove the husks to the 2-3 years the cobs have to sit and dry out so they can be turned into a pipe. An interesting tidbit is that modern corn is nothing like the corn that was grown in our past; with modern farming methods, corn is grown for the number of corn cobs, not for size, and modern yields are usually 30,000 seeds per acre. The University of Missouri found out, through testing, that to get the larger corn cob, you need less corn planted, and the sweet spot for Missouri Meerschaum corn is around 18,000 seeds per acre. This is partly because corn will pull a ton of nutrients out of the ground, and there is only so much to go around, even with crop rotation. Thus, modern farming can do a number on your fields, and you’ll have much smaller cobs unsuitable for pipes. It can take six to upwards of eight months to shell all the corn that is harvested through the custom built walnut shelling system they have at the corn crib. Nothing goes to waste, either. All the corn kernels that are shelled go to this large silo pictured above that is sold to two places: ADM (Archer Daniels Midland), which does corn processing: From Wikipedia: The Corn Processing segment converts corn into sweeteners and starches, and bioproducts. Its products include ingredients used in the food and beverage industry, including sweeteners, starch, syrup, and glucose (dextrose). Dextrose and starch are used by the Corn Processing segment as feedstocks for its bioproducts operations. The other place where the corn is sold is Pinckney Bend Distillery, about 20 minutes down the road in New Haven, Missouri. The white corn that Missouri Meerschaum uses has a higher sugar content and is perfect for making a great whiskey. There, the corn is turned into glorious whiskey, which you can drink Missouri Meerschaum-grown corn whiskey while you smoke your Missouri Meerschaum corn cob pipe while sitting in the place that makes it all. Meta much? Unfortunately, the laws of the state of Missouri say they cannot ship outside of the state, and the current distribution is not large enough to reach most readers, but you can drive there and buy some bottles to bring home. Of note, aside from the great whiskeys they have, they also have a whiskey with some flavor to it called Apple Ambush, which, I kid you not, tastes like you’re drinking spiced apple pie. The Pinckney Bend Distillery offers a tasting flight for $15, which includes a glass. The flight includes eight or so different liquors and a tasty mixed beverage. When we stopped at the Corn Cribb, we checked out the two 1980s model pickers. Modern Combine/Harvesters don’t do the job needed—keeping a pristine cob that can be used for the pipes. From Start to Finish Cobs are stored for 2-3 years on the 2nd and 3rd floors of the factory, where a shoot that goes down to the first floor drops cobs ready for production. Each corn cob you smoke takes around a week to make. They leave the windows open at the factory, especially during the winter months, because it helps dry out the corn better. The cobs come down the shoot and are cut into the size they need based on their current production. Next, the […]
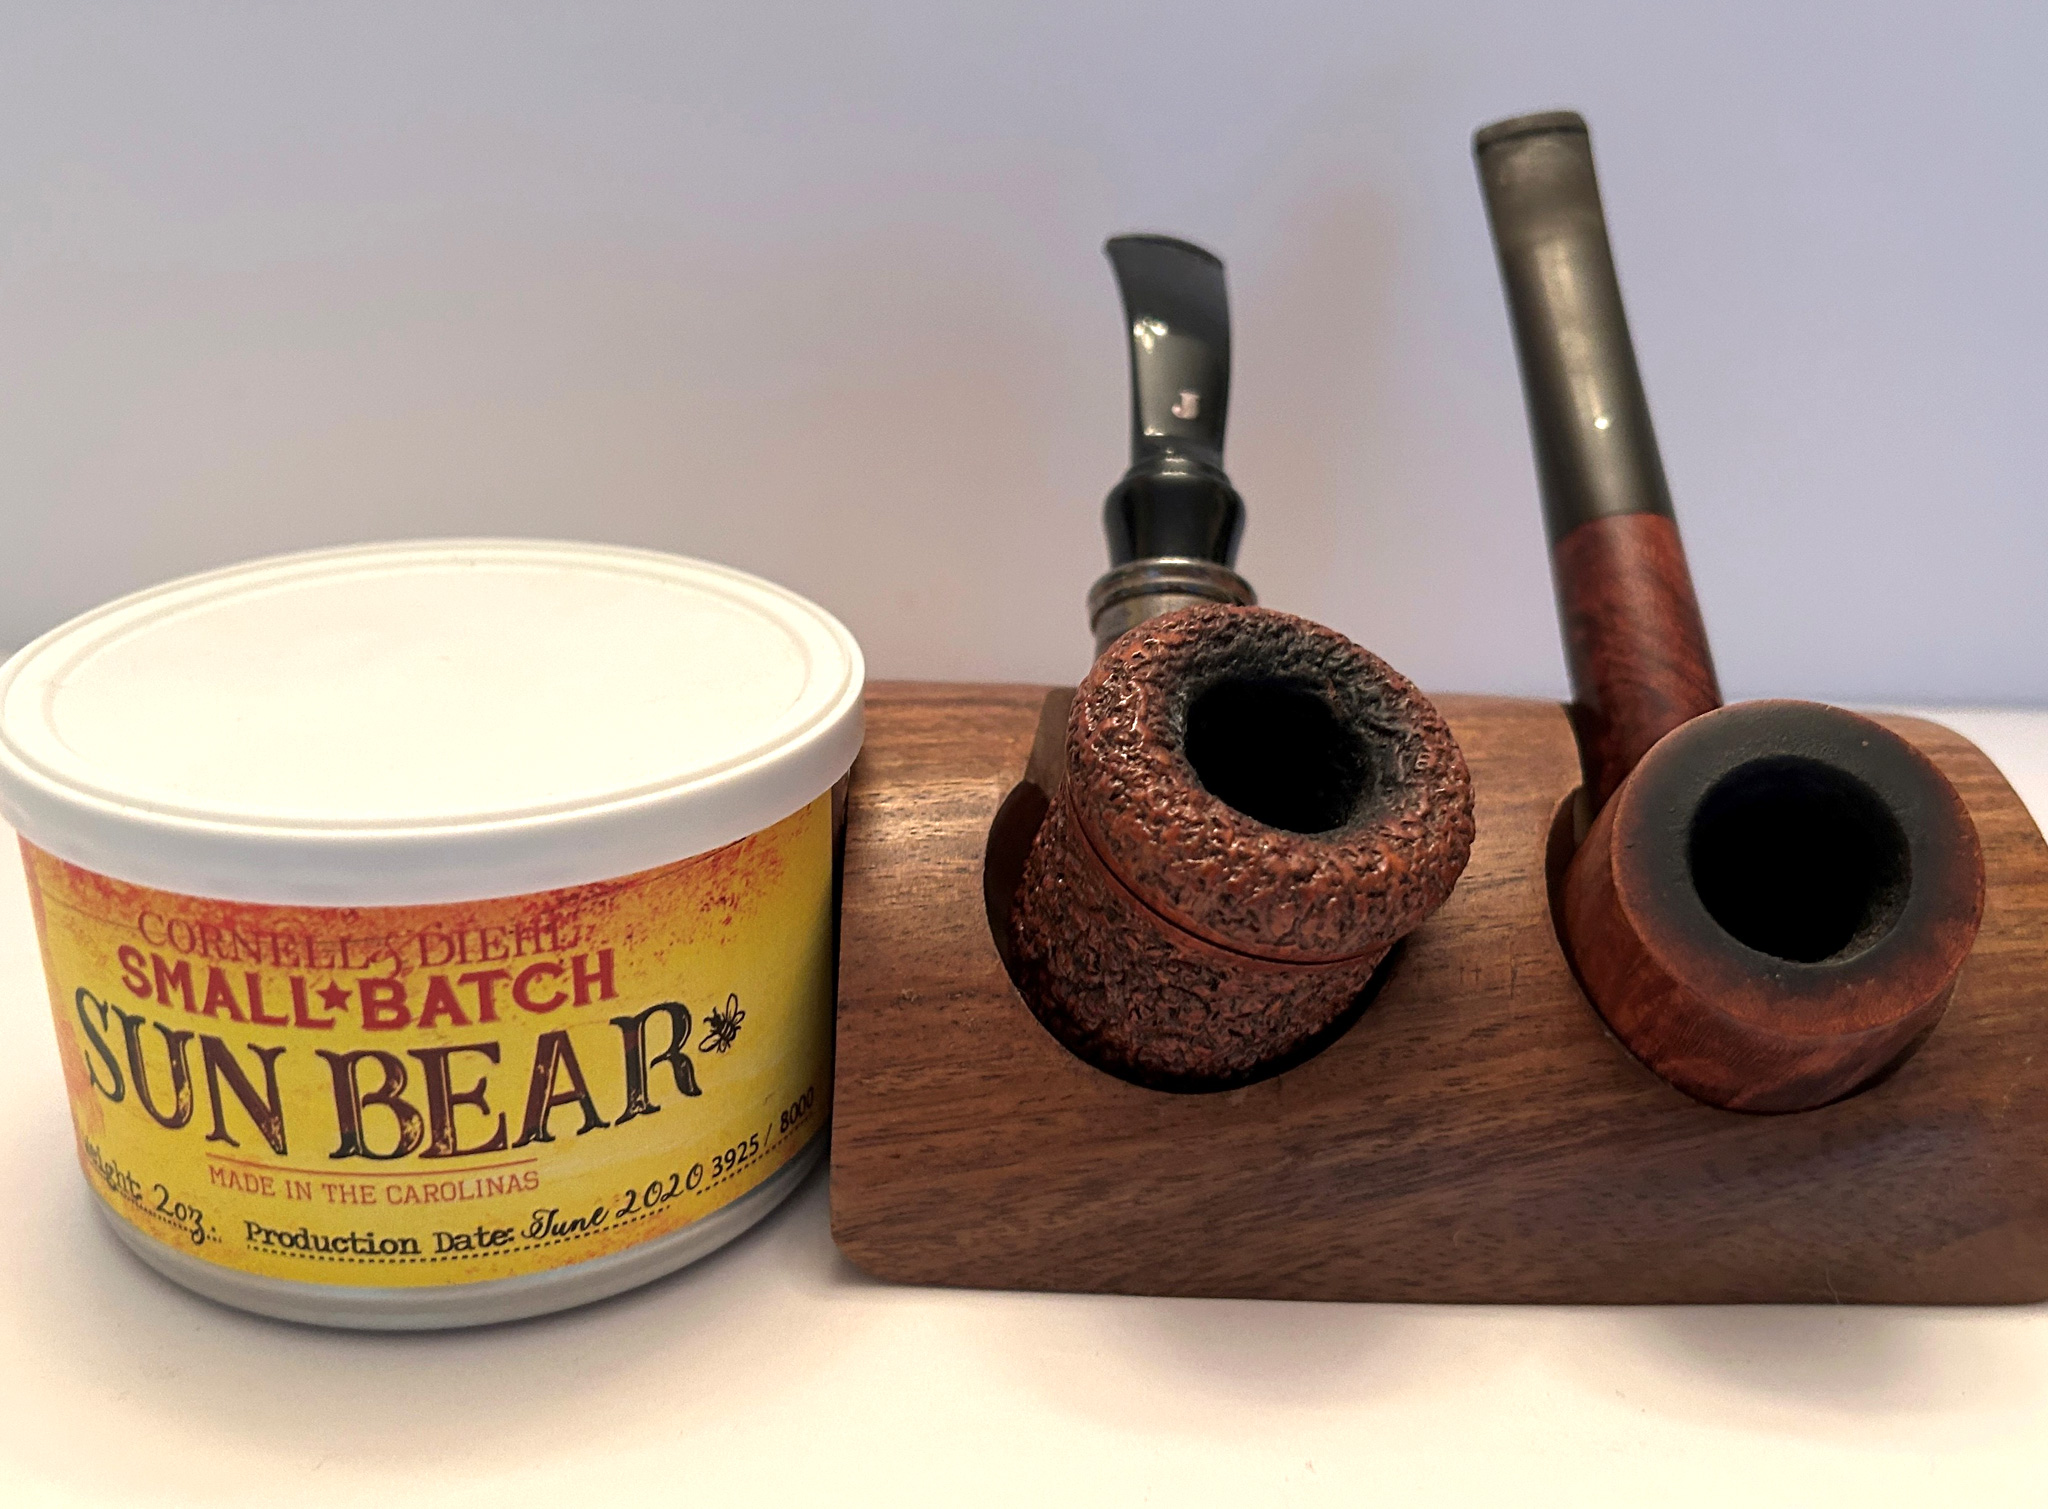
Welcome to The Pipes Magazine Radio Show Episode 629! Our featured interview on tonight’s show is with Danish Pipe Maker Mike Sebastian Bay. Mike got his start in pipe making when looking for someone to repair his father’s pipes in the Copenhagen area. He inadvertently found renowned pipe artisan Tom Eltang, and apprenticed under him for several years. He learned Tom’s signature rustication technique, and then made it his own. His pipe designs are also known for the poker shapes with “the bend” – after the forward tilt, there is another angle bent forward. At the top of the show, Brian will discuss everything about aging tobacco you will ever need to know.
Now that the gritty tooth of summer is loosening its grip a bit, the feel of fall is faintly signaling its changes just around the corner. Warm days and cool nights, which begin in higher elevations, tell trees that the weather is changing (no, Pundit is not a meteorologist. Just an interested watcher of trees!). Change in trees signals it is time to halt the production of chlorophyll. That’s the green stuff that gives tree leaves their color, doncha know! Cooler nights work to close the veins in leaves, producing more red than green color, or something. It’s like the legend Red Smith, sports columnist for several newspapers including the New York Herald Tribune and the New York Times, once sayeth: “Writing is easy. All you have to do is sit down at the typewriter, cut open a vein, and bleed.” Trees author their own stories in the fall. And that brings Pundit to something of a point here. Fall is for taking short walks (ahem, for some of us these days). A pipe in hand. Quick pipe puffing, ogling the beauty surrounding us. It’s free for the most part in neighborhoods. But big national parks are another matter these days. Charges have emerged for some visitors just arriving at a specific time! Money Ball! Pundit loves this time of year with a good aromatic blend, or a sweet Virginia with just a touch of perique or one of those special blends that Jeremy Reeves cooks up for Cornell & Diehl. I especially enjoy his English blends, and always the return of Golden Days of Yore, an annual (pull for its continuation), and a couple of other of Reeves’ Small Batch productions for SmokingPipes.com. Such as Steamworks, a flake with old Red Virginias, perique, and some oriental tobaccos. For a wonderful read on the versatile Virginia Red Flake, read SPC.com’s Chuck Stanion in his splendid story on “The Versatility of Red Virginia: Carolina Red Flake Sept. 20, 2024, in Tobacco Talk.” The piece is a Masters Class on blending Red Virginias, with even a state of Georgia version. It is so well worth reading. Reeves compares the versatility of Red Virginias to variations of different teas. There are so many great fall smoking blends that Pundit has a challenging time choosing what goes with a solid walk in the woods. At times, Pundit closes his eyes, reaches into the cellar, and picks out a batch of something. Maxim at Pipes2Smoke has said it best: Sept. 20, 2024 “On Sunday it will be the fall equinox, the sort of official start date. I like many others will start reorganizing my tobaccos. Fall means, to me, heavier and fuller tobaccos that smoke slower. English Mixtures, think Latakia, oriental tobaccos, and some full flakes with Latakia. And the pipe get(s) bigger to carry these more robust tobaccos. To me fall in the North East is the best pipe smoking time of year. No, death defying humidity so the mixes smoke far better in every way and we enjoy them more that continues till next spring. When it starts getting humid again. Not a big deal but it is fun to mark the passing of the seasons.” For me, It’s all about enjoying nature, both with pipe and tobacco, and a stroll through the colors. There are interesting stops along the way, such as a mighty stream, rushing toward its ultimate connection with a larger body of water. And just a quick note on the Madison River, one of Pundit’s recent trips to a beautiful legendary stream, and bucket list musts. This was one of those five-star trips. Only, it had been years in the making and realization. As Pundit has written before, I was a flyfishing-aholic! In my younger days, I waded rivers in Georgia, Arkansas, Missouri, Upstate New York, and the Upper Peninsula in Michigan. I even pulled off a float trip on the Snake River in Idaho, and a quick one-day fishing the Yellowstone River in Yellowstone Park, a true gold medal experience. But I kept a constant eye on grazing buffaloes. The great beasts were not particularly happy about my presence. But as all the years flew by, I yearned to cast flies over some of the legendary streams: the Madison River in Montana, especially. I got that chance in September when Guy Bartle, a dear friend and long-time flyfishing buddy, and the finest fly caster and angler I have ever known, invited me to join him in a float trip on the Madison. If you are still with me, this is not precisely a pipe-smoking adventure. In the past years, I eagerly carried pipes and tobaccos with me to many rivers and stream banks. But not this time. Guy is not a pipe smoker, and the Madison River was not the proper place to pop out a pipe. Especially in 20-30 miles per hour blustery winds. We put in at a place called the Palisades where the river rippled in white, curly waves. Spray whipped a bit from the wave crests. Our expert guide, Scotty Hall of his Big Sky On the Fly outfitters in Big Sky, Mont., says “I love stripping streamers!” For you uninitiated fly fishers, a streamer is a longish flashy fly that is so attractive to large brown trout on the Madison River. To say that Pundit was in a state of bliss is putting it too mildly. He was giddy with delight. Now a Pipe Smoker of the Past: Niels Bohr, was born Oct. 7, 1885, in Copenhagen, Denmark, and died Nov. 18, 1962, in his hometown. He won the Nobel Prize in Physics in 1922 for his theory in quantum physics. Bohr and Albert Einstein, another famous pipe smoker of the past, were friends and colleagues. They also conducted friendly debates over time about quantum physics, a wee bit over Pundit’s head. If quantum mechanics hasn’t profoundly shocked you, you haven’t understood it yet—Neils Bohr. Fall is a time for pipes and […]
Welcome to The Pipes Magazine Radio Show Episode 628! Our featured interview on tonight’s show is with pipe maker J. Mouton. Jason was born, raised, and currently resides in Gueydan, Louisiana. He started smoking cigars and then pipes. He is a carpenter and wood turner that likes to make duck calls. This led to making tampers, and that naturally led to making pipes. He makes both classic and freehand shapes. At the top of the show will continue the virtual tour of Brian’s pipe collection. He will discuss three meerschaum pipes that are special to him for different reasons.
Welcome to The Pipes Magazine Radio Show Episode 627. Our featured interview tonight is with Aaron from Tobacco Pipe Diary on Instagram. Aaron is a 29-year old pipe smoker from Spokane, WA. His interview is part of our ongoing series of pipe smokers that are under the age of 30. He comes from a family of Japanese tea growers, and his aunt smokes a pipe, but that is not what got him started. He actually started with cigars, and then decided to smoke cigars while practicing the Japanese martial art of Kendo, which is a type of fencing that originated as a samurai warriors’ customary swordsmanship exercises. Eventually he started smoking pipes and he also sells restored estate pipes. At the top of the show we will have an Ask the Tobacco Blender segment with Jeremy Reeves. Jeremy is the Head Blender at Cornell & Diehl, which is one of the most popular boutique pipe tobacco companies in the USA.
Something has been rattling around in my noggin for years, the result of many late night conversations with a lot of folks in a lot of fields, like chefs, winemakers, coffee roasters, and especially other dedicated pipe enthusiasts. It seems like we’ve all got stories about how our palates have developed over time and with continued experience. For many of us, it’s not just that our tastes have changed through the years, but our perceived ability to taste has also evolved. While often this results in a deeper appreciation of our favored blends or styles of tobacco, other times it can result in a complete change in our preferences; we may find ourselves not liking something we’ve previously enjoyed, or craving things we never thought we liked. When I was fairly new to the pipe, I didn’t have much interest beyond fairly rich Latakia mixtures. I’d tried many different “aromatics,” and none of them did much for me. Though I could appreciate the way they smelled in the jar or in the room, their taste rarely delivered what their aromas promised. Similarly, I didn’t find much pleasure in Virginia blends, their flavors being more muted and too subtle to hold my interest. Even when I did smoke them, I’d nearly always follow up with a bowl of the smoky stuff to scratch that familiar itch. I tended to gravitate towards those bold, assertive flavors largely because my palate hadn’t yet developed a full appreciation of the nuances of subtler tobaccos. Plus, I just loved the way they smelled. Many have shared similar stories about their own early steps along the journey, though for some it’s been sort of the opposite; Latakia was too overwhelming to their taster, and they started out preferring more gentle fare. In retrospect, this makes sense to me. Being a bit hyperosmic, I craved tobaccos that provided a taste experience that lived up to the expectations established by their intense aromas. Things are rather different for me now. Though I still crave my long beloved, rich, heavy Latakia mixtures, I’ve learned to deeply appreciate and enjoy a much broader range of tobacco styles. What changed? In honesty, a lot of this is just the natural result of doing what I’ve been doing for a living over the last 25 years. Spending so much time focused acutely on tobacco cannot help but change one’s relationship to it. Concentrating on the minute differences between two batches of some variety, or how a tiny change in the percentage of one leaf over another can influence a blend makes my brain jump through different hoops now than it did when I started out. It’s the same for any of us who zoom our attention in on what we do. We all start out with pretty much the same basic sensory apparatus, but as we concentrate on what we’re tasting, over time our brains adapt to have both greater resolution, and to more quickly identify less obvious nuances. Think of it as building a sort of multi-dimensional network of neural connections, each of our experiences forming a set of individual nodes. The more attention we pay to those experiences, the more complex and densely interconnected the network becomes. We gradually become better able to associate different aspects of the subtle sensory inputs with one another, and the richer the experience becomes. Some of this happens naturally, of course, but the more consciously we focus, the faster we “learn” to appreciate novel subtleties, and the quicker these connections are traversed, allowing us to more easily distinguish one taste from another. That’s pretty much what’s happened inside my own gulliver over the last 25 years of blending, and the process continues to this day. I’m often asked how one can learn to identify and even put a name to all the flavors that different leaf and different blends can present. My advice has always been the same: Focus and take notes. Read reviews to see what others detect, and try to pick those flavors or aromas out. Your experience might be completely different, but their impressions can still be useful. The more information we have, and the more attention we put on our own experience, the more we’ll begin suss out those elusive tastes. To some, this seems like too much effort, too much like work, and that’s a fair cop. As I said, some of this just happens naturally, and there’s nothing at all wrong with just enjoying the natural evolution of our palates over time. But others may want to accelerate this process, or take it to a deeper level, and that’s where the note taking comes into play. By thinking about what we’re smoking, engaging our analytical machinery and putting our sensorial experiences into words, our attention gradually shifts to the more subtle notes we perceive, associating them in their sensory proximity to past experiences, even those unrelated to tobacco, In doing so, we build our own network in a more conscious fashion, and soon begin detecting things we’d never noticed before as our sensory landscape takes on more dimension, adding another aspect to the pleasures of the pipe. The pipe can be a pleasant distraction from a world which is too often complex and over-stimulating. But, as an almost meditative practice, puffing in a more mindful way, focusing attention on the array of pleasures that our seemingly simple pastime offers, keeping a few simple notes, we can take our enjoyment to another level. I certainly recommend it, at least occasionally, but only if you find it fun.