Pipe carving project

Log in

SmokingPipes.com Updates

Watch for Updates Twice a Week

PipesMagazine Approved Sponsor

PipesMagazine Approved Sponsor

PipesMagazine Approved Sponsor

PipesMagazine Approved Sponsor

PipesMagazine Approved Sponsor

Status
Not open for further replies.

pipmannen

Starting to Get Obsessed
Oct 6, 2010
103
0
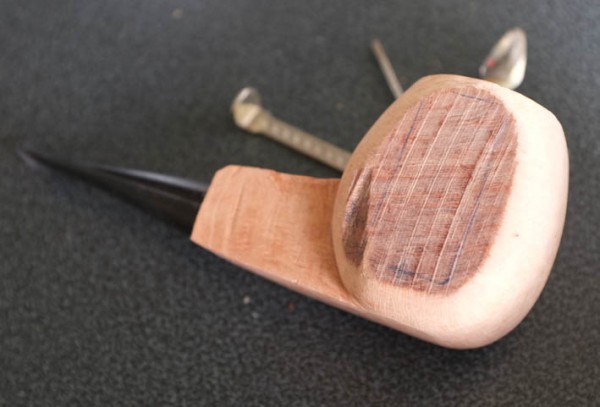
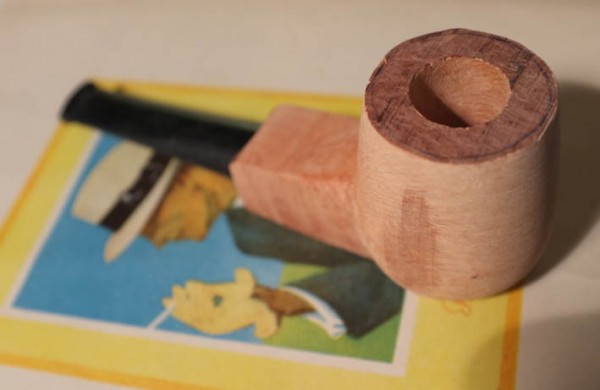
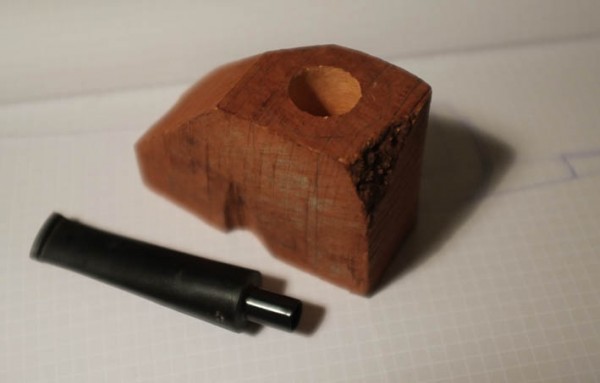
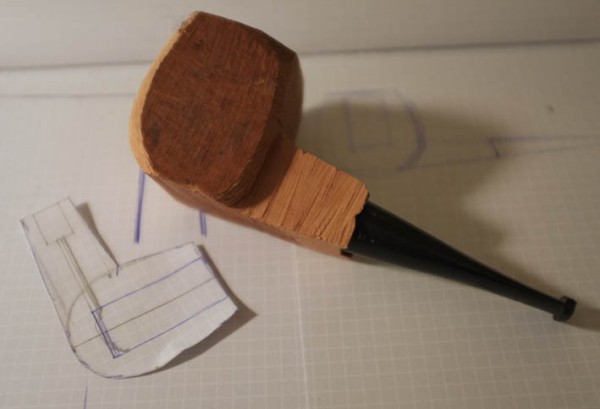
So, I received my first briar block the other day. Inspired by people here and from youtube, I decided to try to carv my own pipe. However it will turn out, I haven't had this fun for a long time! So far I have started with the rough shapes. I will update with more photos during the process.
shape1-600x383.jpg

shape2-600x409.jpg


arinbjorn

Might Stick Around
Sep 14, 2011
80
0
I am SO envious. I recently had a Dr. Grabow laying around that I hadn't smoked lately. I figured, eh, why not...
I openen up the stem and shank to 5/32nds, then rusticated it. I like it a whole lot more now. It wasn't a nice, old Grabow with a history behind it (I wasn't tarnishing a piece of history, in other words.) It was a modern production pipe, and now it has some character, and smokes better.
Now I got the itch to get a block kit like this...
So, I guess that begs the question - where did your kit come from? I understand there are a plethora of folks able to provide pipe kits like this.
Yours looks great! Best of luck with it.
 

pipmannen

Starting to Get Obsessed
Oct 6, 2010
103
0
Wow! Thanks for the nice comments. Arinbjorn: I bought my kit from Jirsa pipes in the Czech republic, from a recommendation. Good price. I am using simple tools like a saw and rasp, since I don't own any machinery.


pipmannen

Starting to Get Obsessed
Oct 6, 2010
103
0
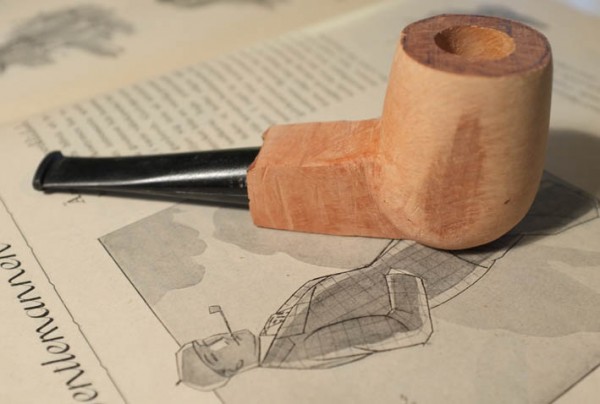
Here is todays update! I continued the rough shape and have now started sanding. There was a cut on the side of the original block that made me decide how wide the bowl could be, I still have some more work to do in order to make the bowl round. Im trying to go for a billiard type shape, but didn't decide if to make a smooth transition or a sharp edge between the bowl and the shank. I discovered some small pits, but hopefully I can make a overall smooth finish in the end. I think the next step is to start to work a bit on the shank.
shape3-600x407.jpg


shape4-600x390.jpg


shape5-600x404.jpg


ejames

Lifer
Oct 6, 2009
3,916
24
You may find that some of the pits will disappear as you work the shape only to have others pop up elsewhere. A few small pits/flaws in a smooth pipe doesn't hurt. Adds character IMO.


pipmannen

Starting to Get Obsessed
Oct 6, 2010
103
0
Thank you! I could do with a sanding machine, but strips of sand paper with tape on the back works really well and sands quicker than I thought it would.


schmitzbitz

Lifer
Jan 13, 2011
1,165
2
Port Coquitlam, B.C.
This is a great thread, watching your pipe take shape before our eyes. Looks like she is going to be a beauty. I would spring for a kit, but I'm afraid I would end up smoking a ebauchon block with a single deep gouge and blood-stains (with a free thumb-tamper).

 
Jun 26, 2011
2,011
2
Pacific Northwest USA
Thanks for posting the pics of your progress.

I've toyed with getting a pre-drilled kit myself and threads such as yours push me in the direction of getting one.
The bowl is certainly shaping up well!
Attaining a good fit at the shank/stem has always struck me as being one of the more difficult aspects of process. Make sure and take plenty of pics of that as well.

 
Status
Not open for further replies.