


K
klause
Guest
I've been at a bit of a loose end lately, now that all the firewood has been gathered from the woods; I still have to finish cutting, sorting and stacking, but, it's been raining incessantly so all outdoor play is temporarily suspended.
Through necessity I have not made anything in a little while - the demands of gathering fuel for winter heating and hot water have been occupying my time. But, while sitting in the greenhouse this morning, watching the tomatoes grow, I felt my fingers get itchy; itchy with the need to create something, to carve, and to take a little time to quiet the mind.
So I gathered some materials and sharpened my knife - I had a tamper or two in mind.
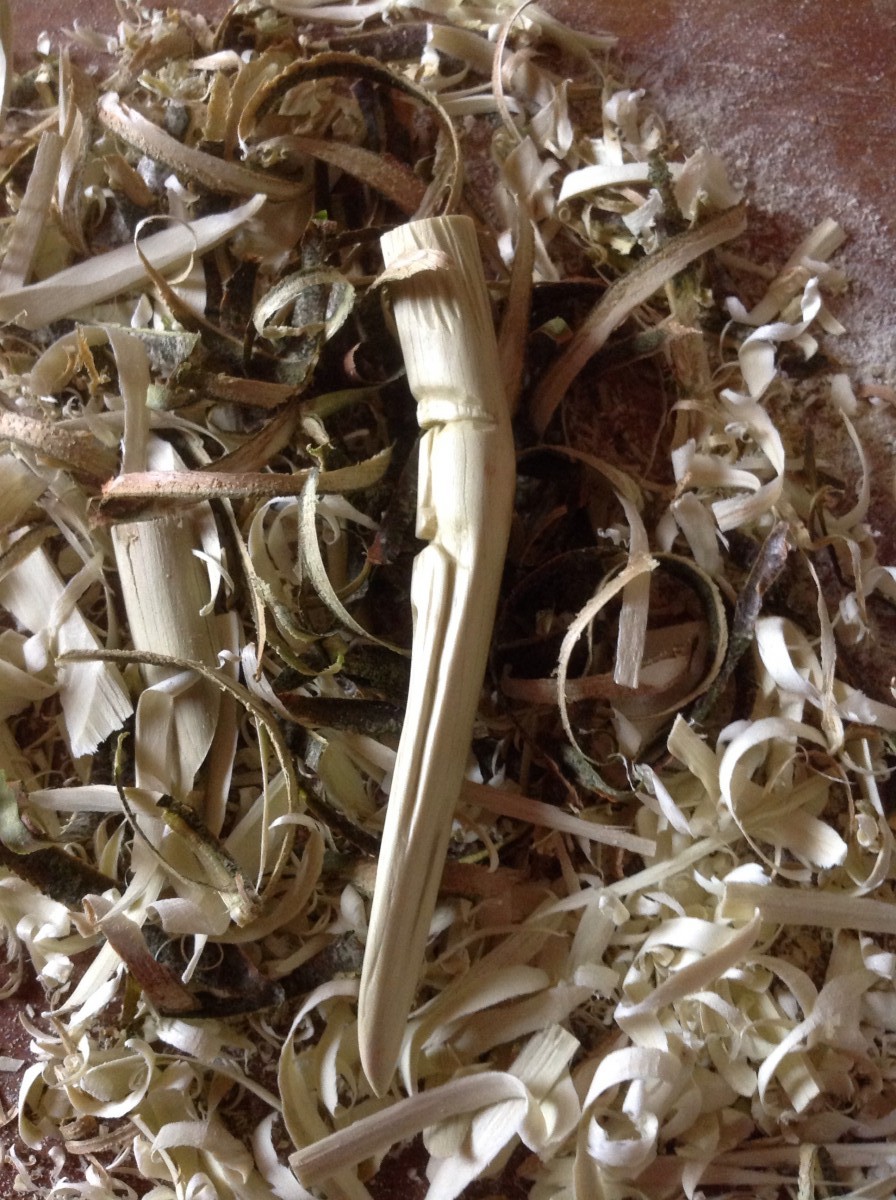
When I start a tamper I consider which wood I want to use, as each has different properties, and each will age differently. In this instance it was to be Beech, a wood I am particularly fond of, especially for tampers - the grain is quite beautiful, and it darkens, with age and use, to a lustrous golden hue.
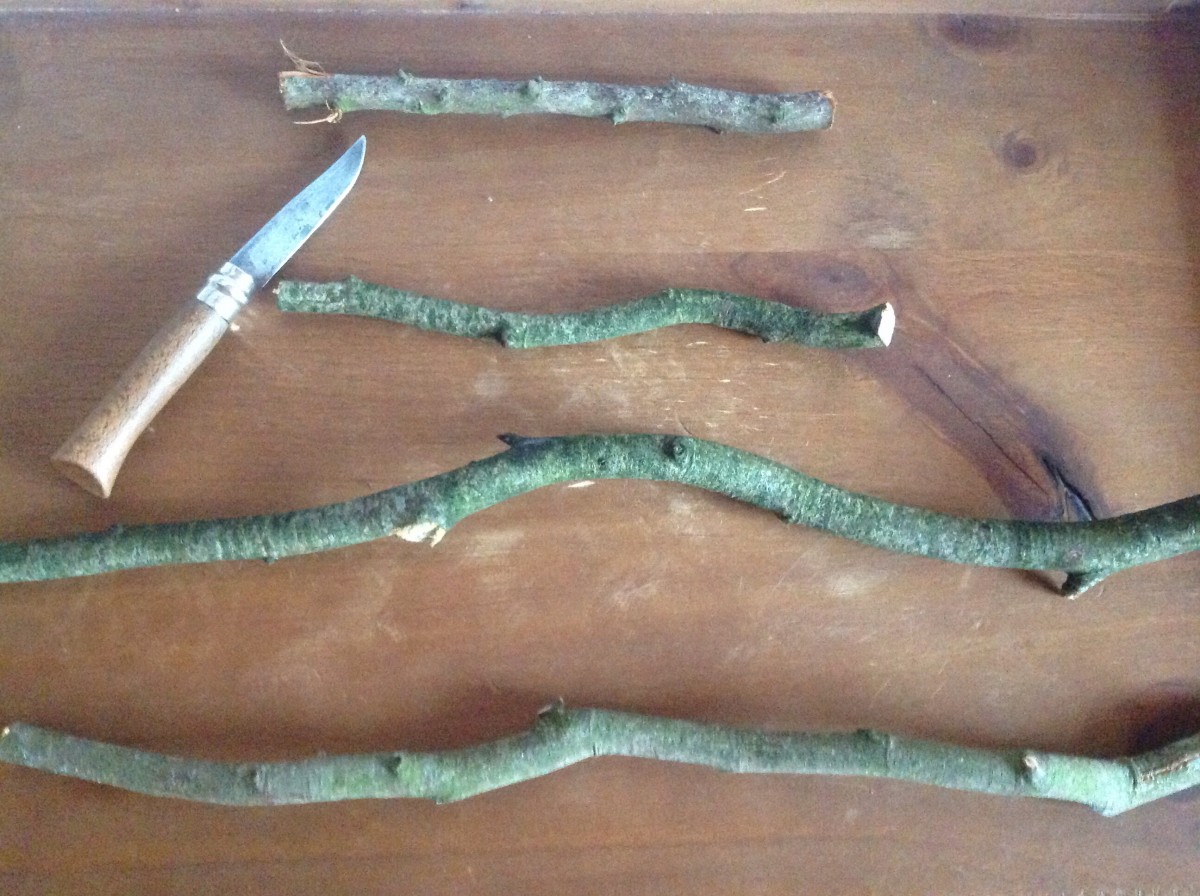
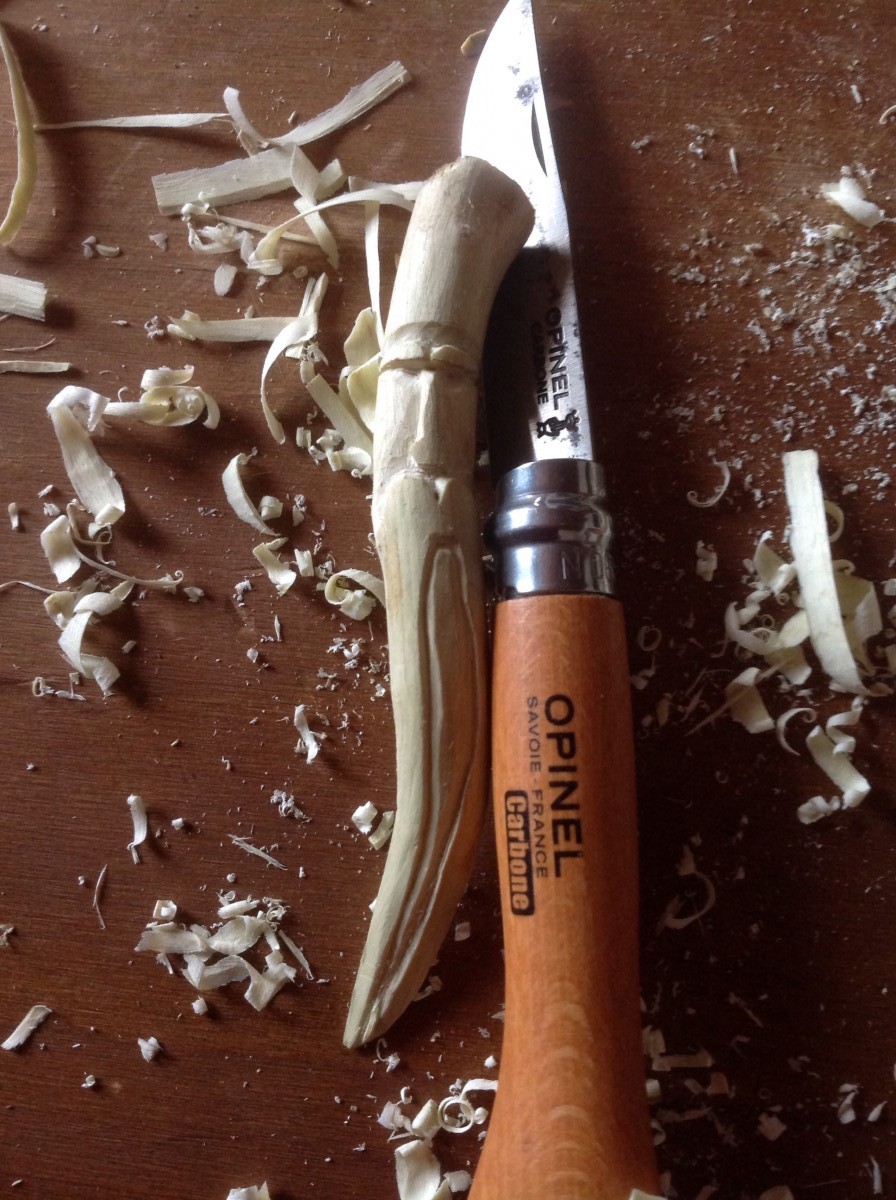
From the fresh cut branches I selected the two pieces I intended to work with. At this point I pay careful attention to the shape of the wood, trying to visualise the tamper within.
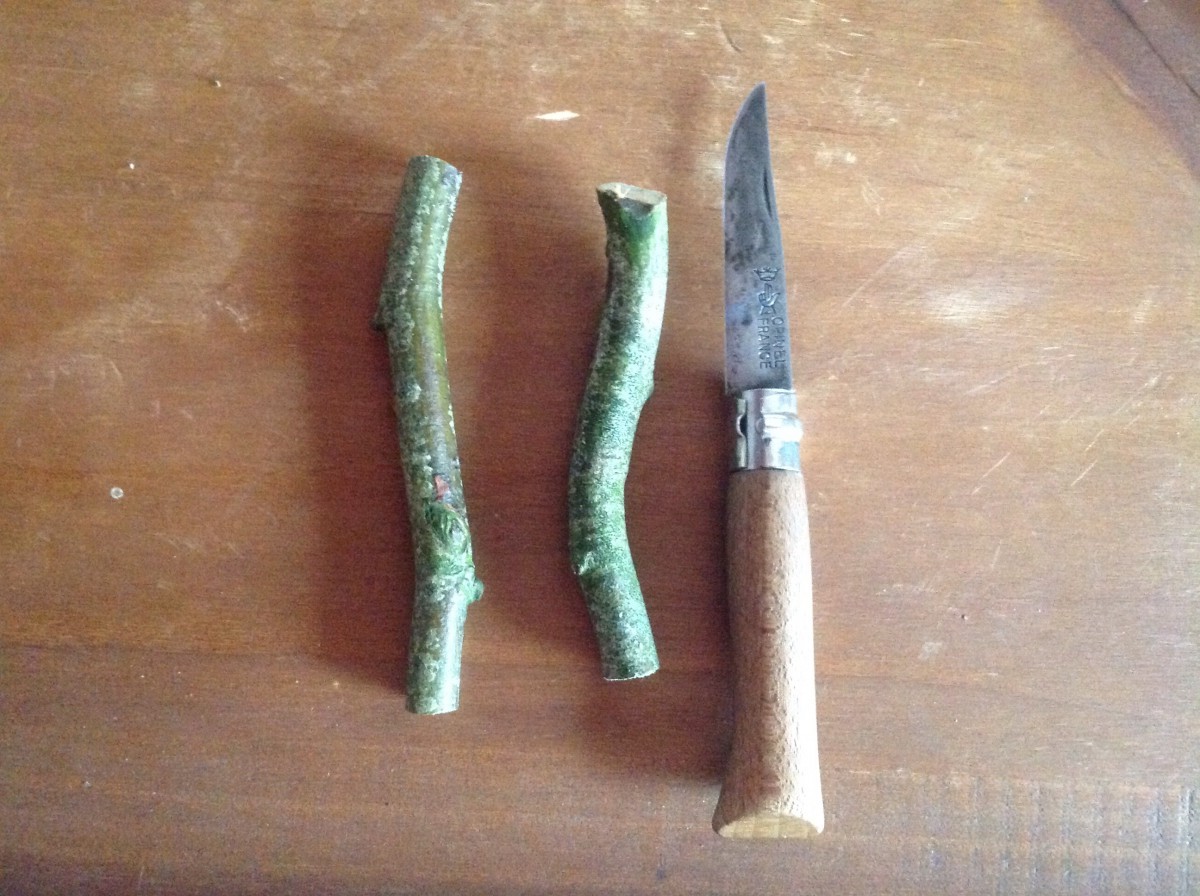
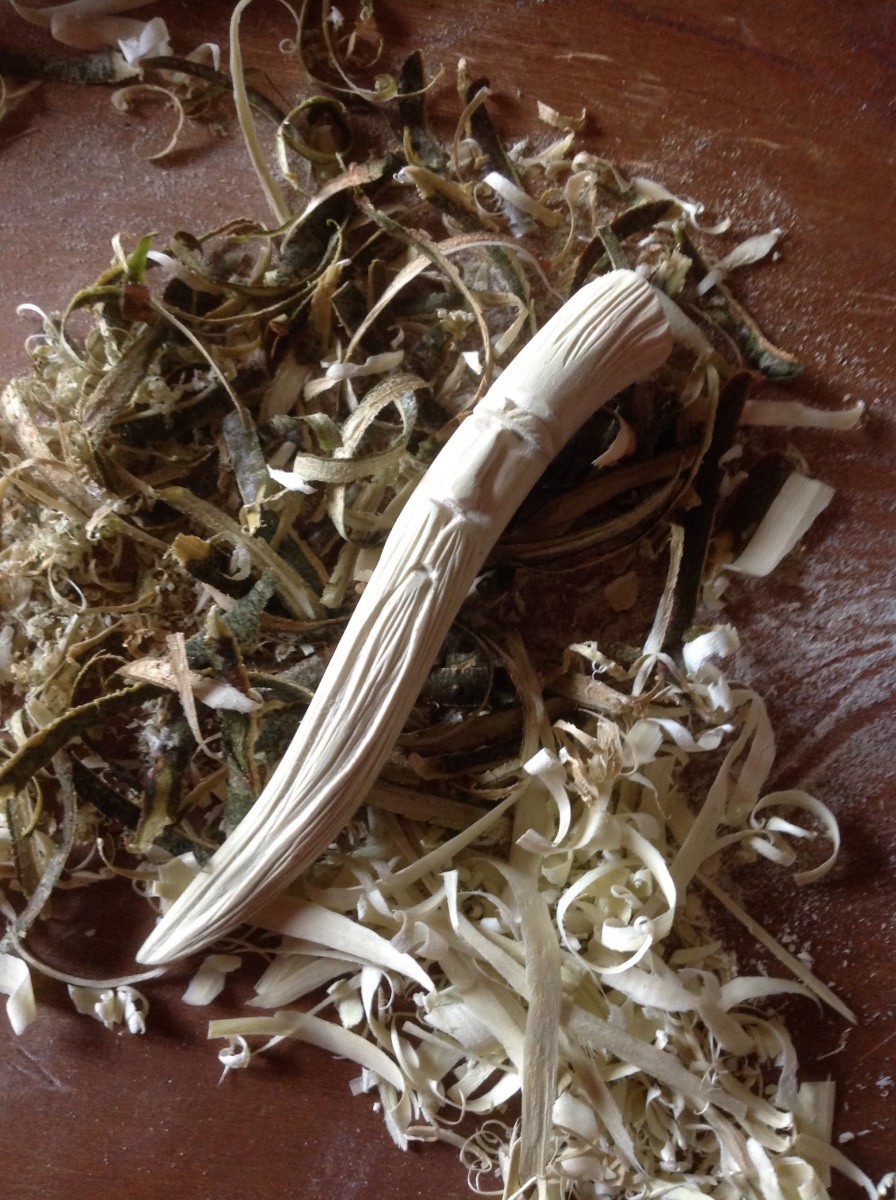
Once happy with the pieces, the size, shape and overall form I carefully strip the bark, being careful not to dig the blade into the wood.
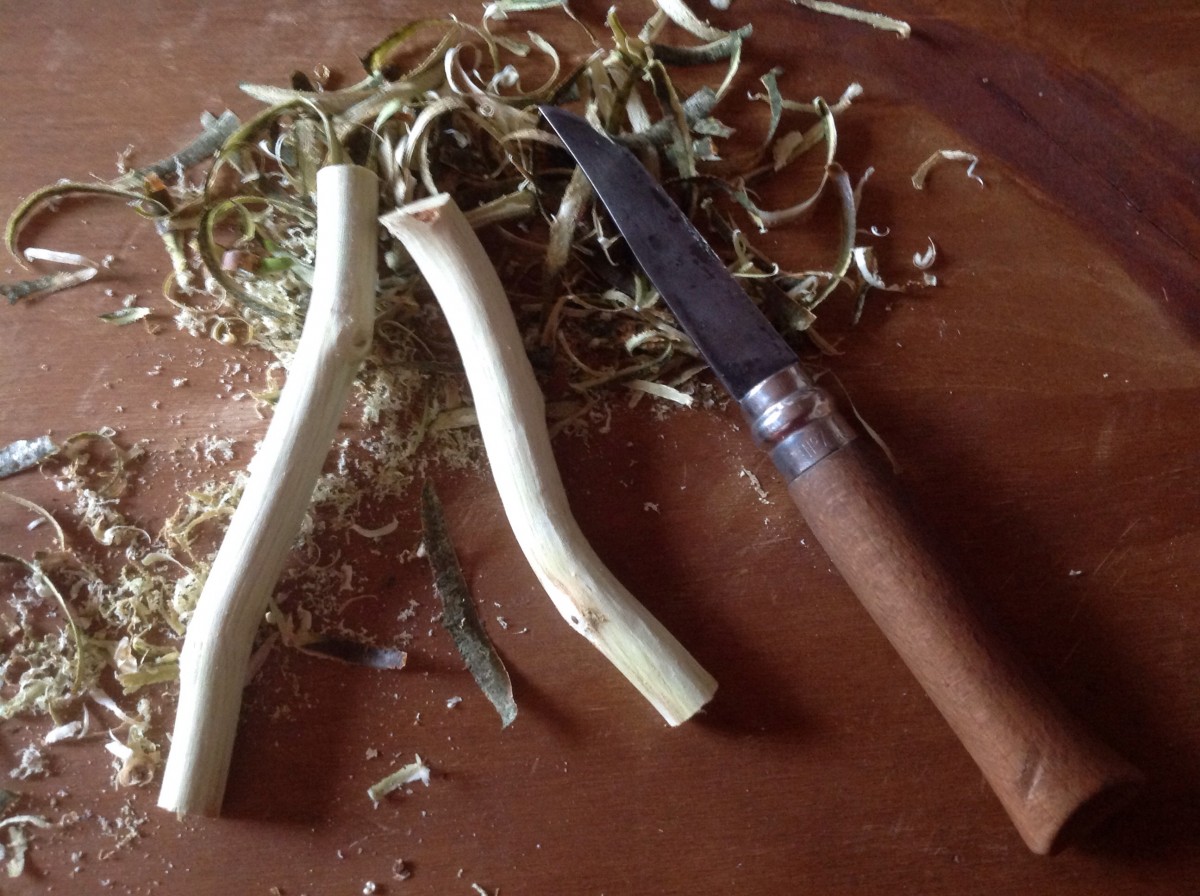
At this stage I scrape the wood, holding the blade of the knife at 90 degree angles to the wood. This removes all the under bark, and also smooths the wood. Then I make two stop cuts at 90 degrees to the grain - one for the eye socket/brow and the other where I want the nose to end and the moustache to begin. These are then followed by a wedge cut, creating two half-moon shapes.
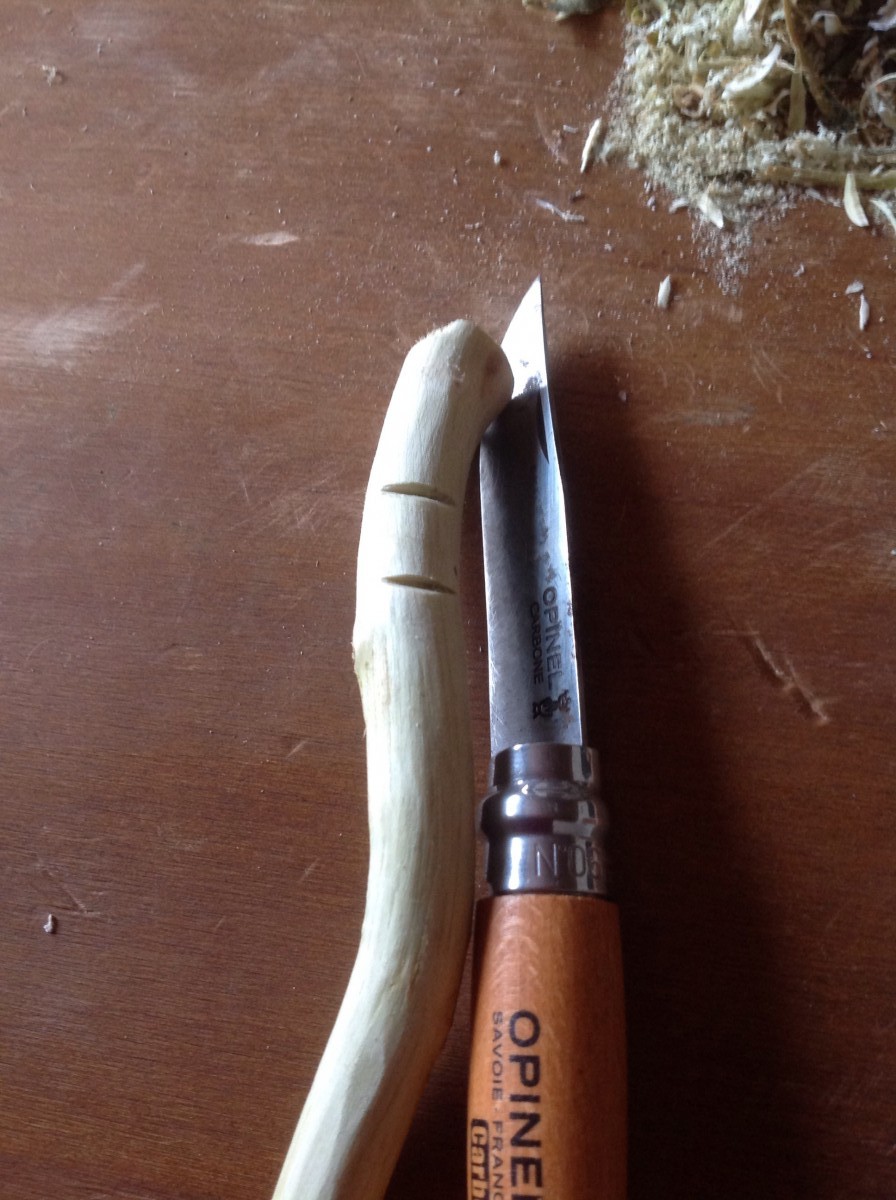
The distance between these two cuts decides the length of the nose and face being carved - if I am working with a narrow diameter piece of wood, I exaggerate the distance creating a long slim face. For wider diameter pieces I reduce the distance between the cuts. I works for me.
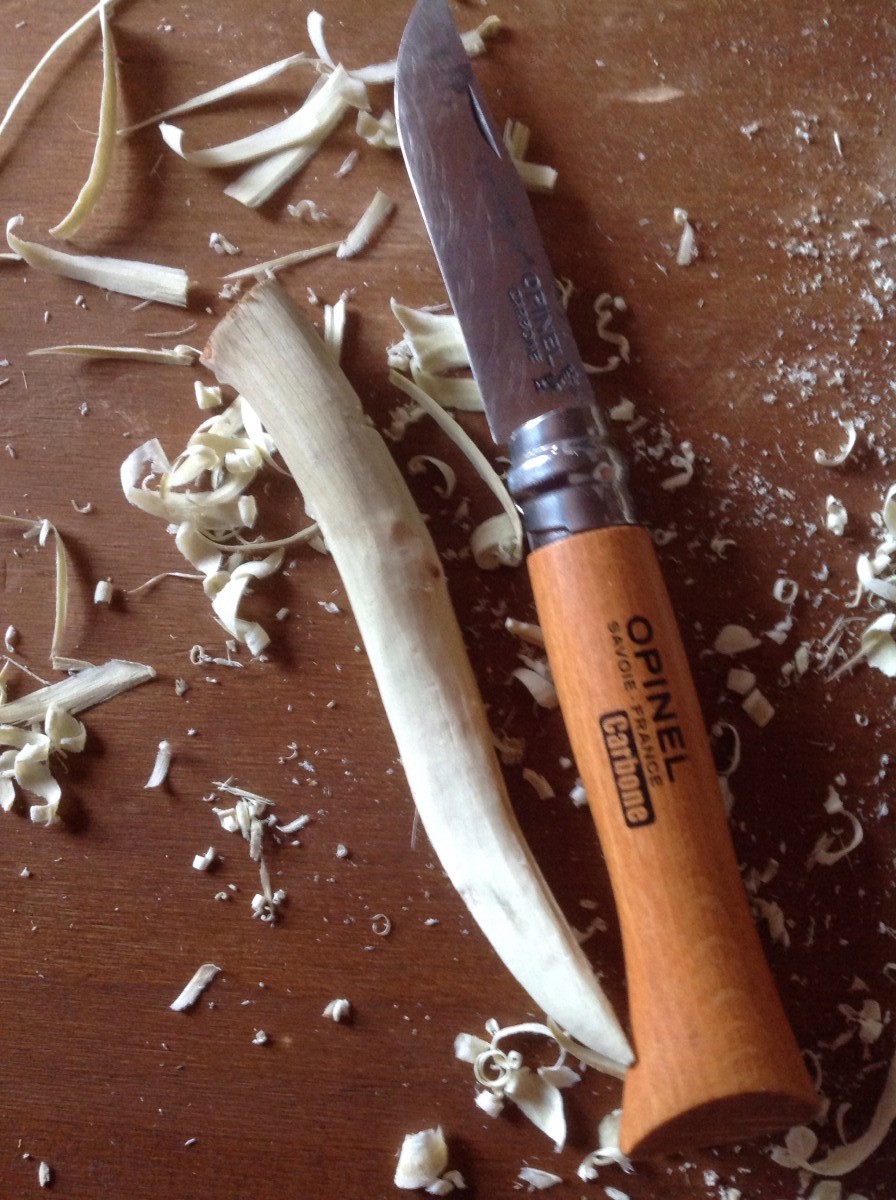
To form the nose I add two stop cuts from the brow down to the moustache, angling them apart the further they go. The I cut into them, forming the cheeks, and leaving the nose proud of the surrounding wood. I do some rough shaping to make the 'lump' look more nose-like.
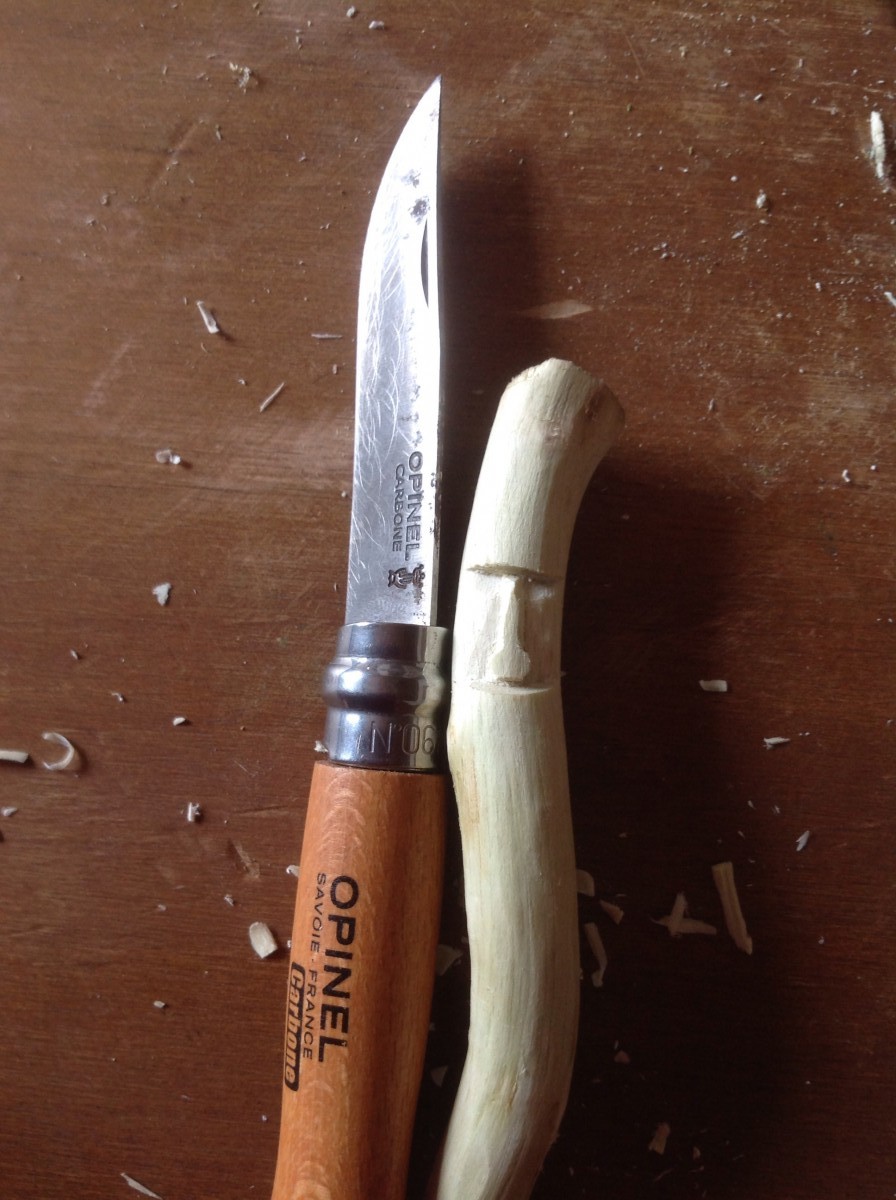
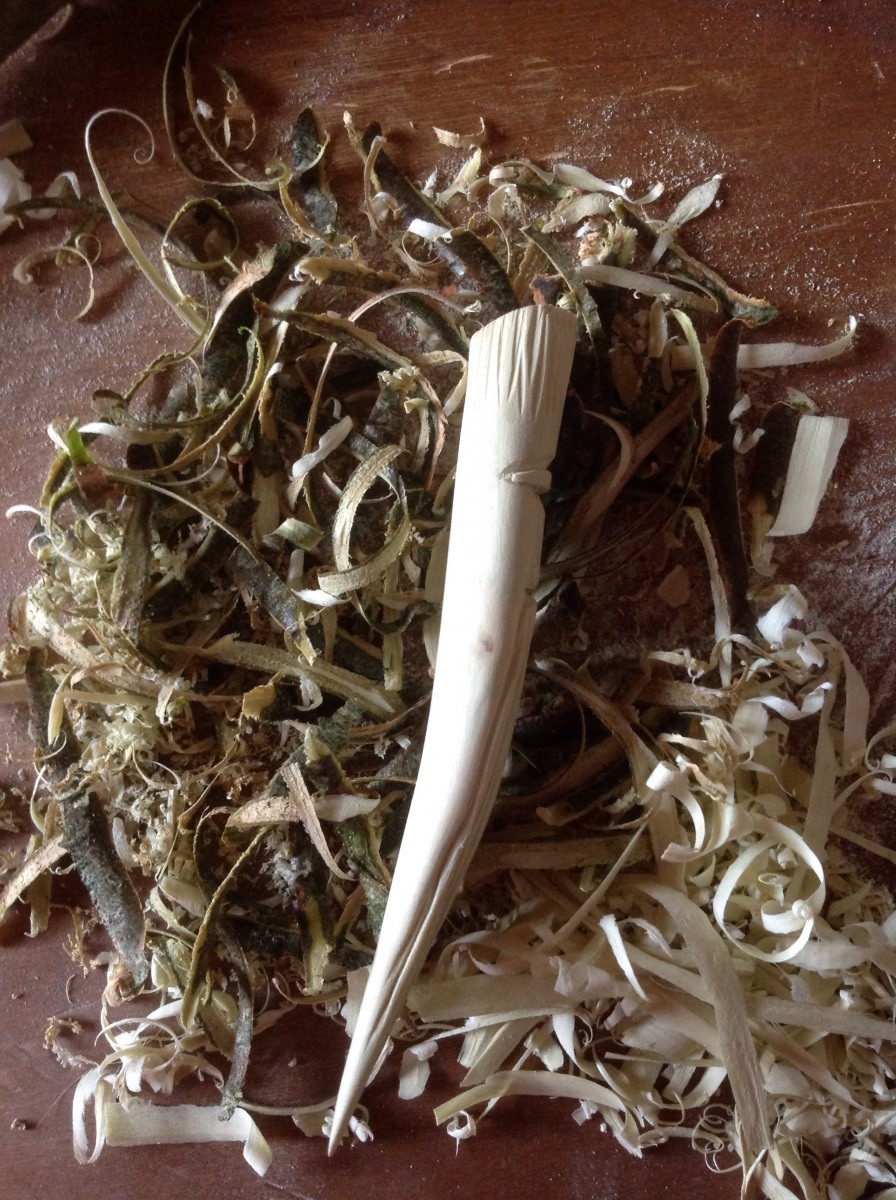
Once I'm happy with this I roughly carve the eyebrows, again using stop and wedge cuts. These can be left angular, or refined, depending on the look required. I tend to round the top edge of the brow, leaving the bottom sharp. I also start to define the moustache, again with stop and wedge cuts.
To form the mouth, and beard, further defining the moustache, I remove some material below the mouth and make more cuts to define the inside line of the moustache.
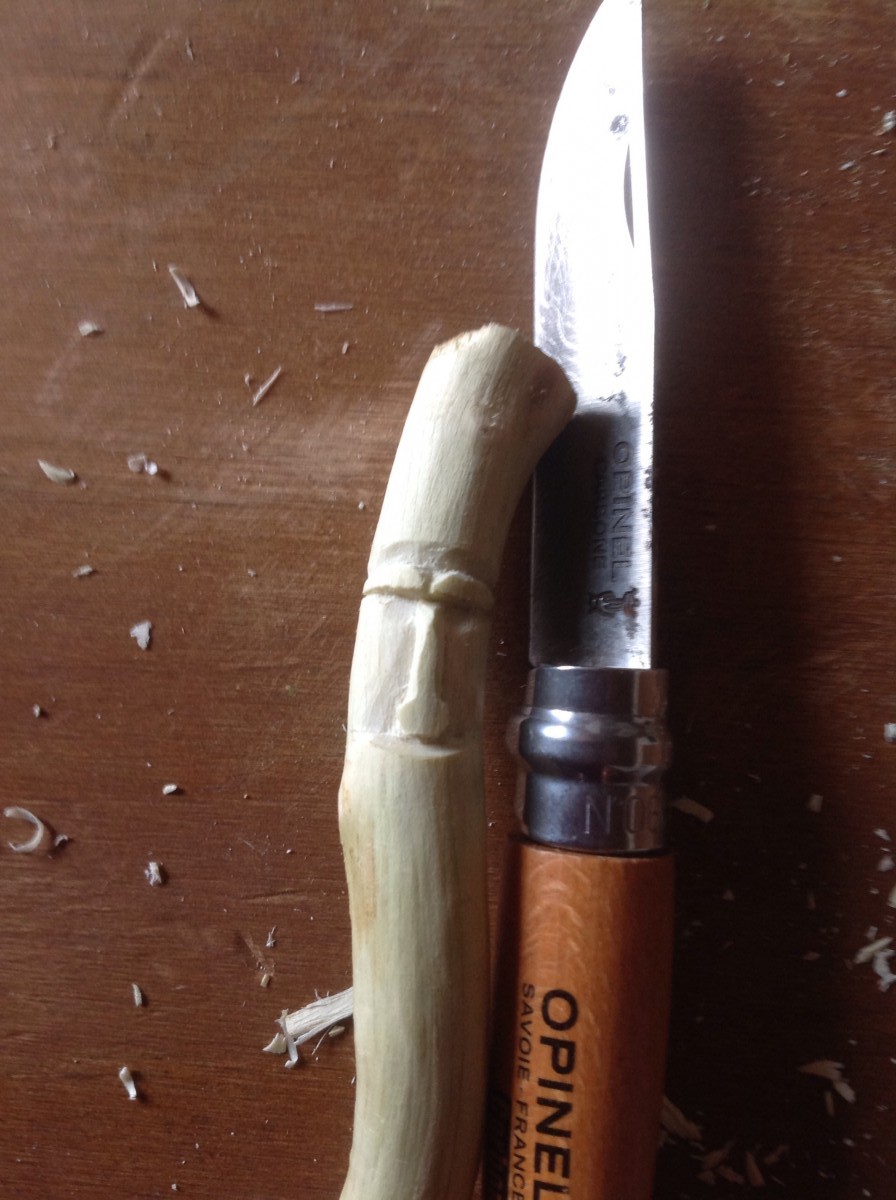
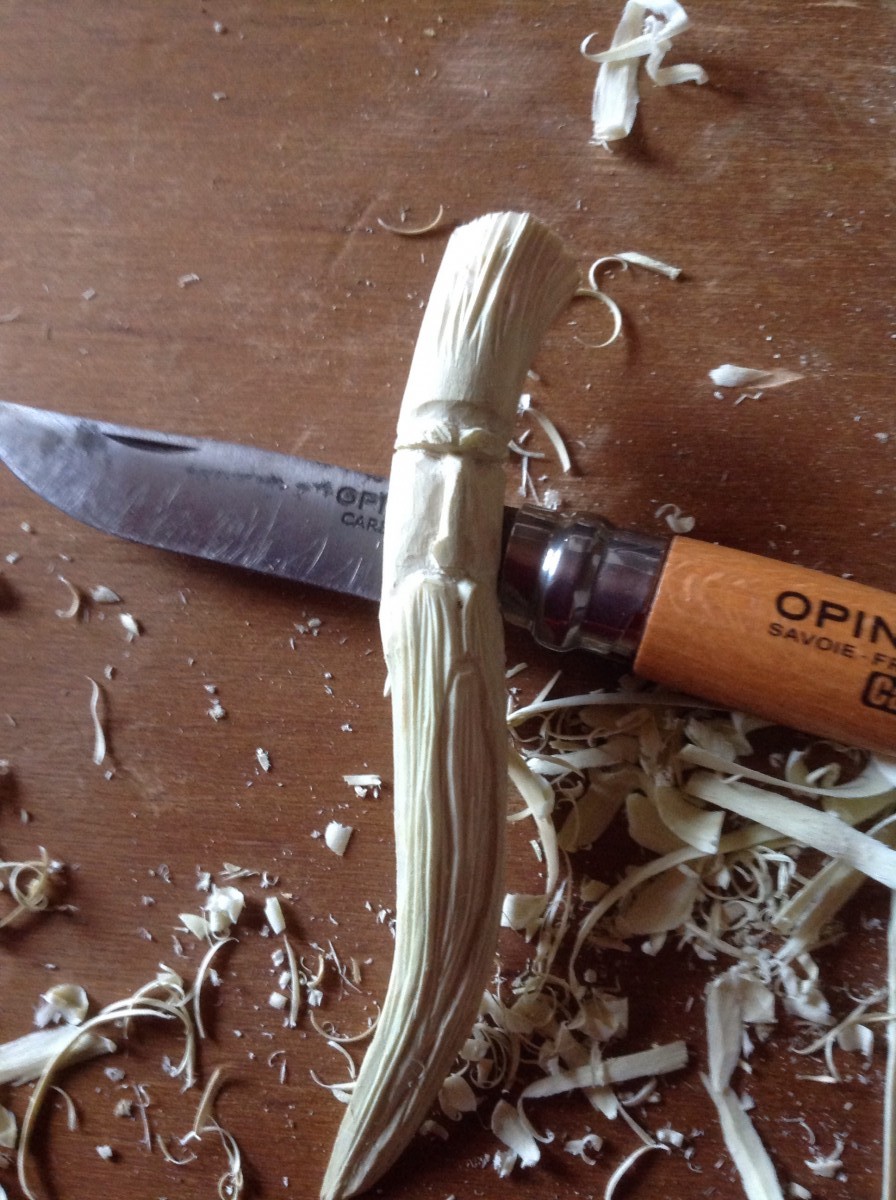
From here on in its all finishing touches and refinements - this can, on occasions, depending on the level of refinement I'm after, take as long, or longer, than all the stages so far. This is also the point that I remove material from the back to form the 'blade' of the tamper, and shape it - I always try to get this to match the shape of the beard and moustache.
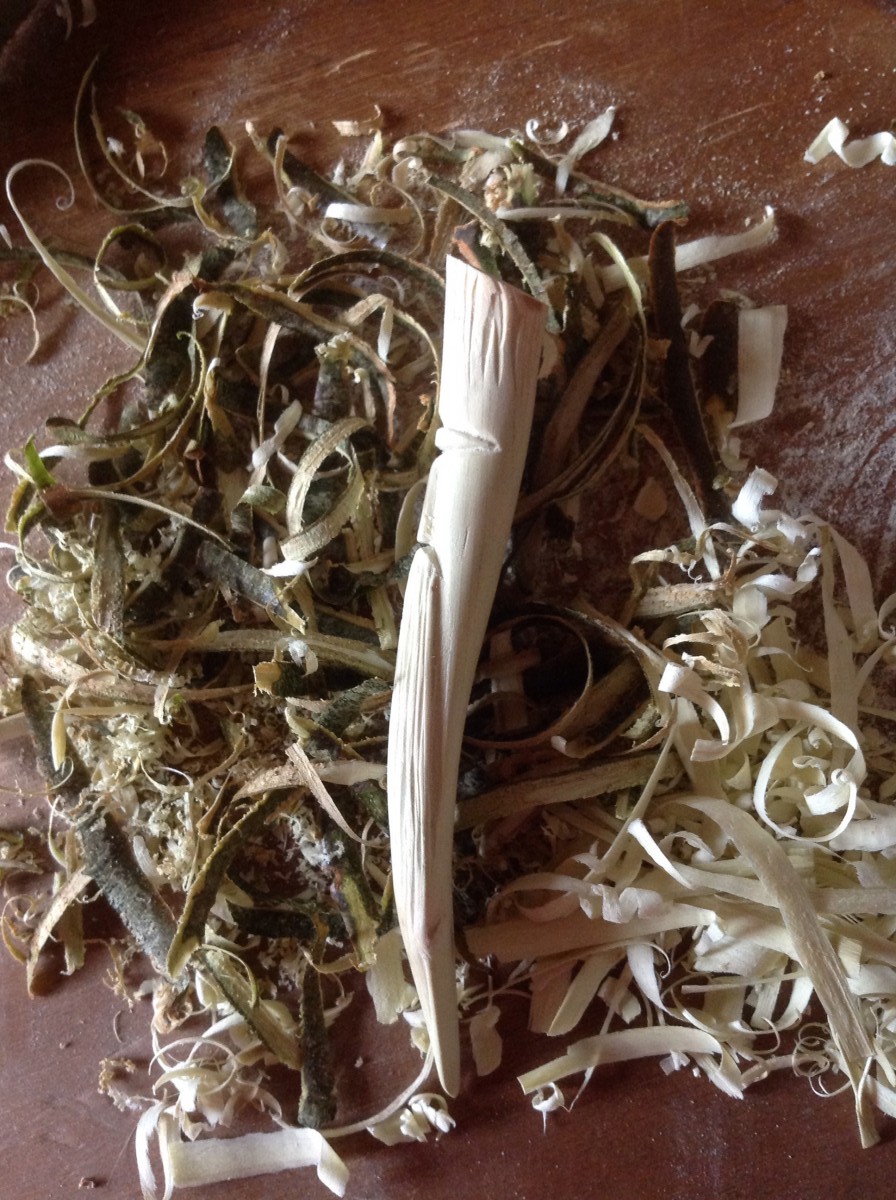
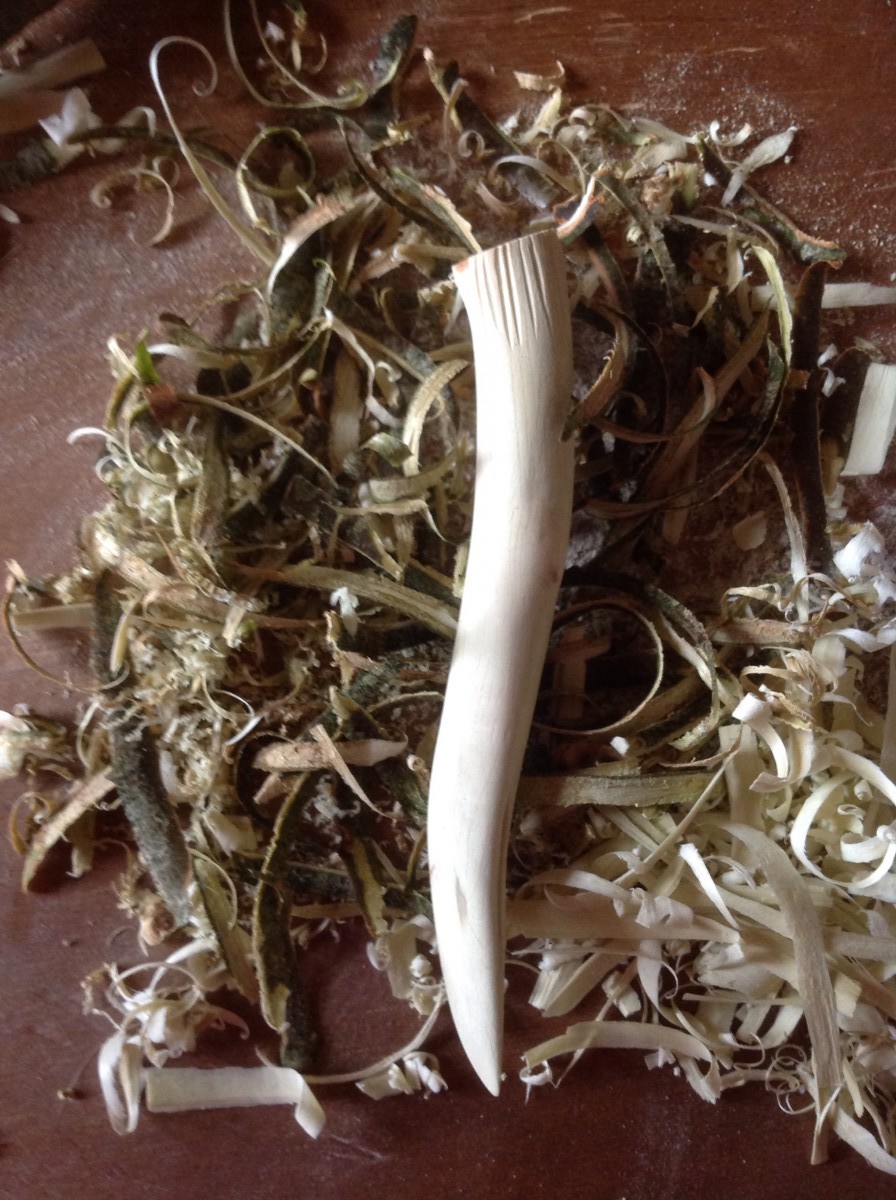
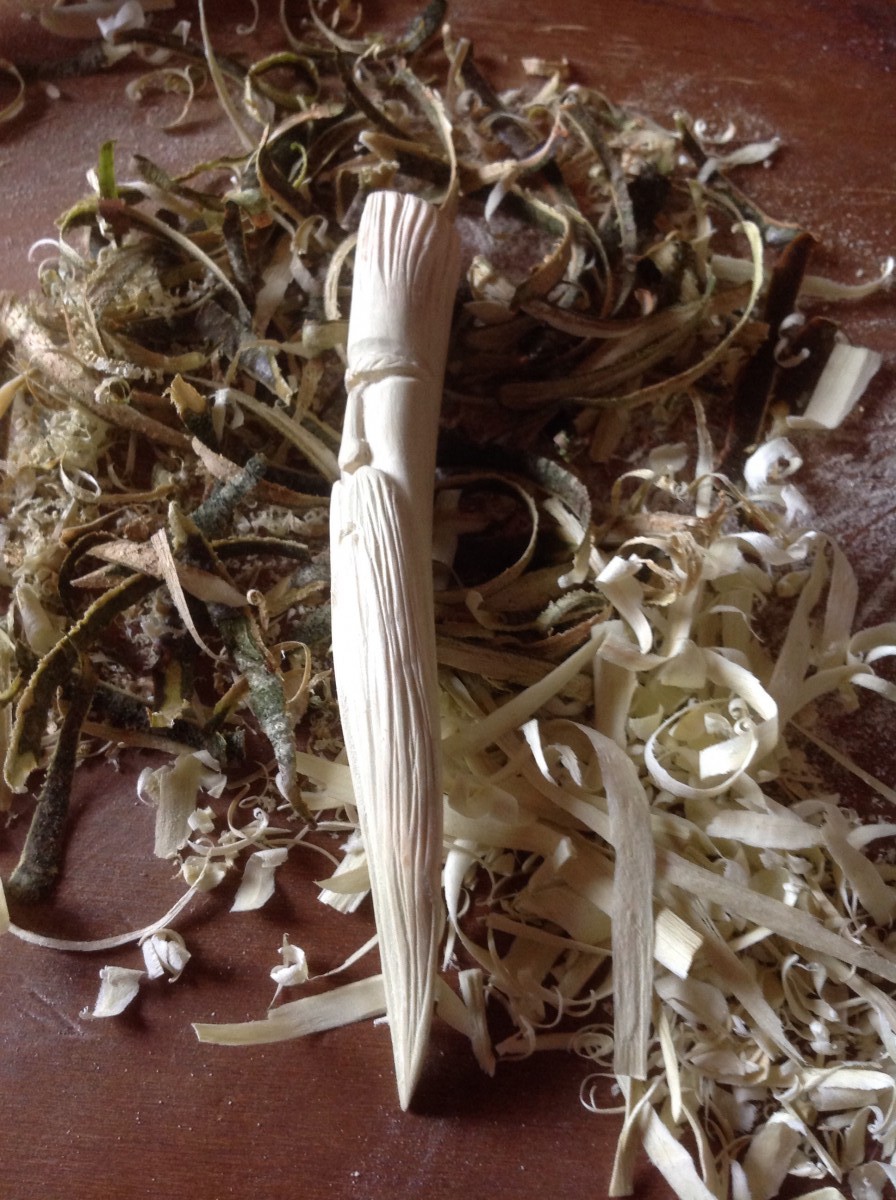
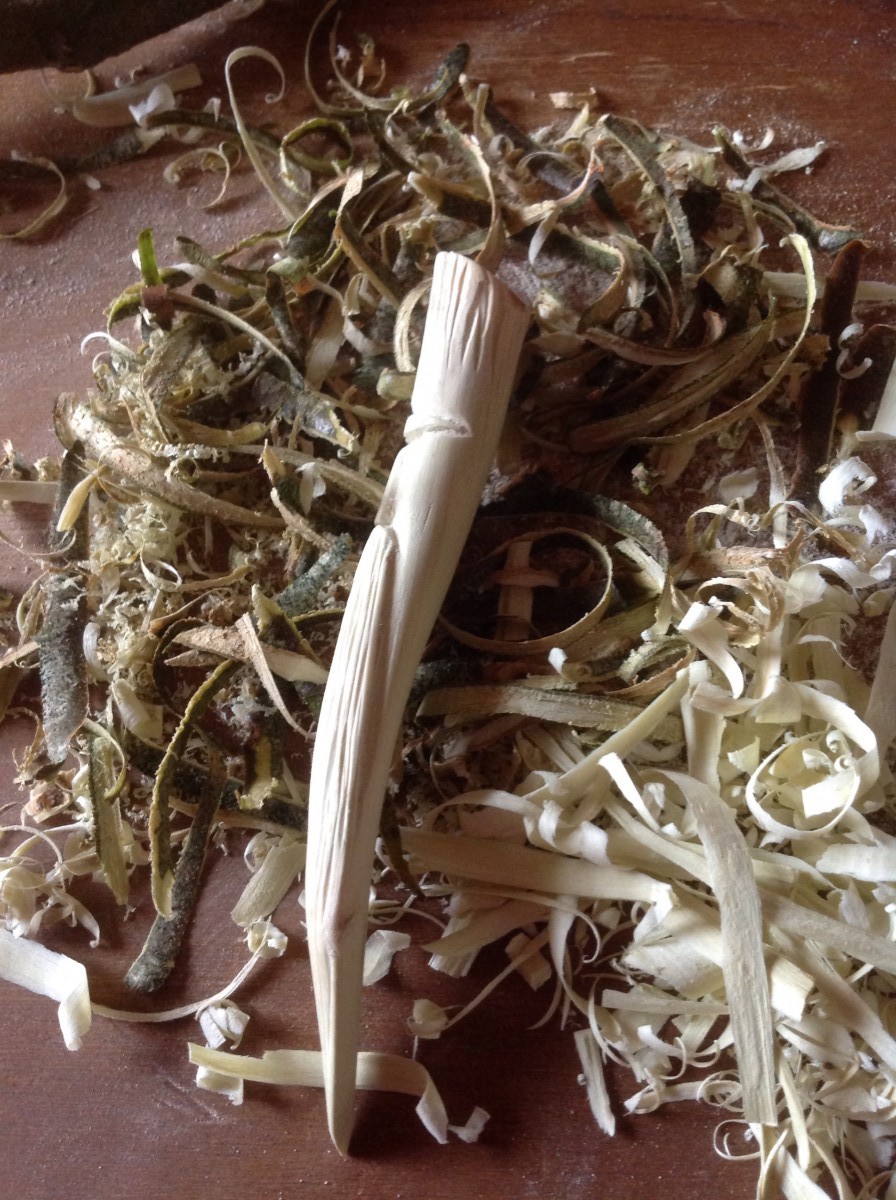
At point, as long as I am happy with the tamper, I wax it with beeswax. This will prevent the wood from drying out too quickly and possibly cracking, as well as giving it a protective, and aesthetically appealing coating. The wood has a green sheen that quickly disappears as it dries; within 1 hour the colour has changed and is starting to darken. Over time the grain will become more prominent, making this not only a very tactile object, but also a visually attractive one.
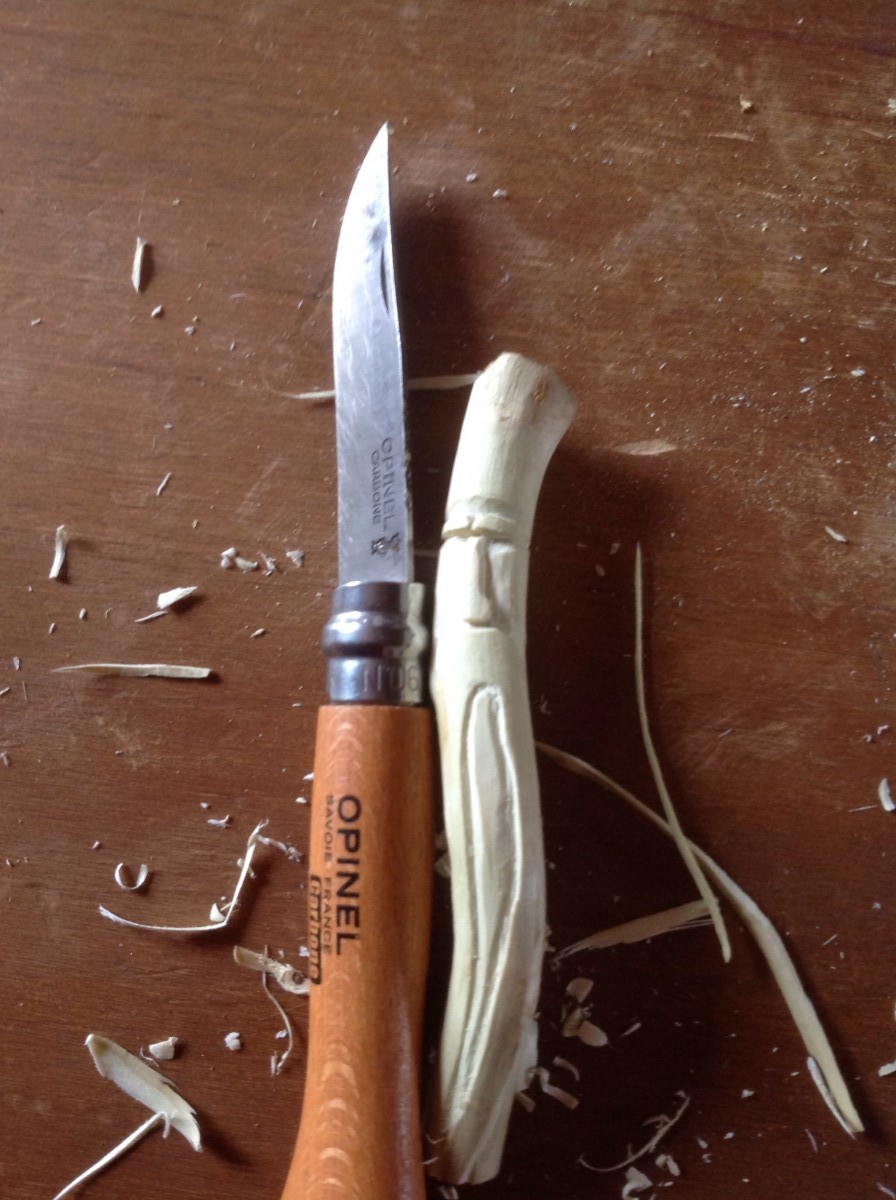
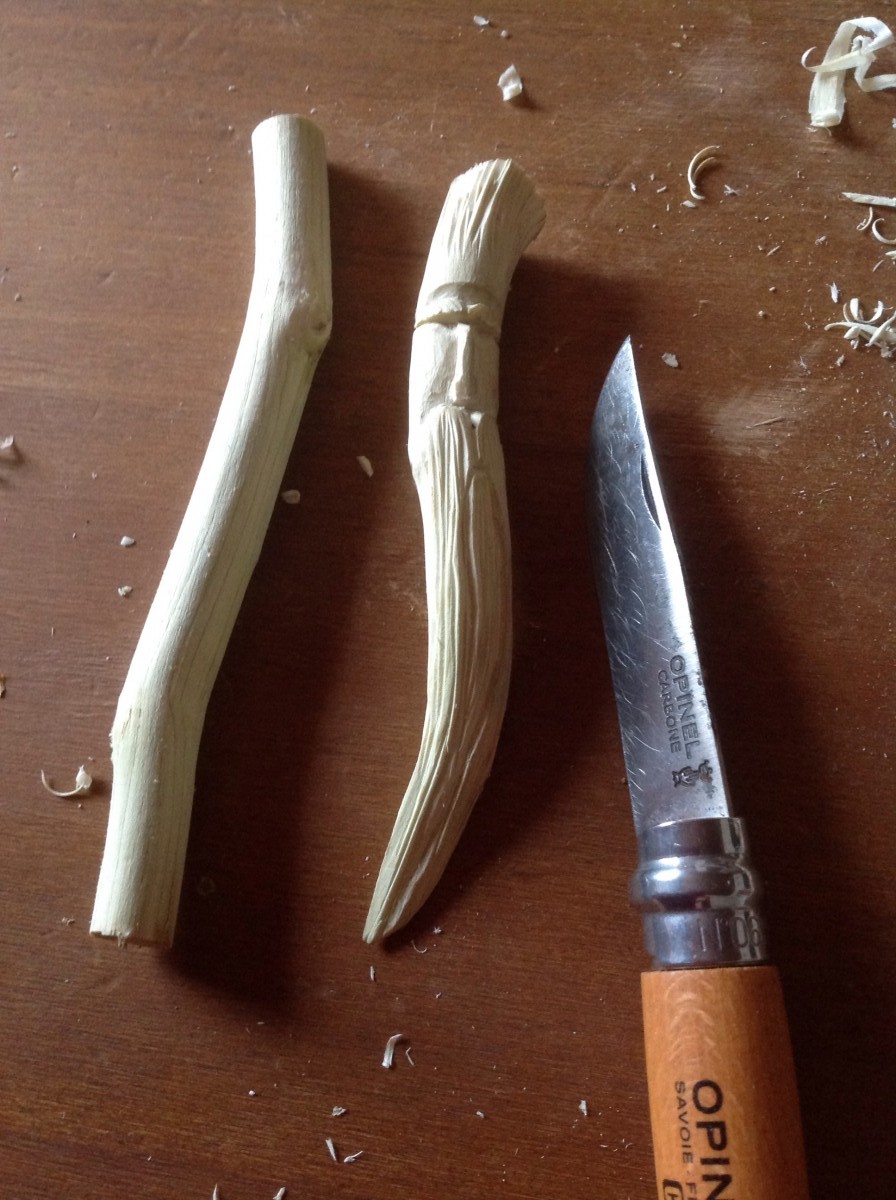
While I was on a roll, and because it was still foaming out of the skies, I made a second smaller tamper.
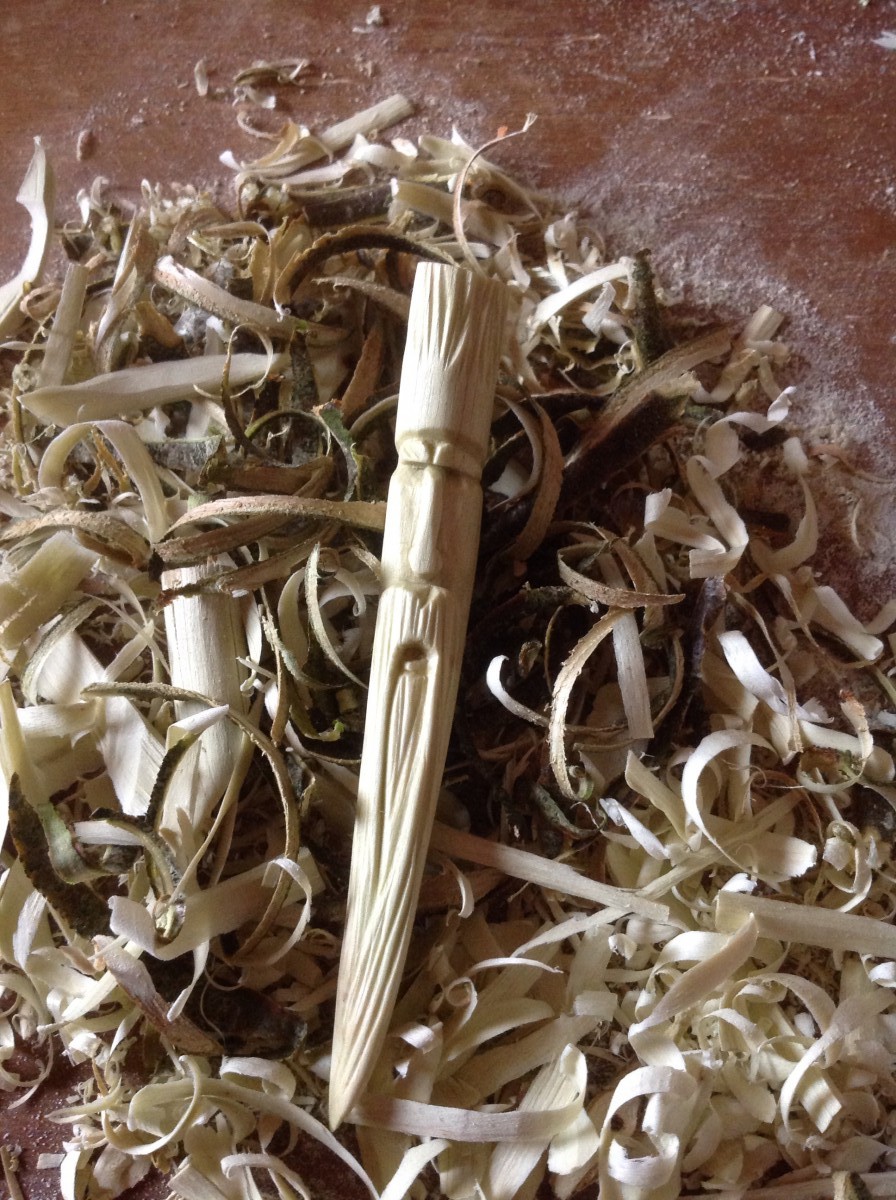
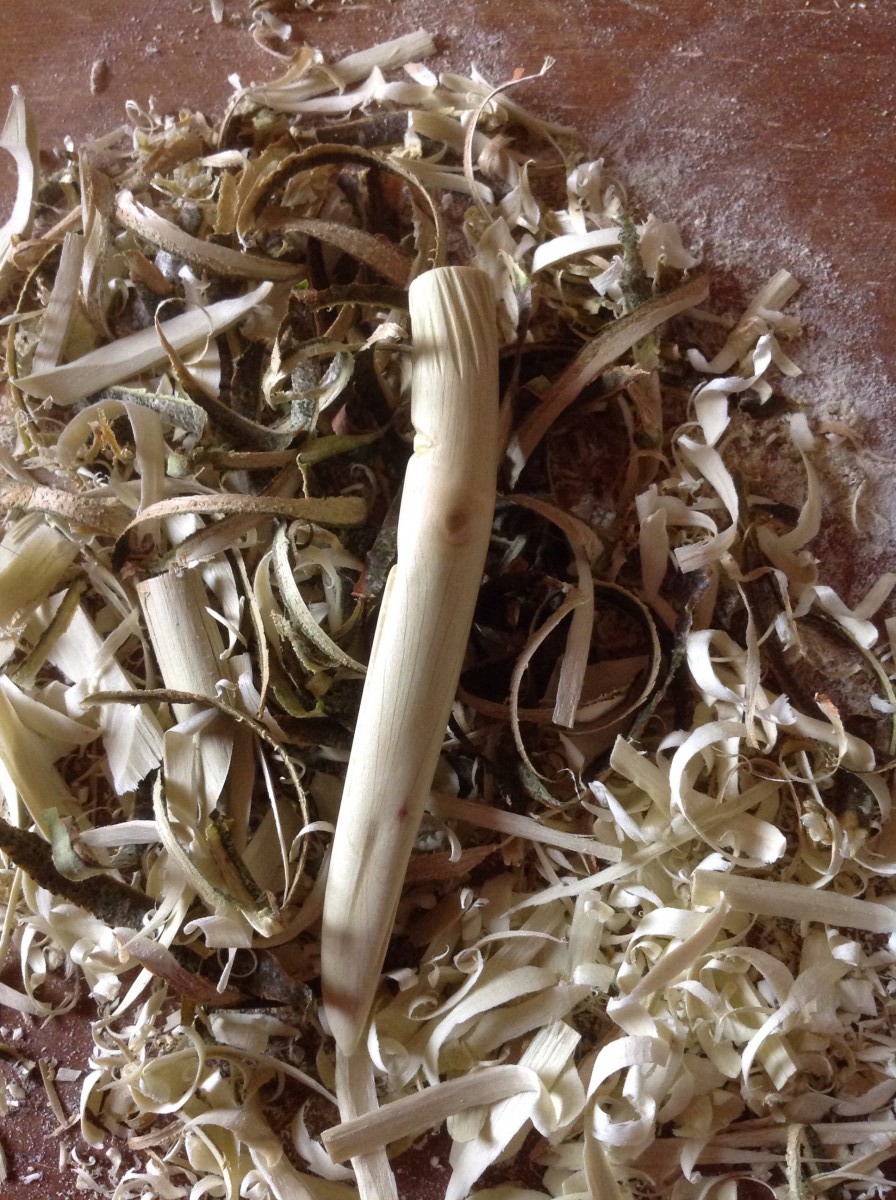
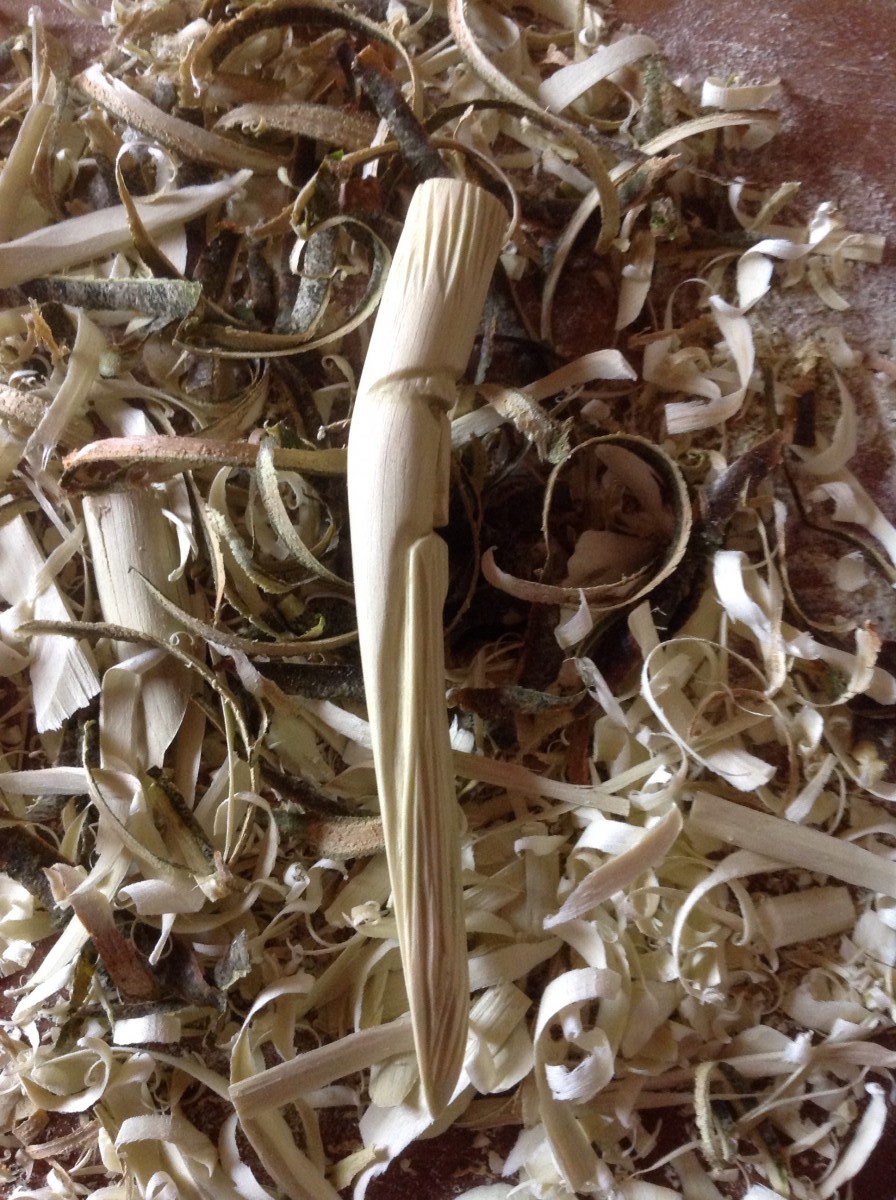
And, side-by-side.
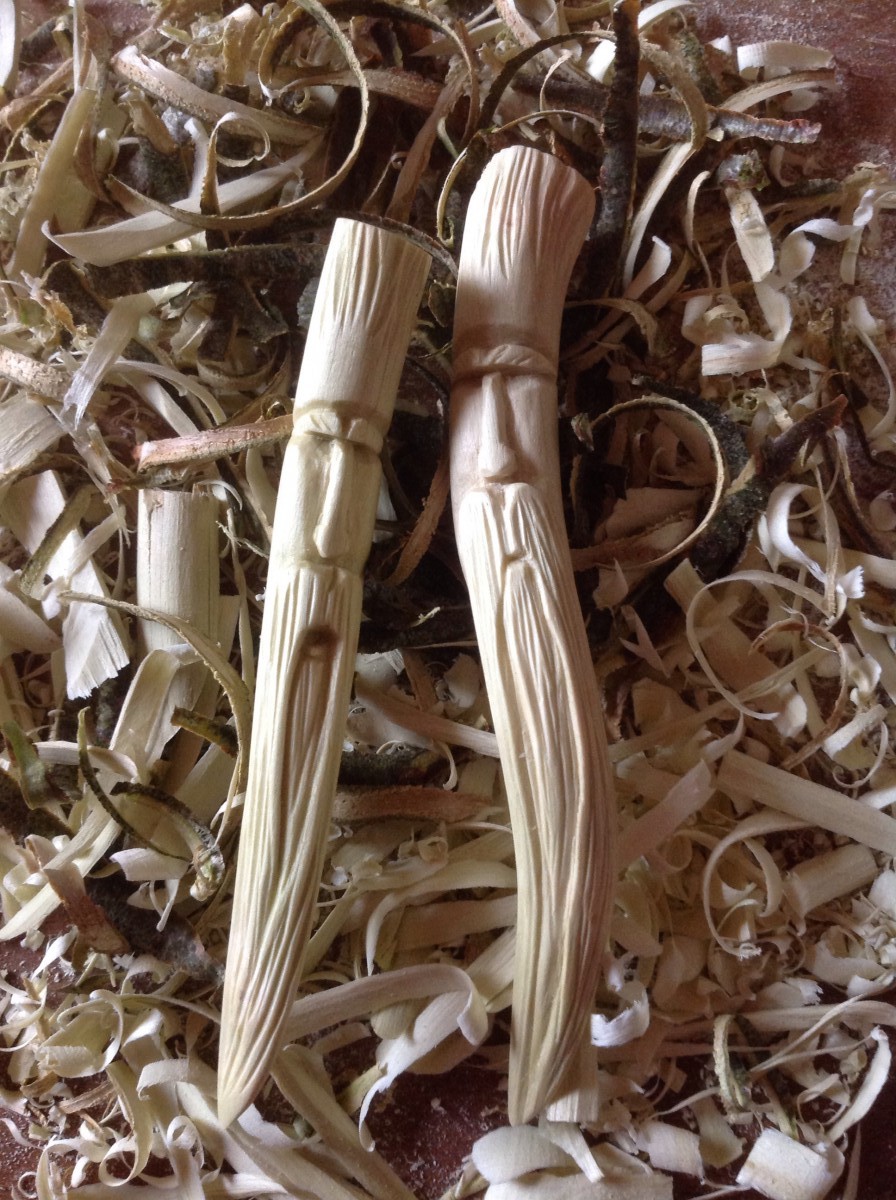
You can see, if you look carefully, how the colour of the larger tamper has already changed.
The large tamper has a slightly angled tamp head allowing the smoker to create a nice rounded ember in their favourite tobacco ( I personally favour this type of tamper ). The small tamper has the more traditional finish.
Through necessity I have not made anything in a little while - the demands of gathering fuel for winter heating and hot water have been occupying my time. But, while sitting in the greenhouse this morning, watching the tomatoes grow, I felt my fingers get itchy; itchy with the need to create something, to carve, and to take a little time to quiet the mind.
So I gathered some materials and sharpened my knife - I had a tamper or two in mind.
When I start a tamper I consider which wood I want to use, as each has different properties, and each will age differently. In this instance it was to be Beech, a wood I am particularly fond of, especially for tampers - the grain is quite beautiful, and it darkens, with age and use, to a lustrous golden hue.
From the fresh cut branches I selected the two pieces I intended to work with. At this point I pay careful attention to the shape of the wood, trying to visualise the tamper within.
Once happy with the pieces, the size, shape and overall form I carefully strip the bark, being careful not to dig the blade into the wood.
At this stage I scrape the wood, holding the blade of the knife at 90 degree angles to the wood. This removes all the under bark, and also smooths the wood. Then I make two stop cuts at 90 degrees to the grain - one for the eye socket/brow and the other where I want the nose to end and the moustache to begin. These are then followed by a wedge cut, creating two half-moon shapes.
The distance between these two cuts decides the length of the nose and face being carved - if I am working with a narrow diameter piece of wood, I exaggerate the distance creating a long slim face. For wider diameter pieces I reduce the distance between the cuts. I works for me.
To form the nose I add two stop cuts from the brow down to the moustache, angling them apart the further they go. The I cut into them, forming the cheeks, and leaving the nose proud of the surrounding wood. I do some rough shaping to make the 'lump' look more nose-like.
Once I'm happy with this I roughly carve the eyebrows, again using stop and wedge cuts. These can be left angular, or refined, depending on the look required. I tend to round the top edge of the brow, leaving the bottom sharp. I also start to define the moustache, again with stop and wedge cuts.
To form the mouth, and beard, further defining the moustache, I remove some material below the mouth and make more cuts to define the inside line of the moustache.
From here on in its all finishing touches and refinements - this can, on occasions, depending on the level of refinement I'm after, take as long, or longer, than all the stages so far. This is also the point that I remove material from the back to form the 'blade' of the tamper, and shape it - I always try to get this to match the shape of the beard and moustache.
At point, as long as I am happy with the tamper, I wax it with beeswax. This will prevent the wood from drying out too quickly and possibly cracking, as well as giving it a protective, and aesthetically appealing coating. The wood has a green sheen that quickly disappears as it dries; within 1 hour the colour has changed and is starting to darken. Over time the grain will become more prominent, making this not only a very tactile object, but also a visually attractive one.
While I was on a roll, and because it was still foaming out of the skies, I made a second smaller tamper.
And, side-by-side.
You can see, if you look carefully, how the colour of the larger tamper has already changed.
The large tamper has a slightly angled tamp head allowing the smoker to create a nice rounded ember in their favourite tobacco ( I personally favour this type of tamper ). The small tamper has the more traditional finish.

 :
: