Dr. Chuck’s May 1 seminar for the CPCC 2009 show
by Chuck Gray
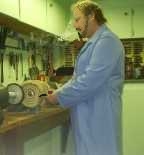 Hello, I am Chuck Gray of Dr. Chuck’s Tobacco Pipe Restoration and Repair Service. I have been involved in pipe repair since starting with Clarence Mickles in the middle 1970’s. I worked with Clarence for about seven years. Some of you may remember him. I have had my own shop since then, working part time for friends and acquaintances. In 2003 I expanded my services to include the restoration and repair of antique and collectable pipes to fellow hobbyists.
This seminar is intended to present some tips in basic pipe repairs and remedies, that can be done at home, with a few hand tools and common materials. This discussion is targeted to people who don’t have a shop full of machinery, but want to keep their collections clean and well maintained.
I wish to cover basic pipe cleaning, the use of a retort, vulcanite oxidation removal, briar dent reduction/removal, tooth mark reduction/removal, buffing, polishing, and waxing of briar pipes.
I will also give an overview of; nomenclature cleaning, logo cleaning, stem bending, re-staining briar, tenon tightening, stem fitting, use of sandpaper and files, and draft and slot opening.
I must warn you that this comes with a strong caveat, I bear no responsibility for any accidents you may have in the improper use of these techniques. Please practice any of these techniques on junk pipes many times before you try them on your valuable collection. There is no substitute for practice. The experience you gain from practice will reduce the possibility of error or mistakes, that may take a professional to fix.
One last bit of advice before we begin. With any tool you use, be it sand paper, saw, drill, file, or powered machine, pick the right tool for the job, never force it, and let the tool do the work.
Interior Cleaning
We will start with interior cleaning since we all know that a clean pipe smokes better than a dirty one.
When I clean a pipe I start with the airways. I pass a dry pipe cleaner through the stem, the shank, and on into the bowl to check the draft for obstructions. I use a dull probe to check the mortise for build-up. A round toothpick would work as well. My tool is a metal pick with a rounded point so it won’t scratch what it touches.
For clearing the shank draft I suggest that you have a full set of drill bits and a bit chuck (I use an extra drill chuck or tap handle). I carefully try to pass a 1/8th inch (3mm) drill bit from the shank to the bowl. Do not force it or you may scar the briar. Be sure to not let the drill tip pass into the wall of the tobacco chamber. If that drill size passes, try the next size up being careful to cut only the build-up tar and char. Repeat as needed. I do not recommend putting a drill bit into the mortise. Use a dull probe or wood toothpicks.
Next I assess the need to ream the bowl cake. The suggested thickness for a cake is a dime to a nickel’s thickness, depending on the size of the bowl. Using an adjustable reaming tool you may wish to ream the cake. Never ream to the wood as the carbon protects the wood from burning during smoking. Sometimes the bottom of the bowl is not easily reamed with the adjustable reamer. I often trim the lower portion of the cake with a three cornered tool. This can be made from a three cornered file with the tip rounded and the file teeth ground off. The corners of the file should not be sharp. Clear the airway again with a pipe cleaner and a puff of air through the pipe.
If a pipe has tar build-up, smokes foul, or I wish to sanitize the pipe, I will use the retort to dissolve and remove the tar thus sweetening the pipe. I do not use commercial pipe sweeteners, as I hate the taste, and they rarely have enough alcohol content to dissolve the tar. I use potable wood grain alcohol (Everclear is one brand) it is 190 proof or 95% alcohol by volume. You may use any good booze you like (vodka is Ok), but be advised that drinking alcohol is cut with water and water will not dissolve tar effectively. I never use isopropyl alcohol or denatured alcohol since they are not potable. I will not put anything in my, or my customer’s pipes, that I would not want in my mouth. Do not get alcohol on the exterior of a pipe as it may remove some stain.
If the pipe is not in need of sweetening I will simply use alcohol on pipe cleaners and cotton swabs to rinse the airways and the tobacco chamber. When the cleaners come out beige that is good enough.
Cleaning Briar Pipes Using a Retort System
When using the retort some warnings and precautions are needed.
Wear eye protection, old clothes or a shop smock, and gloves. I use nitrile/latex gloves. Protect all surrounding surfaces, and the pipe exterior. Alcohol can remove stain from your pipe and harm table tops. You will also be using heat to boil the alcohol. Alcohol is flammable and serious burns could result from accidents. Have a ready place to dispose of the spent alcohol and any pipe cleaners/swabs/cloths used.
Benefits: removes tar; nicotine; off tastes; sanitizes pipe and stem.
Components: retort; connector; alcohol; heat source; funnel/syringe; clothes; cotton balls; pipe cleaners; Q-tips; disposal can, table protection.
Steps: Clear airways of the pipe.
Fill the retort bulb with alcohol about 6.5cc or 65ml. More for big pipes, less for small pipes. Avoid overflow.
Affix a connector to pipe. Put cloth over bowl top or cotton ball in chamber. Hold the pipe bowl higher than the retort bulb.
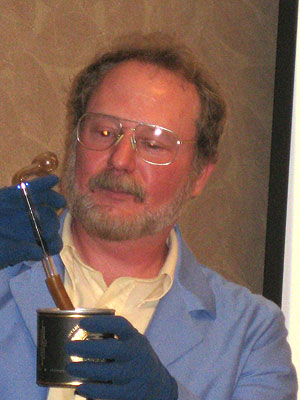
Heat the alcohol. Boiling will force the alcohol into pipe bowl. Allow the to bulb cool, the resulting vacuum will suck mix back into retort bulb. Raising the bowl will get most fluid from the bowl. Repeat 10 times with the same fluid.
 |
 Notice the black gunk that is sucked out into the bulb (Click for larger image) |
| Heating the alcohol in the retort bulb (Click for larger image) |
|
 |
|
| Dump the Gunk (Click for larger image) |
|
Disassemble pipe and dispose of sludge.
Immediately dry any drips from stummel and stem exterior.
Clean the stem draft, tenon, and slot.
Clean the mortise.
Clean the shank draft.
Air dry the disassembled pipe for 8 to 24 hours before smoking.
For my heavily used pipes, ones I smoke three times a week, I usually clean them with the retort once a year. The pipes I use once a week get retort cleaning every other year. My less used pipes get a cleaning without the use of the retort.
Cleaning the Top of the Pipe
To clean the top of a smooth pipe use saliva on a clean rag and rub.
If your pipe has a rusticated top, use saliva to soften the char by letting it soak in for a few minutes then rub with a cloth. Repeating as needed. For stubborn or deep char you may need to dislodge the softened char with a rounded metal tool or round toothpicks. Followed by a light brushing with a fine wire brush.

Buffing the Stem
For buffing your smooth pipe stummels and stems have a bench vice with rubber jaw covers. Carefully tighten the vice on your pipe avoiding crushing pressure. You only want to securely hold the pipe while buffing. To buff, use cotton strips cut from clean old t-shirt cuffs, neck, and bottom area. Rub the appropriate buffing compound on the cotton strips and using speed not pressure strop the cloth across the surface. It is best to use masking tape to protect the areas you do not want to buff (lip, logos, nomenclature). Do not mix compounds on one cotton strip. Use different compounds on separate strips, it helps to label the strips to avoid contamination. Yes, this is slower than a powered buffing wheel, but the results can be the same.
For textured pipe stummels, clean dry brushes work best. Stiff horse hair or pig bristle brushes are excellent. For heavy debris cleaning use a fine wire brush sparingly. For the final waxing use one stiff brush rubbed with wax, do not use this brush for other purposes.
To buff around stamped painted stem logos masking with tape is necessary. Carefully cut a mask for the logo and affix it to the stem. Try not to buff over the masked logo, but around the mask. To clean oxidation in the area around the logo use white auto buffing compound on a cotton rag. Rubbing as close to the masking as possible without disturbing it. You will leave some oxidation, but that is far superior to buffing off the logo.
Whiten the Logo on the Stem
After you have cleaned up the stem as much as possible, remove the masking from the logo and examine it to see if some whitening is required. To whiten the logo clean it first with a small amount of alcohol on a clean cotton rag. Be careful to not rub hard as some white can be removed. Fill the logo indentation with a small amount of Liquid Paper and allow to dry. With a small amount of white auto buffing compound on a cotton rag carefully rub off the excess Liquid paper. This will help remove more of the left over oxidation also. If you go too far with the rubbing just repeat the process of cleaning with a bit of alcohol, apply more Liquid Paper and rub again with auto buffing compound.
To gain better relief on the stummel nomenclature brushing with a dry brush may remove imbedded grease, oil, or wax. For some nomenclature you may need to use alcohol on a brush. Be advised that you may remove some stain from the area. Re-staining is not as difficult as it may at first seem.
Staining the Stummel
To spot-stain the stummel use aniline dyes, commonly available at shoe repair stores. I use Fiebings leather dyes, they are premixed and come in many colors. Buy more shades of stains than you need as you will want to work from the lightest color and move to a darker color if needed. If you start too dark the dye is difficult to make lighter after it is applied. As I mentioned previously, it is always best to practice on a junk pipe before you apply stain to a valuable pipe. Wear gloves and cover anything you want to protect. This dye is flammable and will be difficult to remove from anything you get it on. First clean the area you want to dye with a small amount of alcohol on a cotton cloth. Allow the area to dry. While that is drying, open the dye bottle and remove the foil from the bottle top. Replace the plastic cap and shake the bottle well to coat the inside of the cap with dye. Wrap another clean dry cotton rag over your gloved index finger. Open the bottle and touch your wrapped index finger to the stain on the inside of the cap. Apply as little dye to the area you want stained as possible. After the stain has dried rub it with a clean rag and see if you want to apply more stain, or a darker color. When you are satisfied with the color rub the stained area with a clean rag, then wax the area.
Removing Teeth Marks
For reducing or removing stem tooth damage you may be able to raise indentations with heat. Using a small fine flame, with an adjustable butane lighter, heat the stem at the point of the indentation. Be careful not to scorch the vulcanite. Hold the flame one and a half inches below the spot for about eight seconds. Repeat a couple of times and, if it is a compression mark, it may release a bit.
If it does not release completely you may have to use abrasive techniques to get better results. Look at the stem slot, face on, to see if the stem is thick enough to allow for the removal of vulcanite. If you feel the stem has some excess thickness you may proceed. Use masking tape to cover the lip of the stem with two or three wrappings, allowing the excess tape to continue off the lip face. This will keep you from damaging the lip and provide you with a guide for sanding. For slight imperfections fine sand paper (220 grit, no coarser) can be used in alignment with the stem lip. That is to say, lay the straight edge of the sandpaper in the area immediately following the lip (I call this area the "bite"). Work the paper parallel to the masked lip. Do not press hard, if you let the sandpaper bend into the bite and move it you will produce less cutting action and get a smoother result. Drawing the paper towards the stem’s tenon, as you move it side to side, you will effect more area if needed. Do not overwork with 220 paper, you can’t put back what you have removed. Instead change to 400 grit paper and work out the scratches from the 220. Follow with 600 grit paper for a finer surface texture. Next, using a "super fine" finger nail salon buffing board (from the cosmetic department of a local store) buff the surface until no scratches are seen. You can now put the stem in your bench vice (with the rubber jaw guards) and strop buff the stem to a shine.
If you are really bold you can begin your tooth damage job with a "Single Cut Mill Bastard File" (not a double cut). Be careful, these tools really remove material. To avoid creating deep surface scratches use almost no downward pressure on the file, let the tool do all the work. Work the tool ninety degrees to the orientation of the stem. Buy a new file and keep it clean, do not use it for any other purpose.
Stem Bending
Stem Bending for vulcanite or acrylic is done with heat. Use a small controllable flame. I use a heat gun for big jobs and a alcohol fuel lamp for small stems. Warning, you can burn or scorch vulcanite and acrylic. You can use a butane lighter if you have one that stays lit without holding it. Use as small a flame as possible heating the area of the stem you wish to bend. Rotate the stem (preferably mounted in the pipe) over the flame at a distance of about two inches for a butane lighter or about four inches for a lamp (five inches for a heat gun).
With either heat source count off thirty seconds and test the softness of the stem. Repeat until the stem bends with slight pressure. After you are satisfied with the bend, quench the stem in cold, not iced, water for the same time it took to soften it. Note: Do not do this with amber stems.
For stem straightening dipping the part of the stem you wish to straighten in boiling water for a minute may suffice. If you use a lamp, lighter, or heat gun use the precautions mentioned previously.
Tightening loose tenons are similarly done with heat, however pinpoint accuracy with the flame is crucial. First clean out the mortise and the tenon with alcohol and pipe cleaners and cotton swabs. Often tenon problems are caused by tar build-up in the mortise or on the tenon. Test the fit after cleaning and before preceding. I only use a lighter for this step. Access the area of the tenon that is loose. Heat only the area to be expanded . Protect the barrel of the stem with masking tape. Again rotate the stem over the flame at a distance of two inches. Due to the small diameter of most tenons count to ten, not thirty, seconds and test the tenon’s softness by pressing the end of the tenon on a hard flat surface. Be sure to press down at a perfect ninety degree angle so as to not bend the tenon. Proper compression will expand only the heated area. Always test the tenon after each compression in the pipe mortise. Repeat as needed.

Tenon reducing can be done by buffing the tenon. But first clean out the mortise as previously mentioned. Often tenon tightness is caused by debris build-up in the mortise or on the tenon. Test the tenon in the mortise before continuing. Put the stem in a vise (with rubber jaw protectors) to hold it and strop the tenon with a cloth that has a coarse buffing compound on it. Be sure to work all around the tenon circumference equally otherwise you may oval it. Clean the buffing compound off the tenon periodically, and test the fit.
Briar dent reduction/removal can be accomplished with steam heat. Do not do this near nomenclature, stamping can also raise from this technique. I use an electric iron used in the furniture repair trade. You can achieve similar results with a regular steam iron. This will not work on scratches, only on areas where the briar has been compressed. Set the iron on "Cotton", have no water in it and set it on "Dry". Allow the iron to heat. When the iron is ready a small bead of water will "dance" and evaporate from the iron’s face. Dampen, do not soak, a clean cotton rag with water (t-shirt cloth is great). Double the damp rag and place it over the dent in such a manner that you can place the steam iron’s flat tip face exactly on the dented area. Allow the iron’s point to create steam on the dent. Do not press hard, the steam does the work. Repeat as needed.
Slot opening (widening) can be done with a home made tool. Sorry, we don’t have the time here to discuss why some people want to open up their stem slots. Most slots are two to three millimeters in height. A cutting tool can be made from coping saw blades. Without bending the blade, cut one in three equal parts. Use only the two end pieces, the middle section can be discarded. Tap out the pins from the two ends. Place the two ends side by side and with metal tape, wrap the base of the blades together. Or, if you can solder, solder them together. The two saw blades, side by side, are less than two millimeters thick. Mount the blades in an adjustable tool handle. Grind off or file the back side of the blades (the side without the teeth) down to a two millimeter "point" that flares out to the original blade back surface at about one half inch to three quarters of an inch. This tool should allow you to get deep into the stem draft hole for your widening. You may wish to make another slot tool that is three blades thick.
With the stem lip held at ninety degrees to a flat surface the tool can be used to widen the size of the draft hole to the slot. Envision a stretched "V" within the stem. With small hobby files you can clean up any rough spots. Folded bits of fine sand paper will smooth your slot work further.
If you wish to attempt to open your shank to bowl draft do it in steps. One drill size up at a time. Buy drill stops, or mark your drill with masking tape, and carefully measure the distance you need to go to avoid drilling across the bottom of your bowl. Don’t force the drill in the shank.
When buffing with powered wheels slower is better. High speed means a loss of control and you may produce a wavy surface. Do not mix compounds on your wheels, mark them and use them for one compound only. For a big 9" wheel 1725 rpm is good. I use a variable drive on my wax wheel for greater control. Do not use a one speed Dremil type tool spinning at 13000 rpm, get a variable speed and start slow. Most powered hand drills are Ok, but I would still advise using a variable speed drill. Use masking tape to protect areas you do not wish to effect. Be sure to use the right angle of attack with the wheel, this is crucial for stem lips.




I should have looked at this First
GREAT STUFF
To clean tar from the smooth rim of a pipe, I’ve found vinegar or lemon juice to be more aggressive (and less repugnant) than saliva; but all three work.
Beautifully written and instructive, Dr. Chuck! Many, many thanks!
Thanks Dr. Chuck. With the help of this wonderful guide I was able to save an estate pipe where someone had removed some of the briar in the mortise with a bit of overzealous reaming. The steam bending worked wonderfully. Cant say thanks enough for passing on the knowledge.
What is the proper procedure to remove and replace the sterling silver shank cap or mount on a Peterson pipe?
Can you make a new stem for my Dunhill bent, class 4? I can send a picture if it will help. Arnold Bierman
please make it easier just to mail my pipes to you to have cleaned,and stems cleaned, especially nowing the price
My pipe is getting old last night I dropped it and the quarter sized chip broke off. I’m going to take it to my local tobacconist if it can be fixed.
My question is can be be repaired?
I have an old calabash pipe that I inherited. I decided to boil the stem to sanitize it. I noticed as I paced it in the water for about 30 seconds, it changed color. I took it out immediately and noticed it was very pliable and had gone from black to beige (it looked as if a stain used to color It was removed. Also, it was mottled, as certain areas still had some sort of stain I believe. My question is this- what is this material, why did this happen, and what can I do to salvage the stem (if possible)? Can it be restrained, and with what as the stem seems porous. Thank you
I broke my black plastic pipe stem near the tip. I think need a new one. I’m not sure it can be repaired. I mean CA glue will fail I think. Any ideas or where can I get a replacement? I can send a pic for you to have a look at the pieces.