
What would you do? Stem/Button broken
- Thread starter throbinson
- Start date
You are using an out of date browser. It may not display this or other websites correctly.
You should upgrade or use an alternative browser.
You should upgrade or use an alternative browser.

SmokingPipes.com Updates
Watch for Updates Twice a Week
PipesMagazine Approved Sponsor
PipesMagazine Approved Sponsor
PipesMagazine Approved Sponsor

PipesMagazine Approved Sponsor
PipesMagazine Approved Sponsor

- Status
- Not open for further replies.
If I could find someone selling them that cheap again I totally would. :D
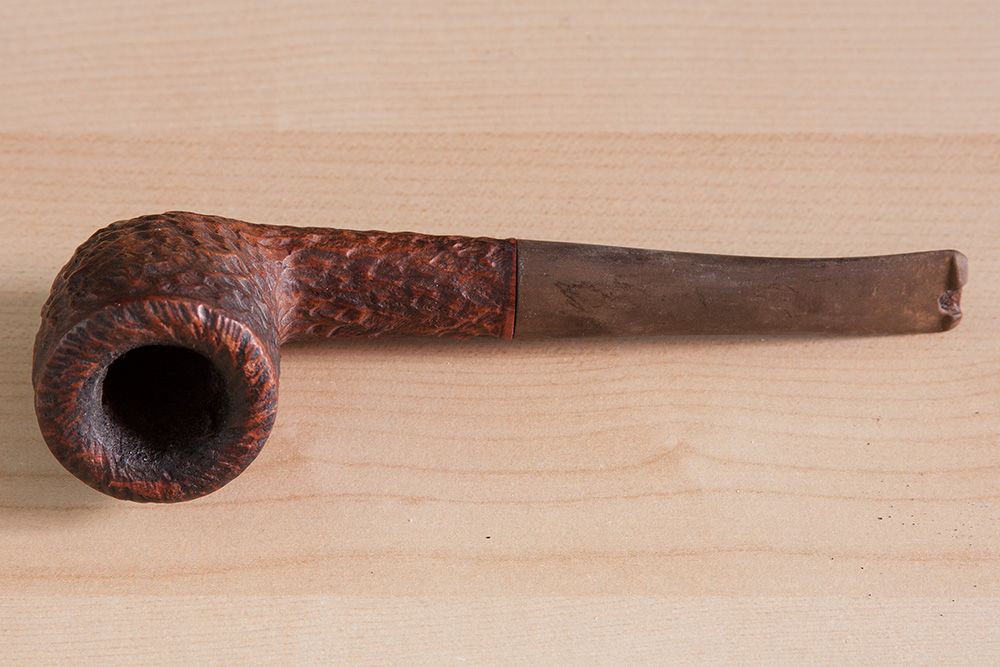
Cleaned it up really nice tonight... now pondering the options.
Cleaned it up really nice tonight... now pondering the options.
So... while debating, I got the micrometer out and did some measuring... where the stem/shank meet is a wide oval just a hair under 11/16" at the widest point. Would have to get a big stem and shave the top/bottom down.
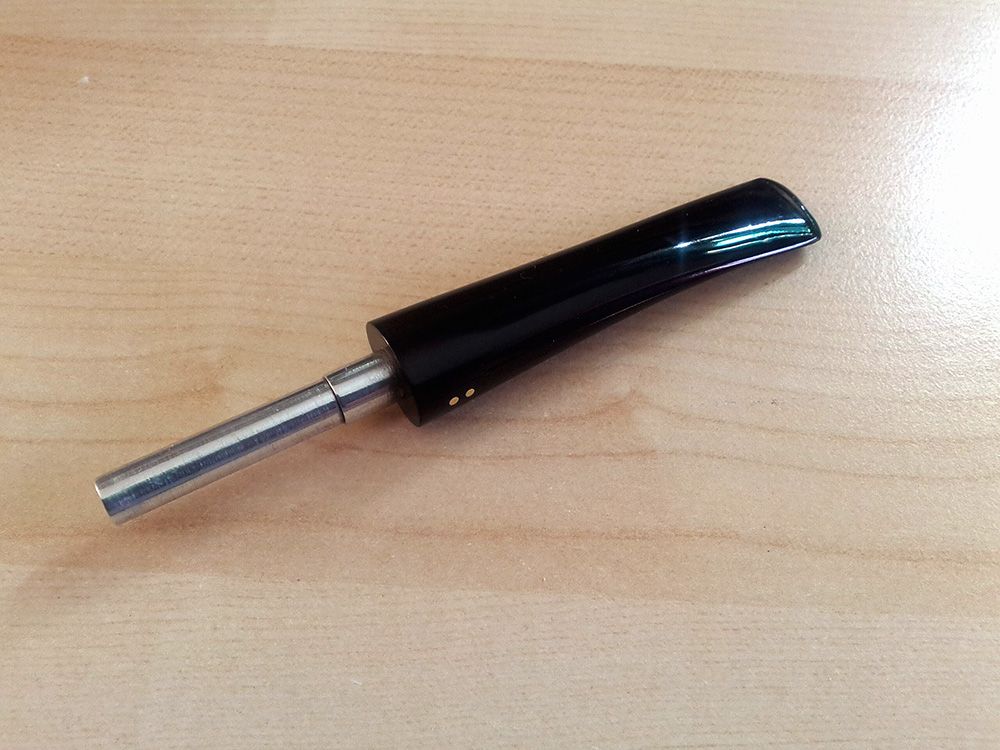
Saw this one on eBay, which I think might work... cheap enough to try at least. I was thinking drill out the tenon and replace it with the metal one... if I have a drill bit that size, otherwise, under drill and slowly sand the hole bigger with a dowel wrapped in sandpaper.
Which of course, prompted 2 questions
1) As mentioned by RCSTAN, slowly heat up the old stem and extract the tenon... but, those two metal dots on the side... are they for show? or do they go through the stem into the tenon? In which case, any suggestions? since heating/pulling won't work. Drill them out with a small bit would but going into the new stem how to I put new ones in?
2) If it is simply heat and pull out the metal tenon, when I put into the new stem, do I simply use some sort of epoxy?
EDIT - Just saw a few oval ones on eBay (same seller) that are oval... may have an 'almost' direct fit. Same 2 questions still apply though.
Ignore #2... apparently the dots aren't there to keep in the tenon, but rather a rating system
The dot system originally consisted of 8 separate grades as follows (from lowest to highest grade):
1 DOT - "Brigham Standard"
2 DOT - "Brigham Select"
3 DOT (star pattern) - "Brigham Exclusive"
3 DOT (vertically aligned) - "Brigham Executive"
4 DOT - "Brigham Director"
3 DOT (horizontally aligned) - "Brigham VIP"
5 DOT - "Brigham Special Grain"
6 DOT - "Brigham Straight Grain"
That stem is repairable. There's a bunch of info out there on using Superglue and either vulcanite dust or activated charcoal powder to do the repair.Also a small piece cut from another stem can be glued into place and then shaped. Check out Steve Laugs site for a ton of info on many types of repairs etc.
http://rebornpipes.com/tag/steve-laug-pipes/
http://rebornpipes.com/tag/steve-laug-pipes/
Worried because as mentioned previously by other members, that part might break out. I plan to sell these off on eBay when done, and last thing I want to do is sell something that might break.
Though that article mentioned black super glue, not vulcanite dust or charcoal powder. Never heard of it before. There's not enough 'meat' at the top to form a new button with so that option is gone. I found a new stem that should be easily made to fit this pipe for under $10, but, if the superglue method is strong I might try it first.
Anyone who tried that method have any comments? Did it work well? Last long? Can you hold the pipe in your teeth or is it hands only?
I have repaired many stems using CA (Superglue) and activated charcoal. It makes a strong repair if done properly,plus it can be done with just small files and sandpaper. The repairs are always visible when looked at closely. That is because of the difference in color( on a vulcanite stem) between the glue/ charcoal mixture and the rubber-which is not a true black.
Wondering, anyone try this stuff? Super glue with rubber? read that when hardens it has some flex for use on things with vibrations and such... may be good for teeth? and with rubber I'm thinking may match the vulcanite in colour more?
I have no vulcanite around else I'd use that... the charcoal I can get since it's in my 9mm filters I use for the Stanwell.
But, went online to find some glue to see how much it cost when I came across the rubber reinforced one and wondered if would be better or worse than black super glue.
I have no vulcanite around else I'd use that... the charcoal I can get since it's in my 9mm filters I use for the Stanwell.
But, went online to find some glue to see how much it cost when I came across the rubber reinforced one and wondered if would be better or worse than black super glue.
If I were dead-set on repair, I would cut the stem shorter and attempt to re-shape the button. There's probably not a lot of material to work with, but I'm guessing a thin button could be shaped with care. The whole stem looks likes it wants a good buffing anyway.
If I couldn't do that, I'd get a pre-molded stem for it and shape it down to match. I'm saying this having a lot of files, drill bits, and sandpaper at my disposal. But if you're really wanting to do some restoration and re-selling, you may as well learn to do this kind of thing.
If I couldn't do that, I'd get a pre-molded stem for it and shape it down to match. I'm saying this having a lot of files, drill bits, and sandpaper at my disposal. But if you're really wanting to do some restoration and re-selling, you may as well learn to do this kind of thing.
I wouldn't use the rubberized glue,I've had good luck with a "thin" CA glue. When mixed with the powder it will set up fairly quick. If you have an old stem laying around sand the piss out of it with some course sandpaper and collect the resulting dust.Wondering, anyone try this stuff? Super glue with rubber? read that when hardens it has some flex for use on things with vibrations and such... may be good for teeth? and with rubber I'm thinking may match the vulcanite in colour more?
I have no vulcanite around else I'd use that... the charcoal I can get since it's in my 9mm filters I use for the Stanwell.
But, went online to find some glue to see how much it cost when I came across the rubber reinforced one and wondered if would be better or worse than black super glue.
The glue/vulcanite sounds the best but again, no extra stems at all... only been smoking a pipe a few months, just happened upon this lot being sold locally cheap and bought them on a whim. ")
I had a gift card for Stewmac.com that's been here 2yrs, finally used it the other day to get the micro-mesh pads and by coincidence bought the thin CA glue, so, should be here any day. I'll have to use the carbon dust.
I like trying new hobbies, so far enjoying this, and hasn't cost too much. Managed to get a good motor for $10, had a table, so made a buffing station, rest I got fairly cheap off eBay and locally. But, just started so, no extras/spares and such yet.
I would like to replace the stem totally, and can get a stem for about the same price of the glue. Downside is, I kinda like keeping things original if possible, especially since that Brigham has those dot-ratings on the side. Stuff like that and logos I'd like to keep. Reforming the button I think would be my 2nd option if the glue fails. I've looked at that stem and there really isn't much I can file down unless I make a very very small/low button.
You can use the glue/charcoal to rebuild that button. Cut some heavy paper-such as from a cereal box and fit it in the funnel. May take a couple of layers to get a snug fit. Once you get it shaped cover the paper plug with scotch tape. The glue will not stick to it. Mix small amount of the glue and powder and apply in layers to build it up. Work into shape with files and sandpaper. Make sure the stem is clean and free of oxidation before starting.
Been a while, got side tracked. The stem is about done though... first attempt was a fail. Could not find black glue that wasn't rubber reinforced so tried it anyways, and did not harden well at all.
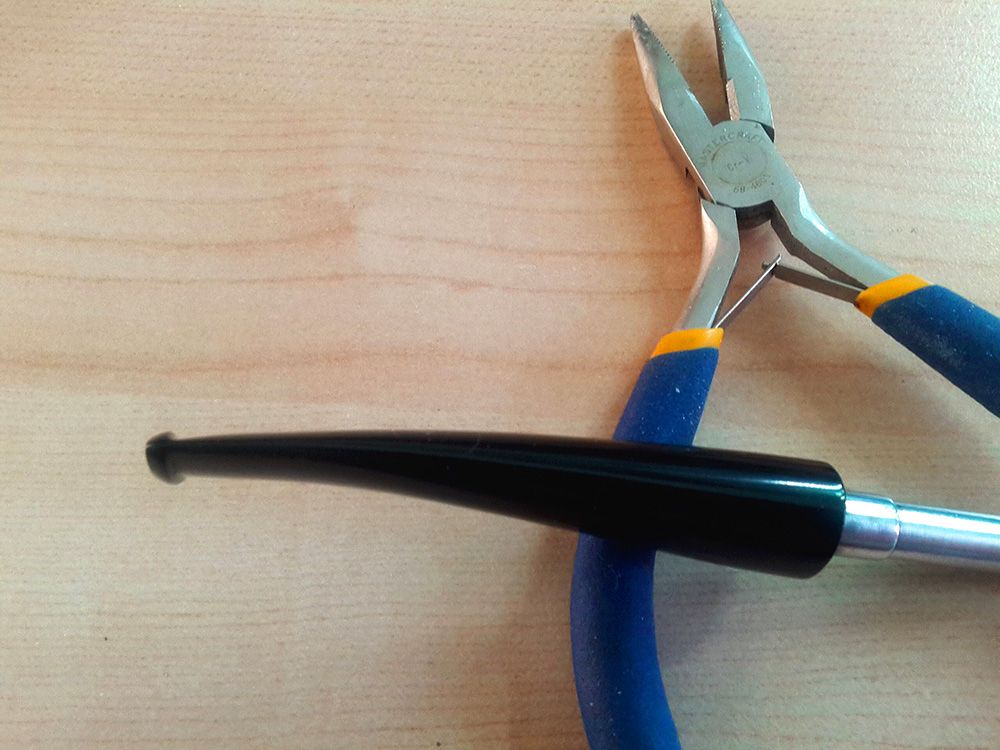
2nd attempt, still using the same black rubber CA glue, plus regular medium thickness CA clear glue. This time I alternated layers, usually applying the next layer before the previous was fully hardened. Worked perfect. The black matches perfect, very hard/solid, pretty happy with the results.
Took a quick snapshot with the tablet... still needs some buffing but pretty much done.
I'll show a final photo when complete.
- Status
- Not open for further replies.