

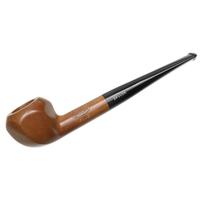


I knew I wanted to redo the shiny and very dark burgundy finish on my old Dr. Grabow Omega. This was my first pipe twenty years ago (I should note that I tried pipe smoking for a couple of months at that time and didn’t come back to it until recently). You couldn’t see the grain of the wood at all, and I never liked the little tobacco leaf carving it came with from the factory. Of course I didn’t think to take pictures before I started, but it looked like a typical Omega with a dark burgundy finish.
Today I went to work on it. I had to make do with the supplies I have here at the house, so unused 0000 steel wool to remove the old finish and stain. This took a while and a decent amount of elbow grease. Once I got down to the grain though….it was somewhat disappointing. There was a reason they went with that dark stain I suppose. Some fills, including one that was a line about 1/4” long. A couple of the fills were dark burgundy.
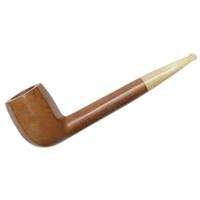
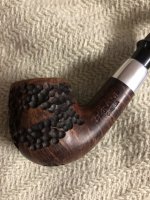
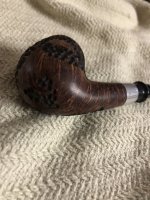
At this point I’m wondering what I have really done here, other than to uncover a chunk of wood that wasn’t particularly attractive. I decided to experiment on the pipe. I figured I didn’t have much to lose. No matter what happens I’ll be meeting the pipe for sentimental reasons. I decided to do some “rustification” on the pipe. I had to look up what that meant exactly. Lol Now I just had to figure out what to remove and how to do it. I didn’t really have a plan, and I’m sure it shows. I used a dremel.
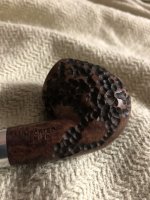
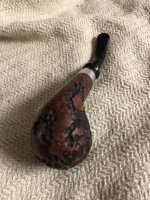
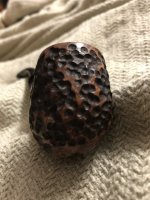
I’m just going to skip to the results and say that I’m satisfied with my result. I’ve never tried to do anything like this before at all and I’m sure it shows, but it was fun and I have personalized the pipe while covering up the worst looking spots. I gave it a light polish and and done for the night.Tomorrow I will work a little more on the rim of the bowl.
Today I went to work on it. I had to make do with the supplies I have here at the house, so unused 0000 steel wool to remove the old finish and stain. This took a while and a decent amount of elbow grease. Once I got down to the grain though….it was somewhat disappointing. There was a reason they went with that dark stain I suppose. Some fills, including one that was a line about 1/4” long. A couple of the fills were dark burgundy.
At this point I’m wondering what I have really done here, other than to uncover a chunk of wood that wasn’t particularly attractive. I decided to experiment on the pipe. I figured I didn’t have much to lose. No matter what happens I’ll be meeting the pipe for sentimental reasons. I decided to do some “rustification” on the pipe. I had to look up what that meant exactly. Lol Now I just had to figure out what to remove and how to do it. I didn’t really have a plan, and I’m sure it shows. I used a dremel.
I’m just going to skip to the results and say that I’m satisfied with my result. I’ve never tried to do anything like this before at all and I’m sure it shows, but it was fun and I have personalized the pipe while covering up the worst looking spots. I gave it a light polish and and done for the night.Tomorrow I will work a little more on the rim of the bowl.
Attachments
-
 A70BD824-89D3-43C7-B818-46F7197A874B.jpeg139 KB · Views: 8
 -
 24A7AEBB-112A-4E53-A6F2-8FE105AA6904.jpeg129.2 KB · Views: 7
 -
 D06B7611-0F90-4978-9DA9-FE418B3CACF6.jpeg164.1 KB · Views: 7
 -
 14E4407D-7150-477B-977B-B8A3AF7B4879.jpeg120.2 KB · Views: 8
 -
 C9CA0F33-220F-4E3D-8107-12DED66B7BF4.jpeg143.6 KB · Views: 8
 -
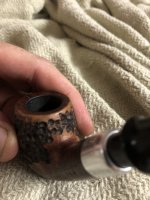 image.jpg116.1 KB · Views: 9

