


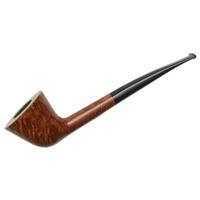


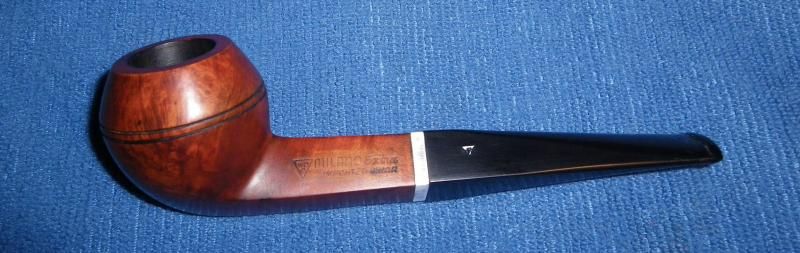
Below is a before and after of a little WDC Bulldog I have been working on. All in all it didn't turn out too bad but a few mis-steps in workmanship, both mine and the original manufacturer, has me disappointed in this one.
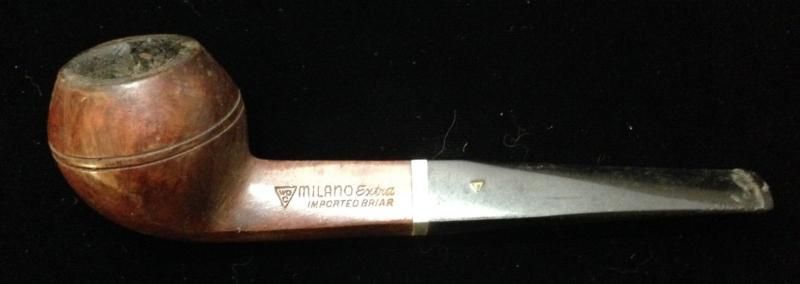
This came to me as a train wreck and had a lot of issues. The bowl was over half way obscured with cake, the varnish finish was checked all to hell, the stem had DEEP indentions right next to the button, the button was chewed up badly, and the stem was completely blocked with gunk.
The stem itself needed major surgery via a black superglue patch job to bring it back to it's original shape. This was my first patch job and I didn't really make it easy on myself by choosing this pipe as my first attempt but it's the pipe that was on the work table so that's the one I tackled. Besides the deep tooth indentions, top and bottom, and the button basically needing to be completely built up and reshaped, both top and bottom, but this stem isn't vulcanite, it's nylon. What I learned from this experience is that nylon is really tough to work on and basically isn't worth the effort. If I get another pipe with a nylon stem I will probably just clean it, oil it, and wax it, anything else is just a waste of time. It took the glue really well but nylon has some quirks. It doesn't sand/shape well and you can't get it to polish AT ALL. It just won't do it. The superglue on the other hand polishes beutifully, so now I have these nicely polished patches standing in stark relief against the dull nylon. The top patch also halo'd on me in the middle but didn't present visually until it was waxed. The halo effect coupled with the much darker black of the patch really look bad and make the patch look sunken in even though it's level and well blended. Structurally the patches are sound but they really visually look bad. I hate nylon.
I also didn't mask the stampings properly, I cut the mask to exactly cover the marks without leaving any extra. This allowed some bleeding under the edge of the tape during the contrast stain and turned some of the letters black. Lesson learned on that one.
Overall it was a pretty valuable learning experience. I learned a ton about glue patching and also that I still have a lot to learn about that technique. I also put this little $10 pipe back into service, even though the stem makes me cringe a little. So not a total waste of time and effort as I garnered some valuable experience. Please excuse my really poor photography skills.


 :
: