
I ran into something while putting a coat of carnuba wax on an estate pipe bowl. While putting the first coat down, I noticed some areas on the briar that are a lighter color than the rest of it. I thought it might just be the wax clouding up in areas. I know clouding can be a part of the waxing process so I continued around the bowl until I felt I had a sufficient amount of wax on it. After the initial coat I began with my finishing wheel to really spread the carnuba around and eventually got it to a nice shine that I was happy with. Problem is, these cloudy and lighter areas were still there. Only now, they are shiny too. This pissed me off. After my frustration subsided (anger and frustration seem to be a big part of my learning process) I asked myself, "Why would these lighter cloudy areas remain on my pipe after all my hard work?" That's when a voice rose up from nowhere ( it was my own voice) and said, "It's the heat." A theory was born and I will share it with you now. My theory is this; after a pipe is smoked for a while, the heat from the burning tobacco can cause the finish on it to be soaked t into the briar. Especially in areas where the heat is concentrated. This can leave areas of discoloration that can not just be buffed out. I remember some of you folks discussing leather dyes that you use on briar. Now, I realize that sometimes we want to change the stain on a pipe because we want it to be a different color. I'm thinking you folks might use it because you run into this issue of dicoloration often. My question is; 1) Is my theory correct? And 2) As pipe restorers, do we run into this issue enough to warrant my going out and purchasing a bunch of this leather dye that is discussed? I have 70 or so pipes left to restore so if I need to spend a little scratch on my hobby, I don't mind. Please enlighten the new guy. Thanks for reading.
New resto guy needs to get schooled
- Thread starter fluffie666
- Start date
You are using an out of date browser. It may not display this or other websites correctly.
You should upgrade or use an alternative browser.
You should upgrade or use an alternative browser.

SmokingPipes.com Updates
Watch for Updates Twice a Week
PipesMagazine Approved Sponsor

PipesMagazine Approved Sponsor

PipesMagazine Approved Sponsor

PipesMagazine Approved Sponsor
PipesMagazine Approved Sponsor
- Status
- Not open for further replies.
No1) Is my theory correct?
Yes2) As pipe restorers, do we run into [uneven and/or faded color finishes] enough to warrant my going out and purchasing a bunch of this leather dye that is discussed?
Hey Fluffie.
A couple questions to narrow the field...
What are you using to buff and apply wax?
How fast is your buffing setup?
What steps are you following prior to applying carnauba?
We'll get you to the bottom of this!
-- Pat
EDIT - George you win the pithy answers of the year award. LOL
A couple questions to narrow the field...
What are you using to buff and apply wax?
How fast is your buffing setup?
What steps are you following prior to applying carnauba?
We'll get you to the bottom of this!
-- Pat
EDIT - George you win the pithy answers of the year award. LOL
.gif)
 :
:Dave, Posting pics from my mobile is impossible. I'll do it when I can.
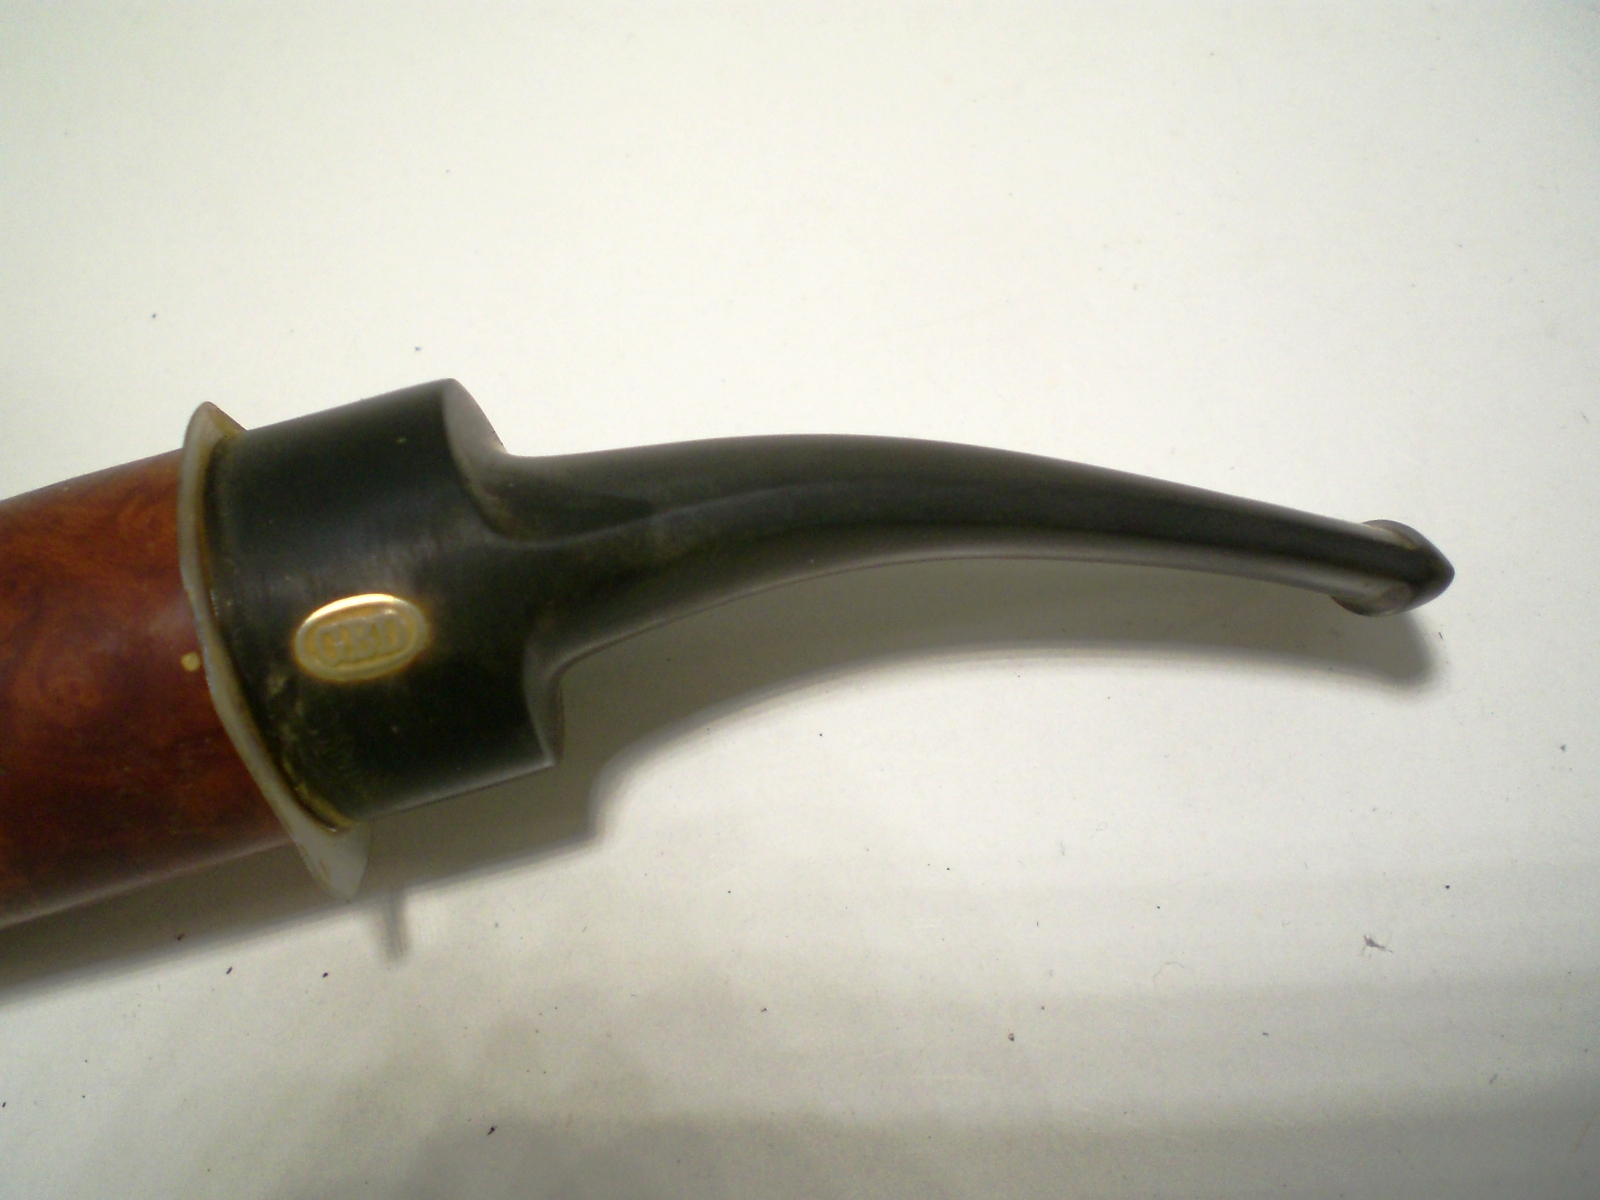
I do think George hit the nail on the head though. The finish looks both uneven and faded. The best answers I've ever got in life were the pithy answers. George, you're the man. Thanks.
So, my motor is 1750 rpm. I used a hard sewn wheel to apply the wax after using white compound to shine it up. Clean flannel wheel to bring the wax to a shine. On this one I just gave the bowl a hard rub with a cotton cloth and a little spit to get the dust off of it.
Any guidence on my buffing methods will be appreciated. The pithier the better.
Use a flannel wheel for the carnauba wax and apply it very sparingly. I only touch the wheel about three times and very shortly with the wax. Dont press the pipe too hard against the wheel. Be sure to have a nicely polished surface before applying the finishing wax. It is just the finishing touch and cant be a sustitute a proper polished surface. Use the hard cotton wheel only for the abrasive wax like rouge or whit diamond.
My first guess would be that the color was worn off through abrasion somehow. It's easy to buff the color right off the pipe, especially with a fast wheel like that. Smoking the pipe generally causes the color to darken, not lighten. (You've perhaps noticed that estate pipes are very often dark colored? Heat and smoke will do that.) It's also possible to wear off the stain by long-term over-handling. Imagine a smoker who habitually rubs his thumb over one spot on the bowl, for example. It will take him a while, but eventually he'll rub a light spot on the pipe.
Is 1750 rpm really to fast? I learned how to buff on this motor and it's been a good speed for me. It's actually an old motor from around the 1960's that a buddy of mine picked up for me at a flea market. I'm sure it's a bit slower than 1750 but the old info plate on it says it runs at that speed. It's the best $5 I ever spent.
I haven't yet found a reason to use red compound on a bowl. I'm sure the red makes short work of any nomenclature that's stamped into the briar. The white stuff has been good to me for getting a nice shine.
I'm amassing quite a collection of buffing wheels. The ones that can be purchased at Harbor Freight do the job. They have a thin work area and I wish I could put two or three of them together to get a larger surface but the wheels aren't uniform in size so I deal with the inch of work space for now. Those Beal buffing wheels look pretty sweet. I have to pay some bills before I can properly explain that purchase to wifey without seeming irresponsible and irrational.
Thank you gents. I appreciate you folks taking the time to give your input. Around where I live I can't go to my local B&M shop and talk about this sort of stuff. Most people are there for cigars and the few pipe smokers I have run into are all about buying and smoking pipes. Starting a conversation about restoring an old pipe might get someone intrigued for a second but the fascination quickly fades and we start talking about TV or the weather. I hate f'n television.
I am quite sure that my one speed buffer has the same revs. Just keep a light hand when buffing.
1725 is typically cited as the correct buffing speed, using a 6" wheel (the wheel size changes everything), and is the motor that I use.
I often find faded spots on an old pipe. You have to be careful sanding oxidation near the stem, the water used will also wick color from the stem (I often use a plastic disc between the stem and shank to prevent this).
I think that I learned this from Dave - use a stain "wash" to rejuvinate faded or splotchy finishes. Using a paper towel, I wipe on a light coat of the appropriate stain, let it dry, buff lightly with White Diamond and then Carnuba wax.
Ssjones, I remember an essay on rebornpipes that included this plastic disc method, or something close to it. You wrote it a while back. I think in that particular essay you made the disc and glued Micro-mesh to it to get the oxidation off the flat part of a stem fitting where it meets the shank. That was a good read. If you can post that link again, I'd like to re-read it. In the case you mention above, are you putting the disc on, assembling the pipe and then wet sanding the stem and shank at the same time in order to remove the same amount of material from both parts? I'm assuming this is to keep the flow from stem to shank? Anyway, if you could explain this in a little more detail, that would be great.
Stvalentine, I remember you fixed an old Dunhill that was burned through by making a plug for the hole out of another piece of briar. If you can link that up in this thread, I'd love to read that one again too. That resto / rescue made you one of my heroes.
I'll tell you, a lot of you folks on here are like the Jimi Hendrix's of pipe resurection. You make it look like it's easy.
Wow, it took a while to locate that article!
http://rebornpipes.com/2014/09/21/holy-grail-upgrade-gbd-9438-virgin/
I make these plastic discs out of packing material (fastener boxes, etc.) Anything thin and somewhat flexible. I've since made them slightly larger in circumference. I punch a hole for the tenon in various sizes.
http://rebornpipes.com/2014/09/21/holy-grail-upgrade-gbd-9438-virgin/
I make these plastic discs out of packing material (fastener boxes, etc.) Anything thin and somewhat flexible. I've since made them slightly larger in circumference. I punch a hole for the tenon in various sizes.
I used to be a wood carver and Woodcraft used to sell a spindle and pully set that would reduce the RPMs of any electric motor. Since I used it for stropping I took a 3750 down to 8-900? RPM's
All I needed was a pully for the motor, a fan belt, and a large enough piece of 3/4 ply to mount it all.
All I needed was a pully for the motor, a fan belt, and a large enough piece of 3/4 ply to mount it all.
- Status
- Not open for further replies.