First Attempt At Pipe Rustication (Pics)

Log in

SmokingPipes.com Updates

Watch for Updates Twice a Week

PipesMagazine Approved Sponsor

PipesMagazine Approved Sponsor

PipesMagazine Approved Sponsor

PipesMagazine Approved Sponsor

Drucquers Banner

PipesMagazine Approved Sponsor

Status
Not open for further replies.

agnosticpipe

Lifer
Nov 3, 2013
3,345
3,484
In the sticks in Mississippi
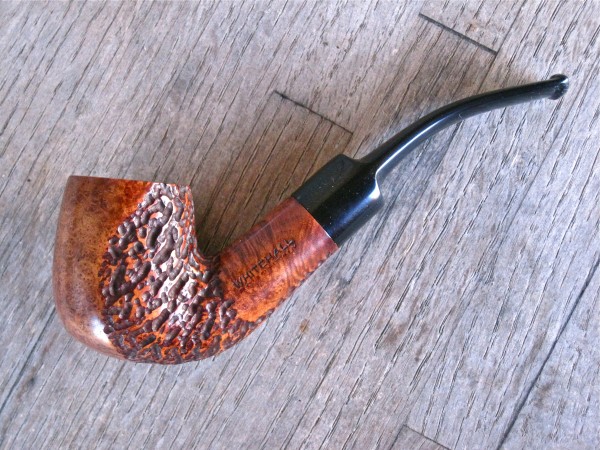
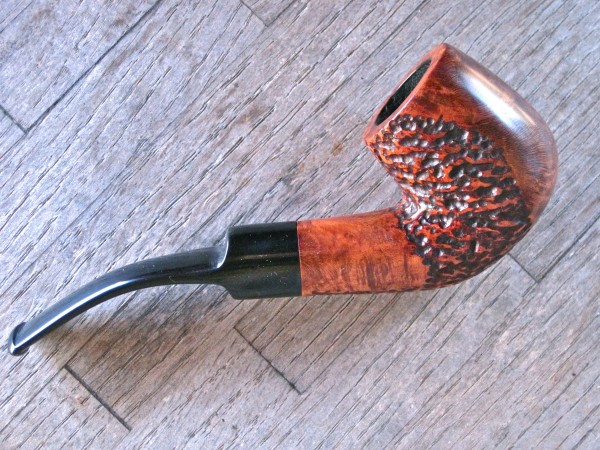
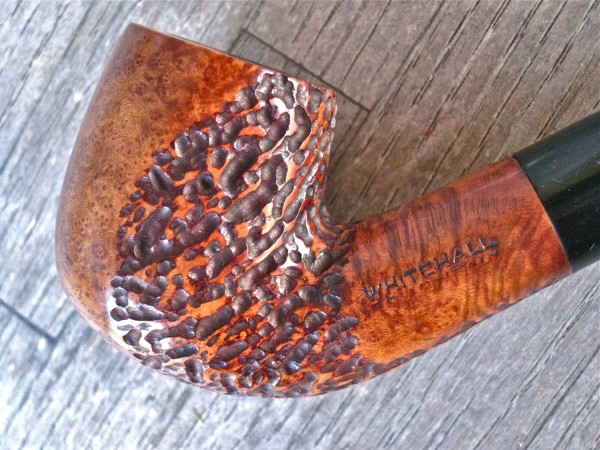
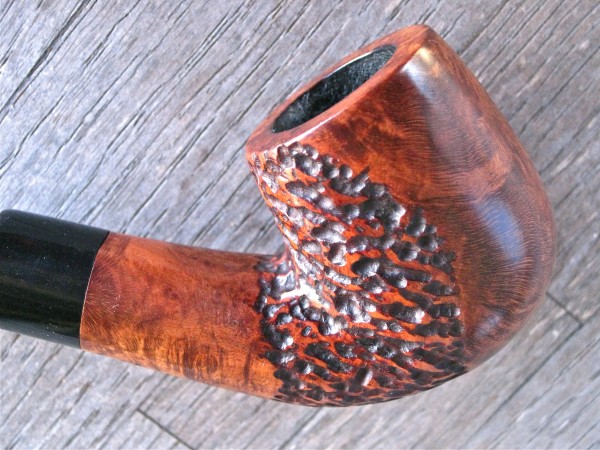
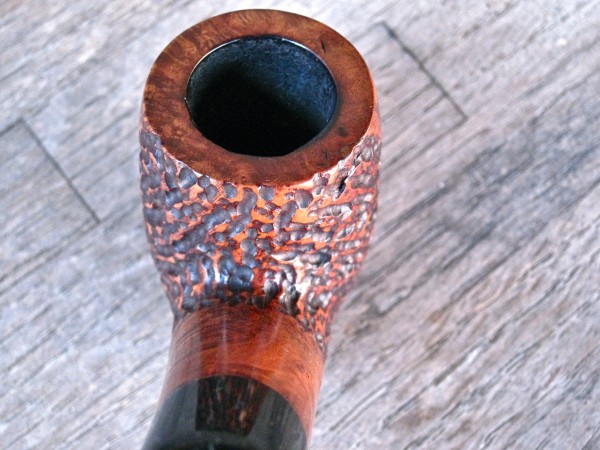
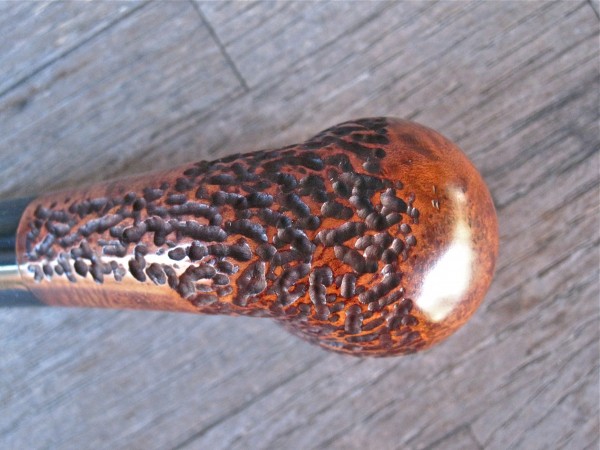
A week ago or so I read the post by member Lightmyfire on a restoration/rustication he did on an old pipe. It looked so good and was so well done, that Lightmyfire, you lit my fire! I had an old Whitehall pipe that fairly decent briar, but was plagued with four ugly fills. (why use pink putty on a brown pipe?) It also had a couple of small dings on the bottom of the bowl. I had stated cleaning the pipe previously, but when I saw how bad the fills looked, I stopped working on it as I needed time to figure out how I wanted to deal with them. Then I read the post by Lightmyfire, and I thought, why not? It's not like I'm experimenting on a big buck pipe. So I got my old Dremel tool out and my shoe dyes to give it a try. It's a little time consuming, but with a little care and planning, it seemed to go ok. I didn't try anything too fancy, and I want to mention that the lower part of the nomenclature that says, "Briar Italy" was very poorly stamped to begin with. There was not much to preserve.

Anyway tell me what you think, or if there is something I should have done differently, or better. I'm hoping this is a learning experience, and might try it again.
img_0199-600x450.jpg
img_0200-600x450.jpg
img_0197-600x450.jpg
img_0196-600x450.jpg
img_0201-600x450.jpg
img_0195-600x450.jpg


mso489

Lifer
Feb 21, 2013
41,210
60,459
A nice even texture that matches the shape of the pipe and looks natural. This is a great technique

for a restorer's bag of tricks.


vigil

Might Stick Around
Nov 12, 2013
99
0
Excellent job! Especially for a "first whack" at it.
Something I've done is to go to the smallest burr tip I could get for my Dremel, and a speed controller as well. Lets me come in after the fact and add the little details, etc. Not that you'd need either of those for this pipe!


irish

Lifer
Aug 12, 2011
1,121
6
Texas
I think you did a great job. Pipes looks good and flows naturally. Congrats on a really nice looking pipe! :puffpipe:


agnosticpipe

Lifer
Nov 3, 2013
3,345
3,484
In the sticks in Mississippi
Thanks for all the positive remarks! They encourage me to try something else next. Might have to buy a few new little tips for my Dremel. But I'd also like to thank Lightmyfire, who's work sent me down this path to begin with. I don't like to copy others work, and I try not to do exactly the same thing, but It's hard not to be inspired by what others are doing. Maybe my slightly reckless stab at working on pipes like this will inspire someone to experiment a little too.

Well, time for my evening smoke. Guess I'll actually try smoking the old Whitehall now.... Cheers


lightmyfire

Starting to Get Obsessed
Oct 23, 2013
102
0
Belgium
Thanks for all the positive remarks! They encourage me to try something else next. Might have to buy a few new little tips for my Dremel. But I'd also like to thank Lightmyfire, who's work sent me down this path to begin with. I don't like to copy others work, and I try not to do exactly the same thing, but It's hard not to be inspired by what others are doing. Maybe my slightly reckless stab at working on pipes like this will inspire someone to experiment a little too.

Well, time for my evening smoke. Guess I'll actually try smoking the old Whitehall now.... Cheers
Thank you agnosticpipe! I am honored to read this, and to have inspired you a bit but I don't think to be the lone having done that. Anyway, you really did a nice job, this pipe has its own particularity now and what a pride to do things with our hands !
I have found a picture of an almost similar work that I done 2 months ago, but yours is well a success !

 
Status
Not open for further replies.