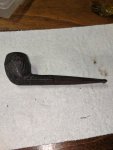
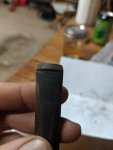
Zombie Pipe 2-Mystery? Bulldog (DUN--Something)
- Thread starter didimauw
- Start date
You are using an out of date browser. It may not display this or other websites correctly.
You should upgrade or use an alternative browser.
You should upgrade or use an alternative browser.
SmokingPipes.com Updates
Watch for Updates Twice a Week
- Status
- Not open for further replies.
So the only thing I can see on the bottom, is
(7) (DUN) and i think a (24)
I'm not going to assume that I know what this pipe is, based off that stamp, and there's no symbol on the stem either. So we will just say it's a mystery.
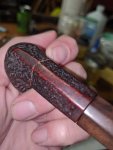
And the break wasnt even repaired all that great. Seemed like they used shoe goo to repair it.
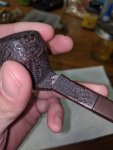
So off goes the shank, to clean off that sticky residue.
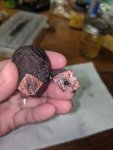
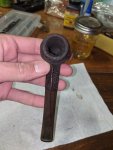
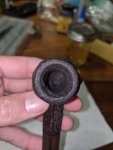
The goo got inside the draft hole at some point, and I couldn't get a pipe cleaner through it. I don't know how he smoked it this way....
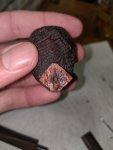
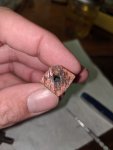
Im so glad I invested in dental tools, they have been priceless in these endeavors.
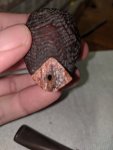
And with all the goo off, It was time to ream.
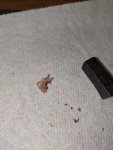
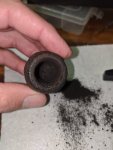
There was still a lot of cake stuck to the walls, so I let it soak with ISO alcohol for a while before continuing.
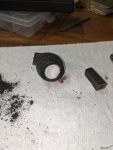
(7) (DUN) and i think a (24)
I'm not going to assume that I know what this pipe is, based off that stamp, and there's no symbol on the stem either. So we will just say it's a mystery.

And the break wasnt even repaired all that great. Seemed like they used shoe goo to repair it.

So off goes the shank, to clean off that sticky residue.

The goo got inside the draft hole at some point, and I couldn't get a pipe cleaner through it. I don't know how he smoked it this way....


Im so glad I invested in dental tools, they have been priceless in these endeavors.

And with all the goo off, It was time to ream.


There was still a lot of cake stuck to the walls, so I let it soak with ISO alcohol for a while before continuing.

So after the good soak, I used 100 grit sandpaper to take the rest of the cake out.
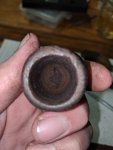
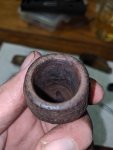
And then I topped the rim lightly. There is a small chip taken out of it, but ill just leave that alone.
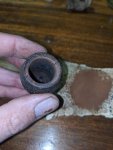
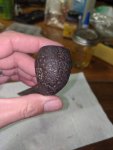
And then I cleaned the stummel with Murphy's oil soap. Man does that stuff smell bad...
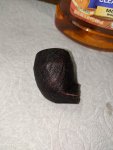
But it cleaned up pretty well.


And then I topped the rim lightly. There is a small chip taken out of it, but ill just leave that alone.

And then I cleaned the stummel with Murphy's oil soap. Man does that stuff smell bad...

But it cleaned up pretty well.
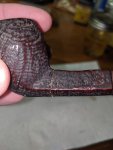
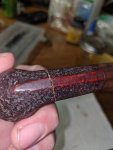
Next up is to reattach the two pieces. Luckily for me, It was not a clean break. There is a small groove that will help guide the pieces to there rightful spots.
I used superglue and stuck them back together. Wiping off the excess, I blew on it to help it dry faster.
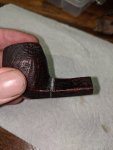
But the glue always turns a white color, when I blow on it, so that will have to be hidden somehow.
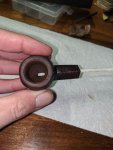
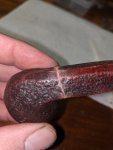
I tried to very gently sand off the excess glue, so I could hide it better.
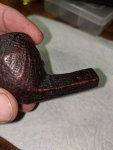
I used a black permanent marker to cover the lines, and smeared it to blend. Then Gently went over the crack with brown leather dye.
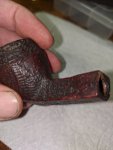
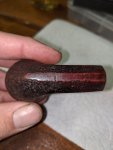
The repair is still visible on the bottom, but trying to keep the little stamping there is, I decided not to sand or fill anymore. But it is smooth(ish) to the touch.
Then with a solid repair, feeling like the two pieces are one now, I took it over to the buffing wheel. Using caranauba wax, I gently went over it.
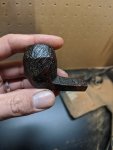
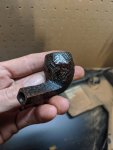
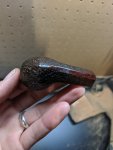
And that's where it sits for now.
I believe this one has been the easiest of the three pipe saga.
But I haven't gotten to the stem yet, so we will see.
I used superglue and stuck them back together. Wiping off the excess, I blew on it to help it dry faster.

But the glue always turns a white color, when I blow on it, so that will have to be hidden somehow.


I tried to very gently sand off the excess glue, so I could hide it better.

I used a black permanent marker to cover the lines, and smeared it to blend. Then Gently went over the crack with brown leather dye.


The repair is still visible on the bottom, but trying to keep the little stamping there is, I decided not to sand or fill anymore. But it is smooth(ish) to the touch.
Then with a solid repair, feeling like the two pieces are one now, I took it over to the buffing wheel. Using caranauba wax, I gently went over it.


And that's where it sits for now.
I believe this one has been the easiest of the three pipe saga.
But I haven't gotten to the stem yet, so we will see.
Oh and if the size of the pictures is too hard to really see, Let me know, ill make them smaller to fit on screen. It looks different on a phone than it does on my computer.
Yes I see that too now. Couldn't see it while I was doing the work. Also, pictures are blown up which is easier to see things.Looking forward to seeing the final results.
On this close up it looks like I can spot PAT (possibly PATENT) just to the right of the crack.
View attachment 7206
Can you see it?
Great work, your skills are definitely coming along.
Could the pipe he a Dundee? I ran into that brand name locally on estates but can't find anything about them.
Could the pipe he a Dundee? I ran into that brand name locally on estates but can't find anything about them.
I appears to me, to be a Dunhill with a replacement stem. The stamping looks to similar to other Dunhill bulldogs I have see pics of.
I would agree with that as well. It seems the owner of these 3 pipes liked to replace the stems himself... As the third and final pipe in this saga will show, when I decide to tackle it....I appears to me, to be a Dunhill with a replacement stem. The stamping looks to similar to other Dunhill bulldogs I have see pics of.
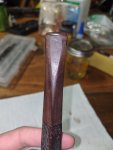
Ok, now for the stem. I hate doing stem work.
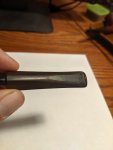
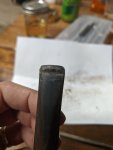
So I attempted to smooth out what the previous owner did to the stem. A little sanding, a little filing..
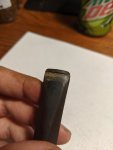
And then paused for a while, till tonight I took it out to the garage so I could smoke while I worked, and continued on.
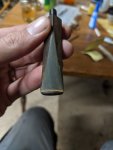
And then I realized I hated how tiny the button was... It just doesn't look right...
Then that's when things got weird.
If you are squeamish, stop reading now.
I remembered I had an old freehand style stem that I previously ruined on a grinder. It was to be used with one of my old corncobs and I just ended up demolishing the poor thing.
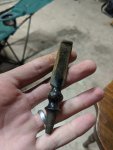
So I have excess vulcanite material....

So I went to town filing it down, to get me some powder.
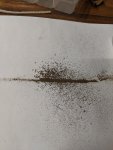
Then made vulcanite superglue goo material, and applied it to the button.
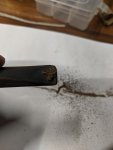
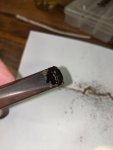
Hey I warned you to stop reading....
But if you insist....
Then after about fifteen minutes and it was fully dry, I started filing some sort of shape to it.
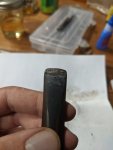
Oh and if anyone was wondering what it looks like when my wife comes out to the garage, asking me what the hell I'm doing out here at midnight? This would be her point of view...

Anyways, where was I?...
Oh yeah the stupid stem.
So more filing, and sanding...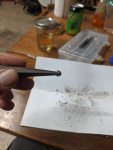
And more....
Oh I guess you can only add 10 pictures to a post....

So I attempted to smooth out what the previous owner did to the stem. A little sanding, a little filing..

And then paused for a while, till tonight I took it out to the garage so I could smoke while I worked, and continued on.

And then I realized I hated how tiny the button was... It just doesn't look right...
Then that's when things got weird.
If you are squeamish, stop reading now.
I remembered I had an old freehand style stem that I previously ruined on a grinder. It was to be used with one of my old corncobs and I just ended up demolishing the poor thing.

So I have excess vulcanite material....
So I went to town filing it down, to get me some powder.

Then made vulcanite superglue goo material, and applied it to the button.


Hey I warned you to stop reading....
But if you insist....
Then after about fifteen minutes and it was fully dry, I started filing some sort of shape to it.

Oh and if anyone was wondering what it looks like when my wife comes out to the garage, asking me what the hell I'm doing out here at midnight? This would be her point of view...

Anyways, where was I?...
Oh yeah the stupid stem.
So more filing, and sanding...

And more....
Oh I guess you can only add 10 pictures to a post....
More patience than I have.Your patience with that...zombie....is astounding.
Good job didi.
- Status
- Not open for further replies.


