
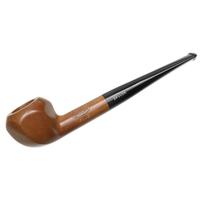
How I Make A Carmette Pipe (Pic Heavy)
- Thread starter clickklick
- Start date
You are using an out of date browser. It may not display this or other websites correctly.
You should upgrade or use an alternative browser.
You should upgrade or use an alternative browser.


PipesMagazine Approved Sponsor

PipesMagazine Approved Sponsor

PipesMagazine Approved Sponsor
PipesMagazine Approved Sponsor
PipesMagazine Approved Sponsor

- Status
- Not open for further replies.
OK, we are on to some rough stem shaping. This set of pictures is a bit over 2 hours of shop time. Very manual intensive and the part I normally screw up the most!
On to the pics!
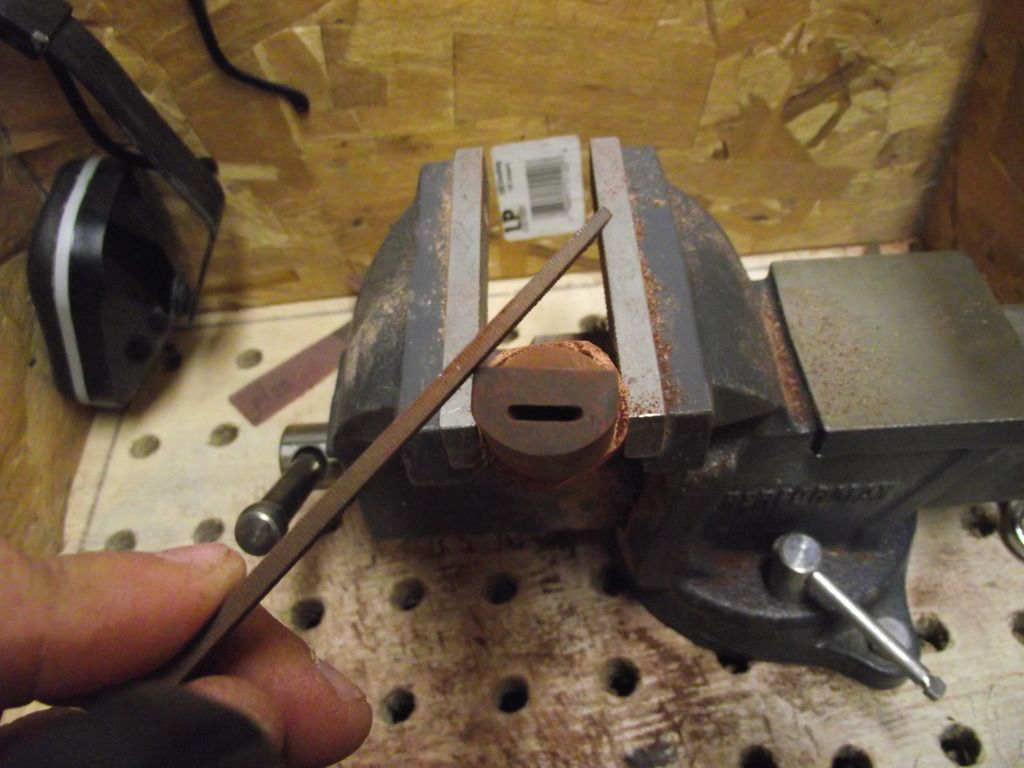
Step 37: First thing I do is mark some lines of the draft hole so I know how deep NOT to go!
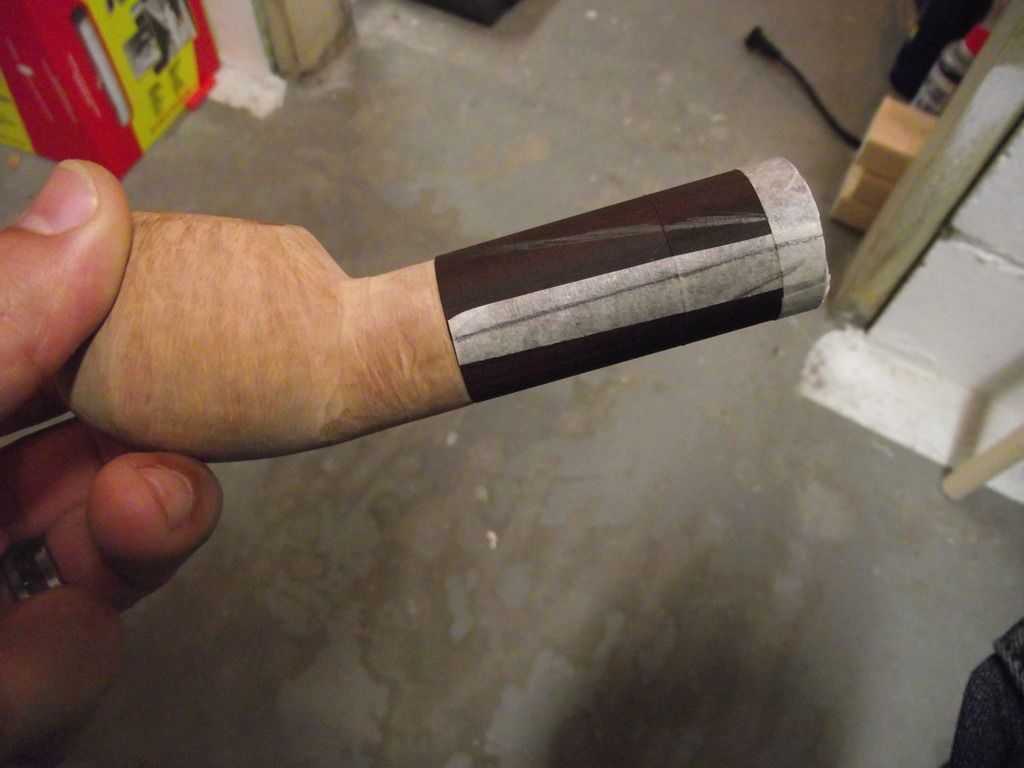
Step 38: Then I take it to the belt sander, I used to do this on the sanding disc, but I just picked up this belt sander at a garage sale, so I figure now would be the best time to try it.
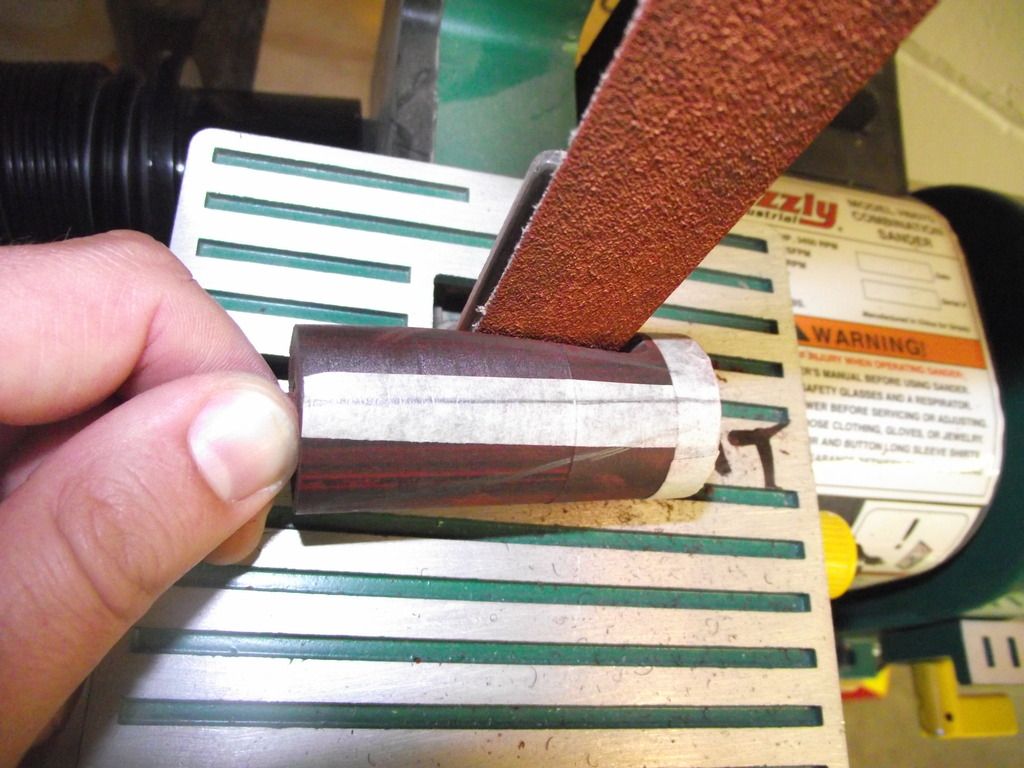
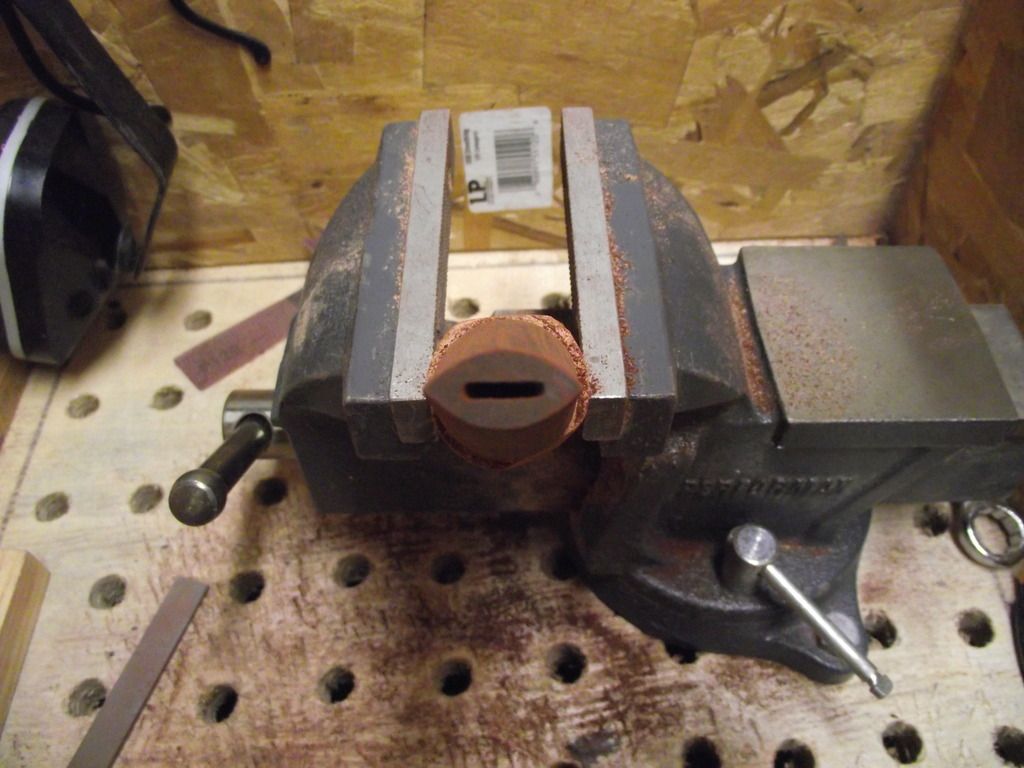
Step 39: I rough both sides and check it. I probably could have gone deeper, but I tend to go too deep and screw it up on the disc sander, so I decided I better play it safe with this.
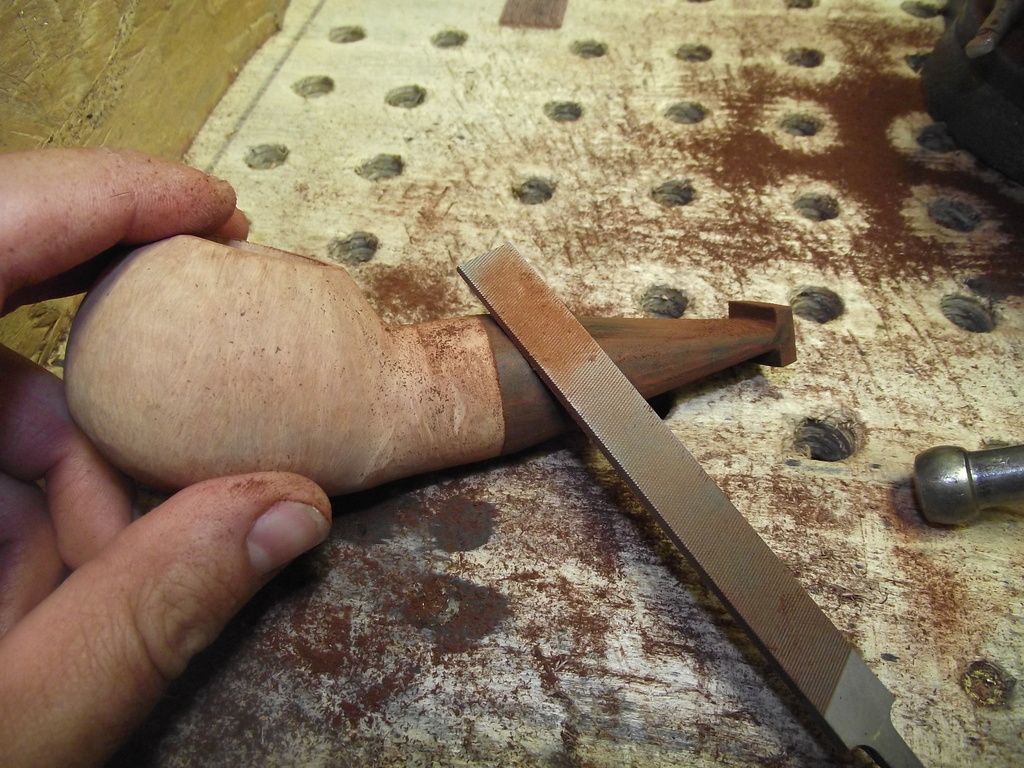
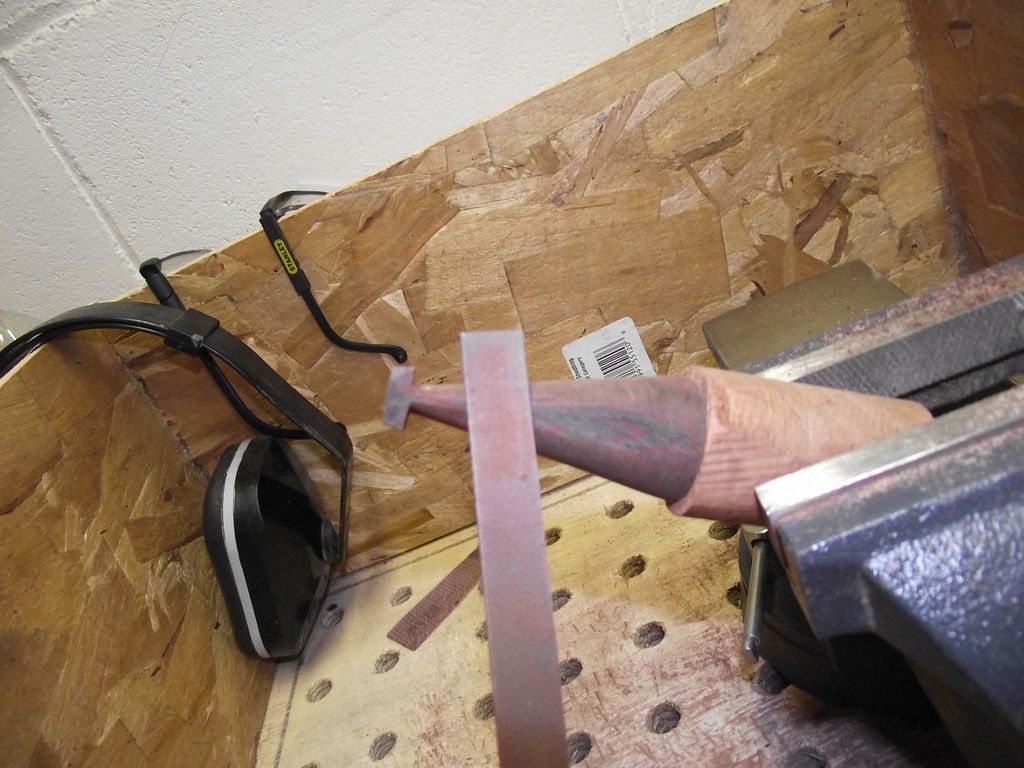
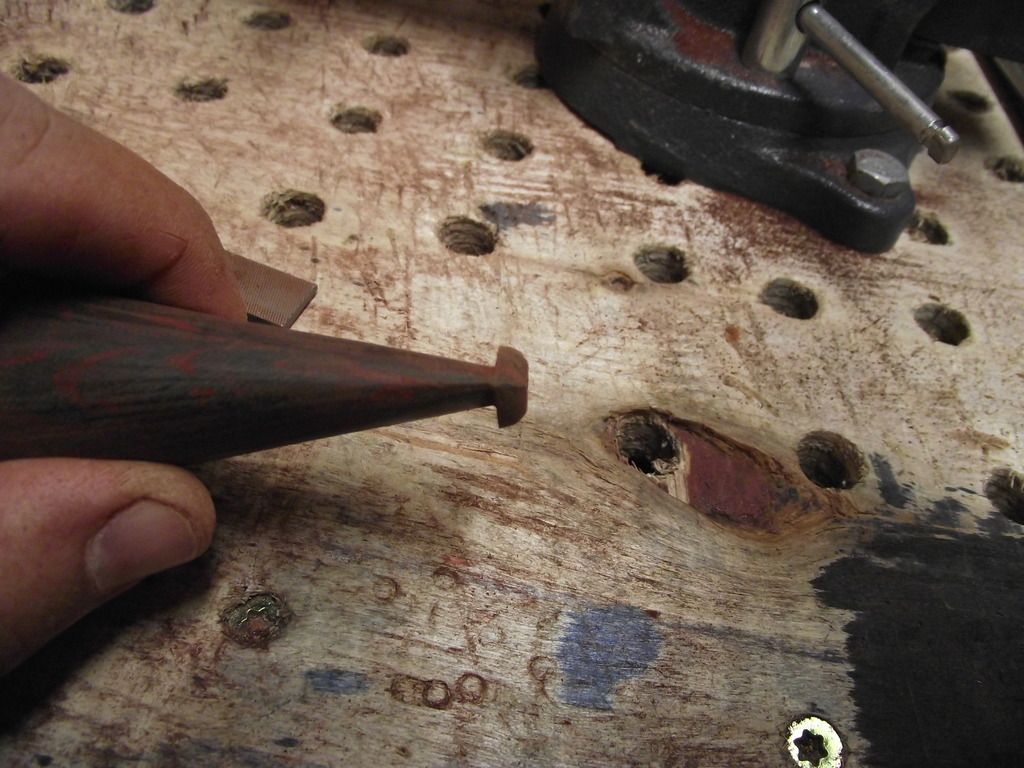
Step 40: I then bust out my Iwasaki flat file, this thing has razor teeth and can remove a ton of material very quickly!
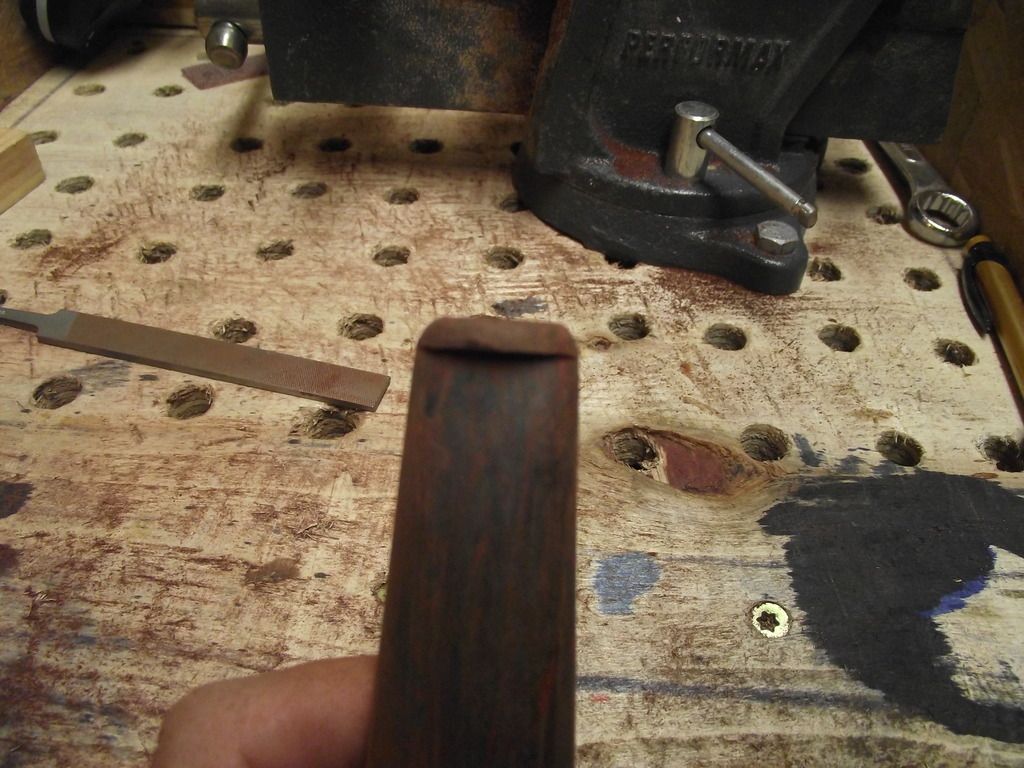
Step 41: More progress with the Iwasaki File.
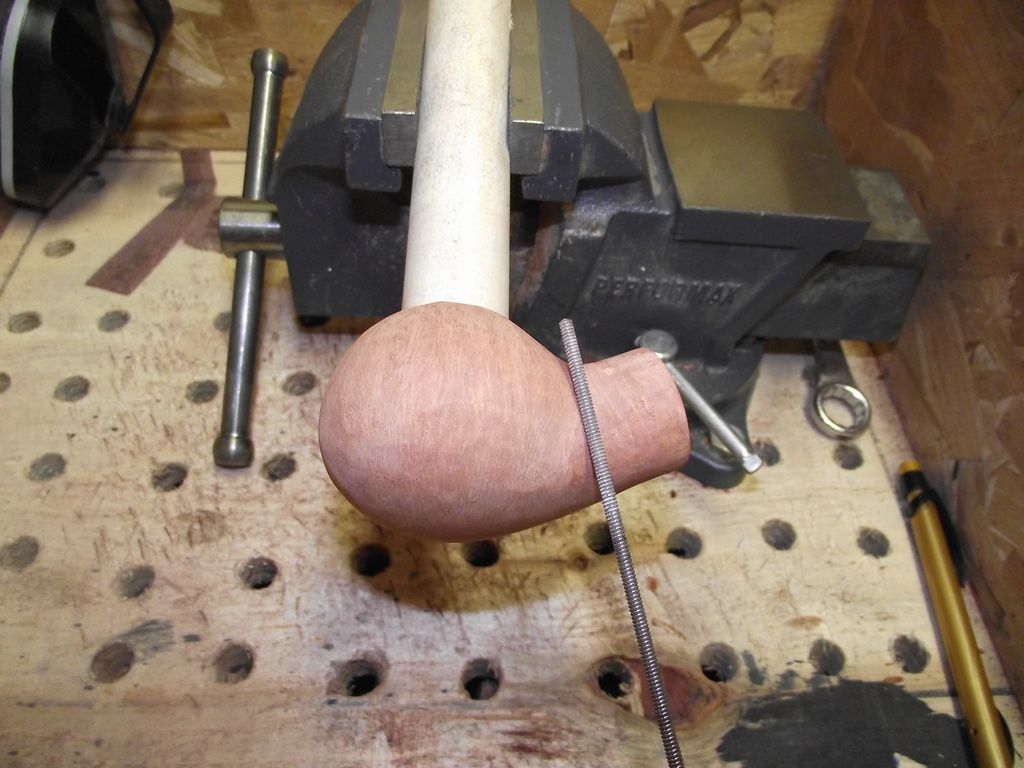
Step 42: Once I get enough meat off with the Iwasaki, I switch to a half round bastard file. This is a bit finer and cleans up the gouge marks, as well as allows me to get tighter angles.
Step 43: I also use it to thin the bit, not too much, but it gets me closer.
Step 44: It is starting to take shape, especially getting thinner behind the button.
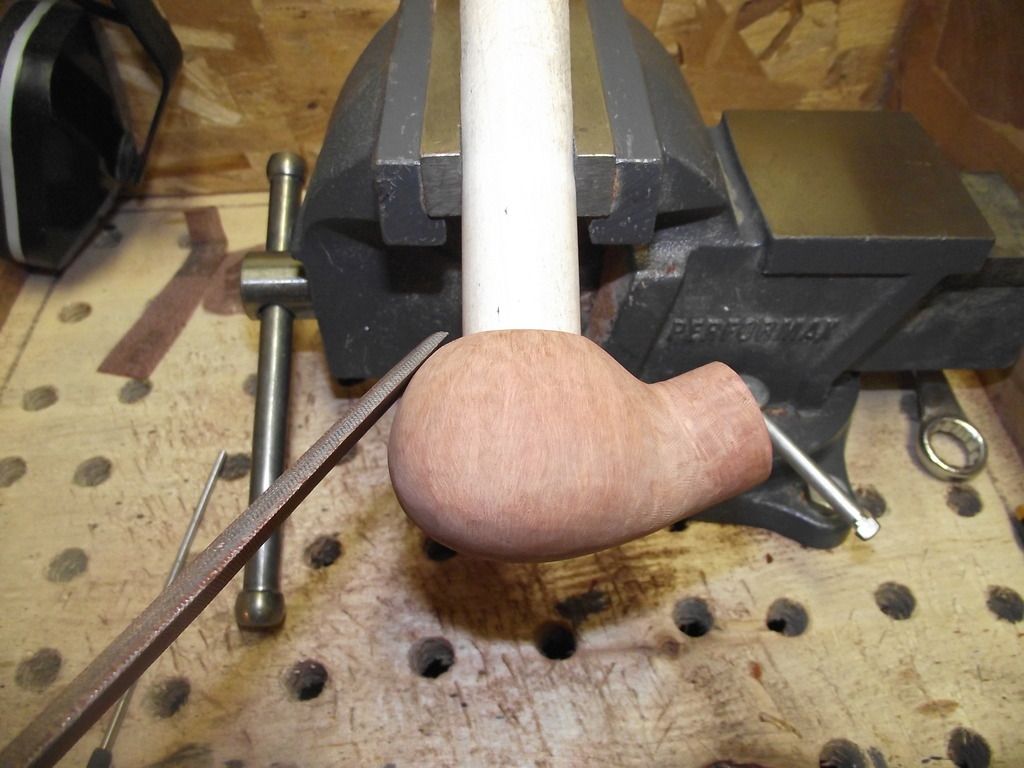
Step 45: I then switch to my Micro file (thanks to David McCarter for turning me onto this file!). This is finer than the half round bastard file and allows me to realy clean up the lines, albeit very slowly.
Step 46: The profile is slowly cleaning up nicely.
Step 47: Smoothing more with the micro file and starting to reduce the height of the button.
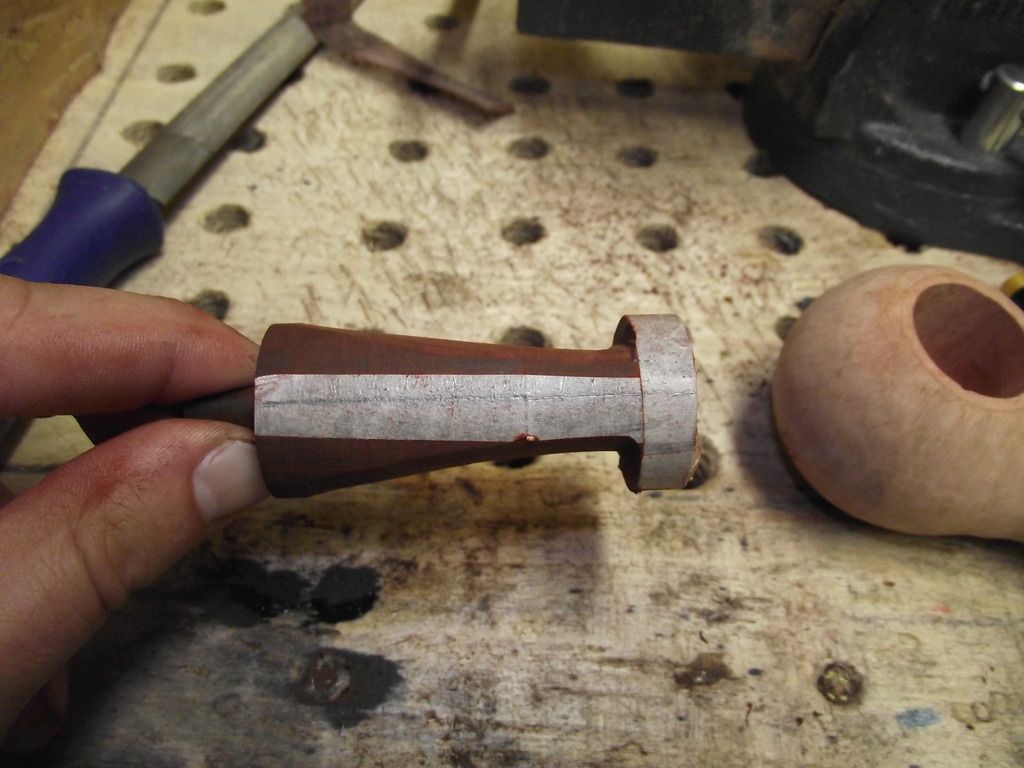
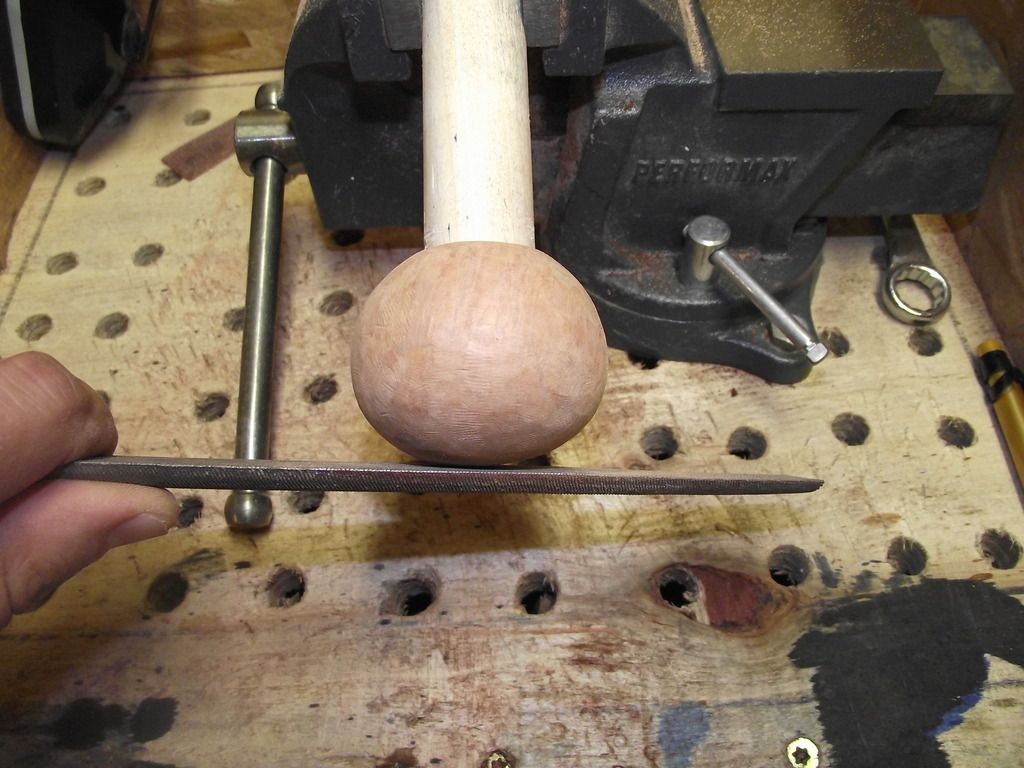
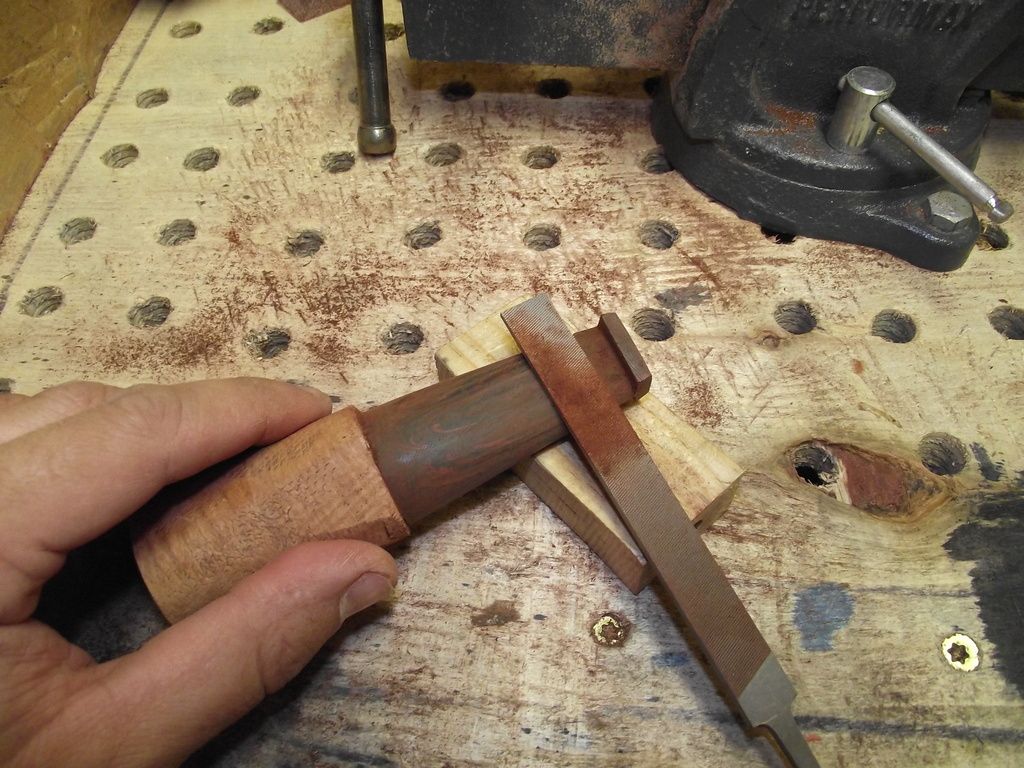
Step 48: Once I have a general rough shape I'm happy with, I need to fit it to the pipe. I insert the stem in the pipe and focus on the shank to stem junction. I use the micro file to get a rough profile that matches the shank to the base of the stem. Keep in mind, all of this is still just rough shaping.
Step 49: The aftermath on my homemade downdraft table, I have to clean it up now!
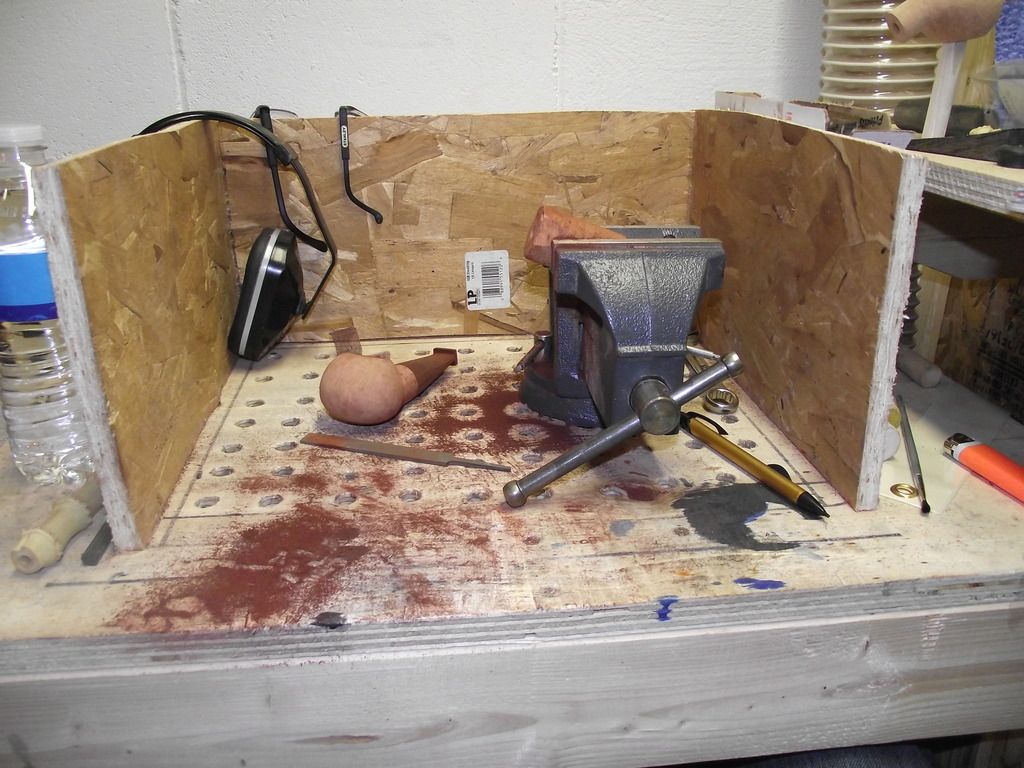
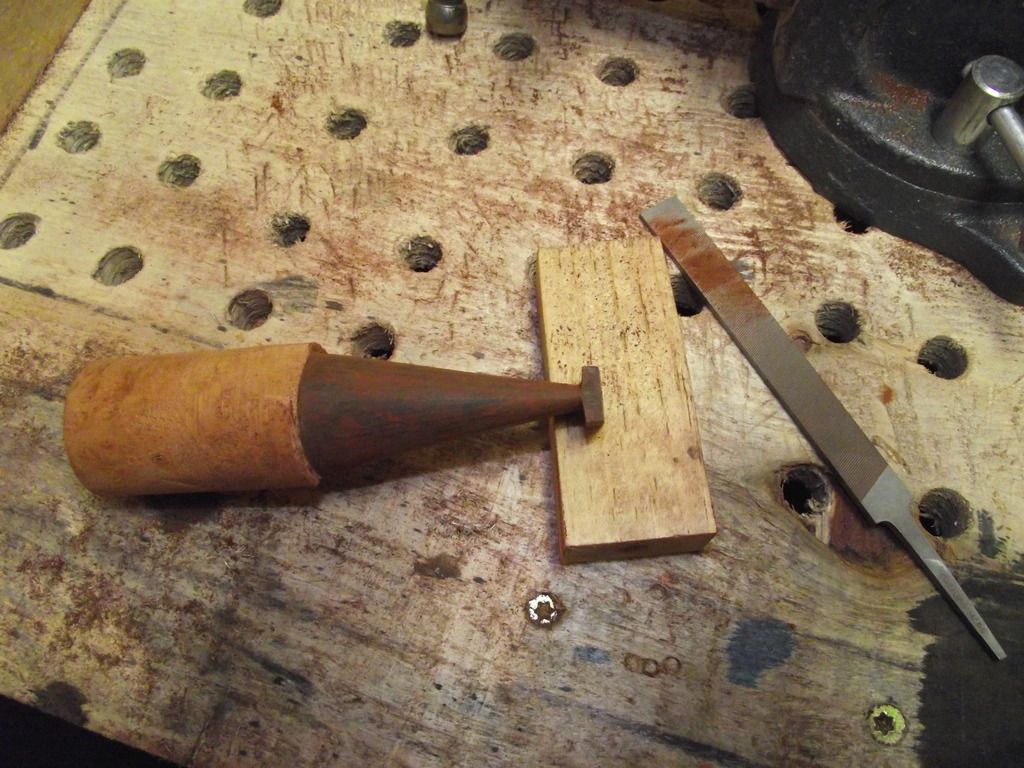
Step 50: Progress peek. The stummel and stem are now both finished rough shaping. I stopped at this point and the next process will be to start fine shaping.
Not sure when I'll get back in the shop. I'm a bit overcommitted at this point and have 4 other pipes awaiting the arrival of my new compressor so I can start officially sandblasting (supposed to arrive on Monday). Over the weekend, I will keep going on this one as much as I can.
TO BE CONTINUED . . . . .
On to the pics!
Step 37: First thing I do is mark some lines of the draft hole so I know how deep NOT to go!

Step 38: Then I take it to the belt sander, I used to do this on the sanding disc, but I just picked up this belt sander at a garage sale, so I figure now would be the best time to try it.

Step 39: I rough both sides and check it. I probably could have gone deeper, but I tend to go too deep and screw it up on the disc sander, so I decided I better play it safe with this.

Step 40: I then bust out my Iwasaki flat file, this thing has razor teeth and can remove a ton of material very quickly!

Step 41: More progress with the Iwasaki File.

Step 42: Once I get enough meat off with the Iwasaki, I switch to a half round bastard file. This is a bit finer and cleans up the gouge marks, as well as allows me to get tighter angles.

Step 43: I also use it to thin the bit, not too much, but it gets me closer.

Step 44: It is starting to take shape, especially getting thinner behind the button.

Step 45: I then switch to my Micro file (thanks to David McCarter for turning me onto this file!). This is finer than the half round bastard file and allows me to realy clean up the lines, albeit very slowly.

Step 46: The profile is slowly cleaning up nicely.

Step 47: Smoothing more with the micro file and starting to reduce the height of the button.

Step 48: Once I have a general rough shape I'm happy with, I need to fit it to the pipe. I insert the stem in the pipe and focus on the shank to stem junction. I use the micro file to get a rough profile that matches the shank to the base of the stem. Keep in mind, all of this is still just rough shaping.

Step 49: The aftermath on my homemade downdraft table, I have to clean it up now!

Step 50: Progress peek. The stummel and stem are now both finished rough shaping. I stopped at this point and the next process will be to start fine shaping.


Not sure when I'll get back in the shop. I'm a bit overcommitted at this point and have 4 other pipes awaiting the arrival of my new compressor so I can start officially sandblasting (supposed to arrive on Monday). Over the weekend, I will keep going on this one as much as I can.
TO BE CONTINUED . . . . .

I love pipe making process shots and the author is one of my favorite shapes. I'll make some popcorn and wait for the finale. ")
Looks great so far! Great job!
Looks great so far! Great job!
Got some more shop time in. More pictures will be up late tonight when I can get them off the camera. Fine shaping is done, next will be the finishing processes.
Since this pipe will be headed for the sandblaster after speaking to the client, there will be a delay until my new compressor arrives. Supposed to arrive Monday.
Ah, such bad luck that this beauty will not be smooth.. I'd have loved to see it done in a smooth finish.. But I guess it's the client taste that matters ..
..Here are the last set of pictures for a while. Once the compressor arrives I have 4 pipes ahead of this one, all waiting to be blasted. So this one will fall back in line. I apologize for this, as I had hoped this would remain a smooth and I could finish it before starting up on the rest of the blasts. Either way, this thread will continue to capture the start to finish progress when time allows.
OK, here we go, finish shaping. Very manual, very tedious, very difficult to maintain symmetry ( at least for my current hand skill level)
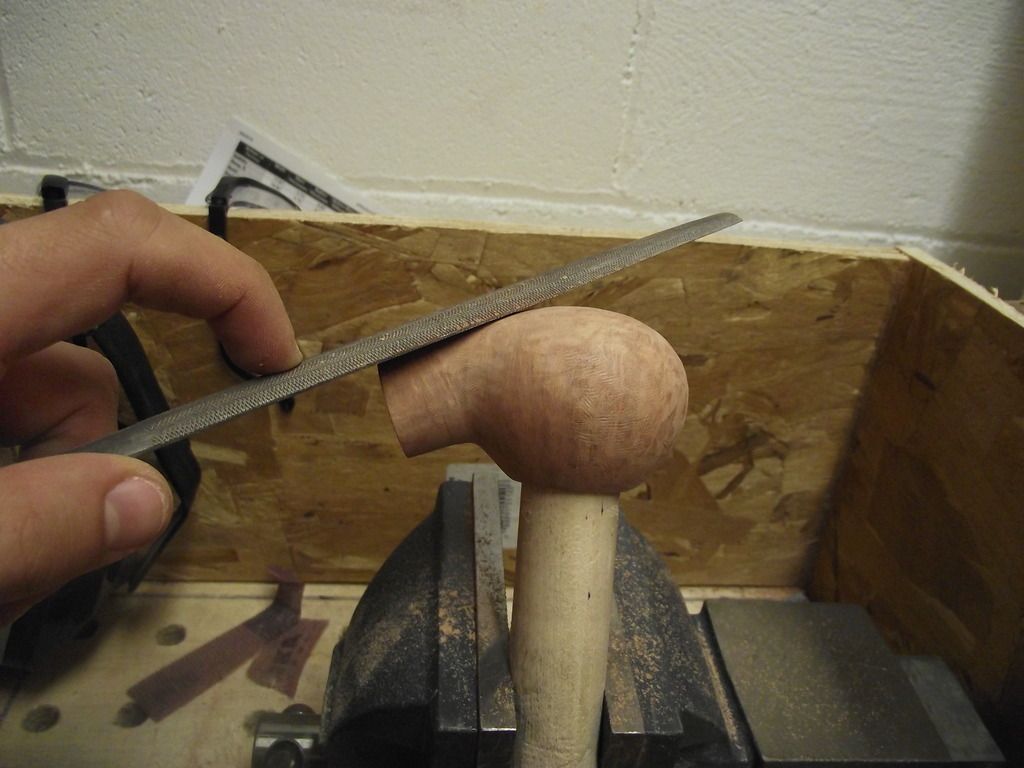
Step 51: Time to clean up the Stummel, I start by getting into the tighter corners with an Iwasaki 3mm Round File, This thing doesn't look like much of a file, but it tears through briar very quickly!
Step 52: Once I'm done tightening up the corners, I switch to my half round bastard file and start refining the entire profile.
Step 53: When I am happy with the side profile, I work on the front symmetry and overall roundness. This is the part I never seem to be satisfied with and spend a long time on. I wonder if there is ultimately an easier way to attain nice symmetry, but this is how I do it, improving each time, little by little.
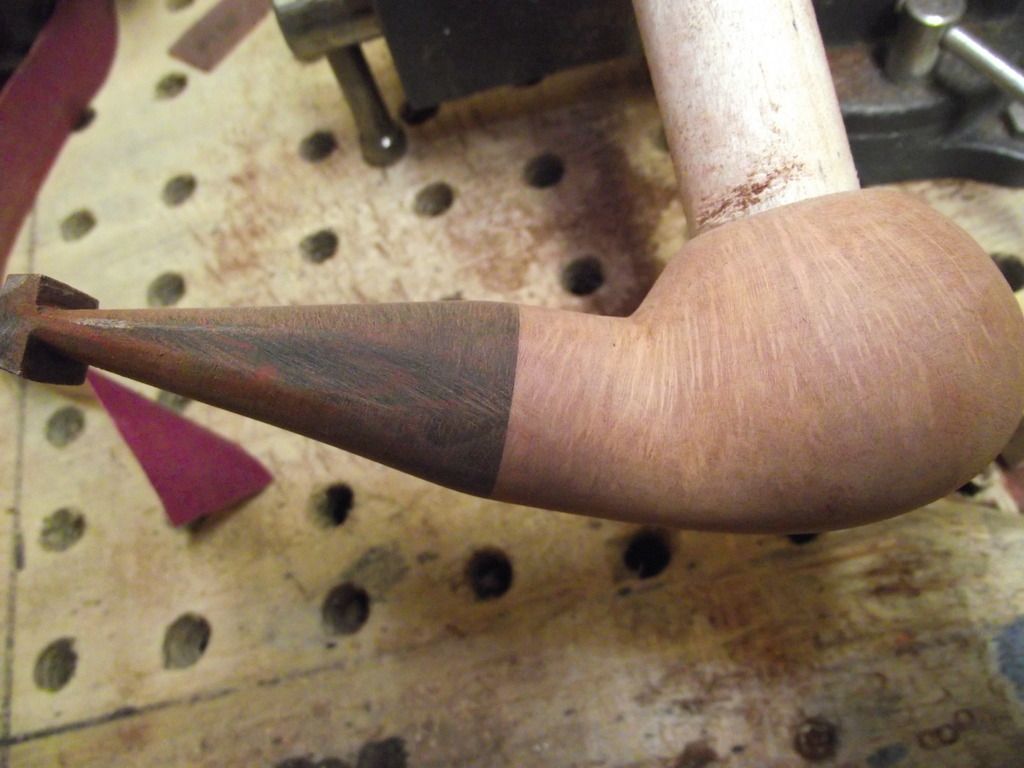
Step 54: I notice that my shank line has a janky angle where it flows into the bowl. It is more appealing to try and make this line seamless.
Step 55: Once I am done with the files, I have to remove all tooling marks. I start with 120 grit sandpaper and go over the entire stummel. I put the stem back in for this part. Any work around the shank needs to have the stem in place or you will never keep a seamless appearance of the stem to shank junction.
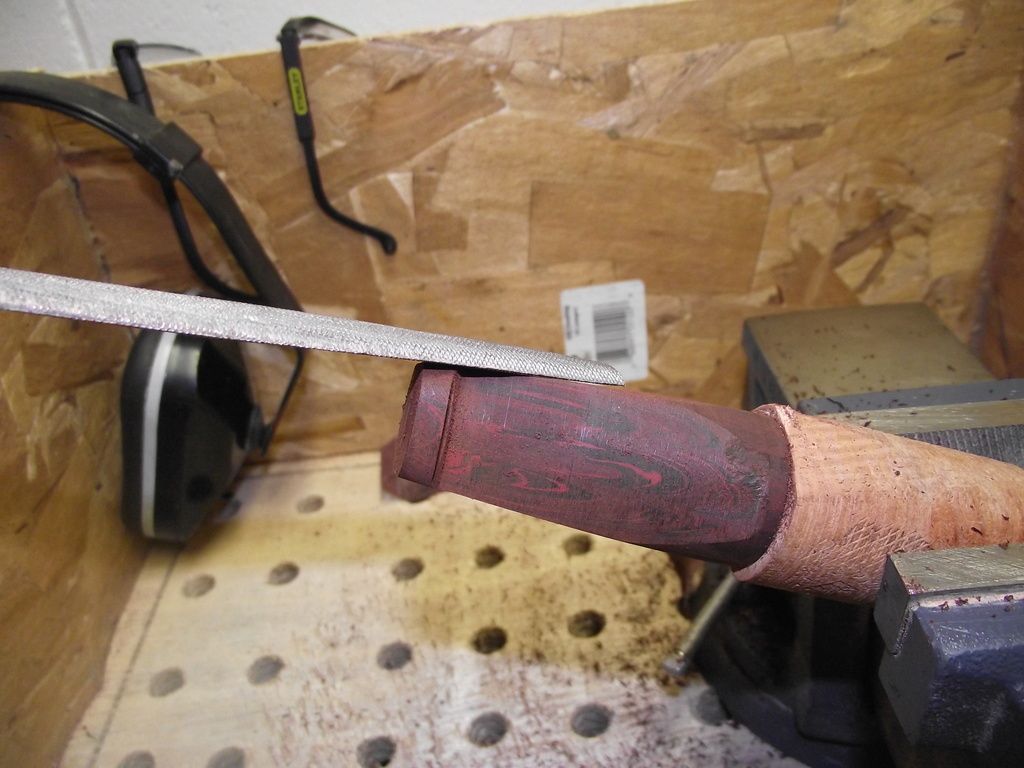
Step 56: Once I'm happy with getting most of the tooling marks out of the stummel, I start work on finish shaping the stem. I start on the side with the half round bastard file.
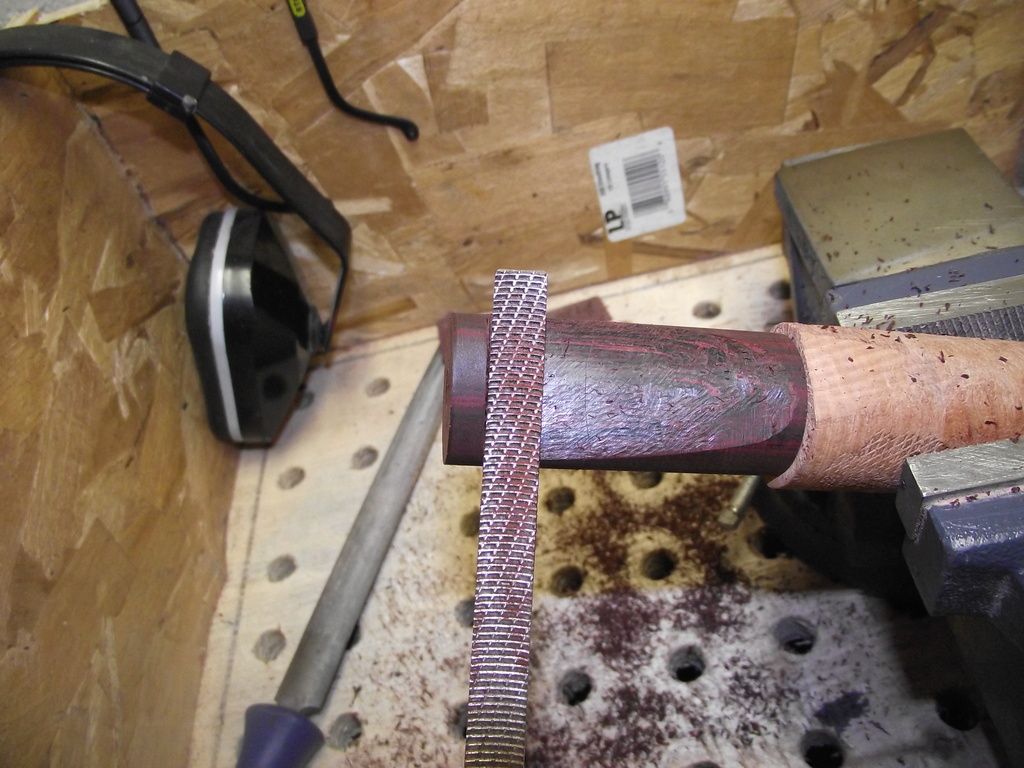
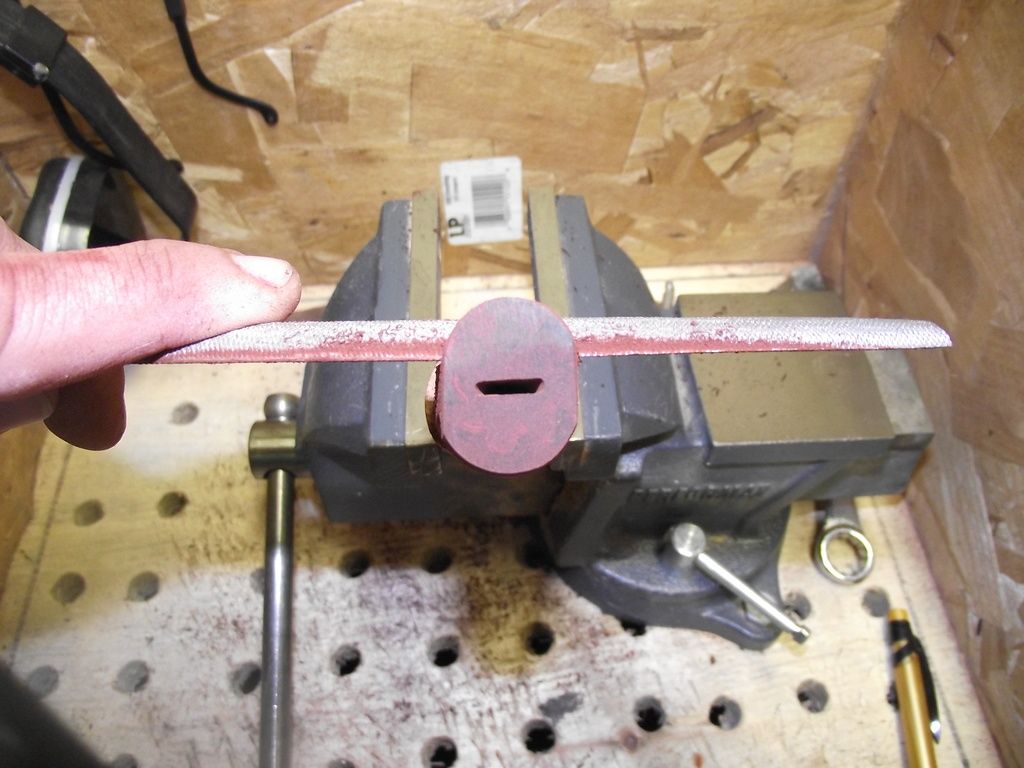
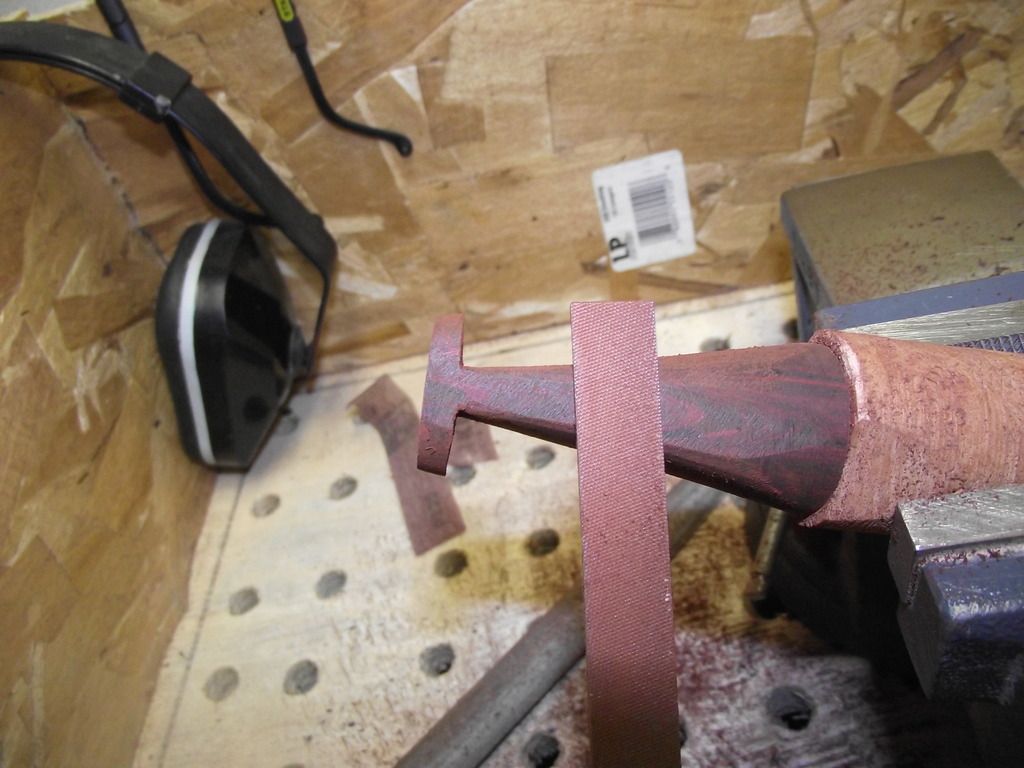
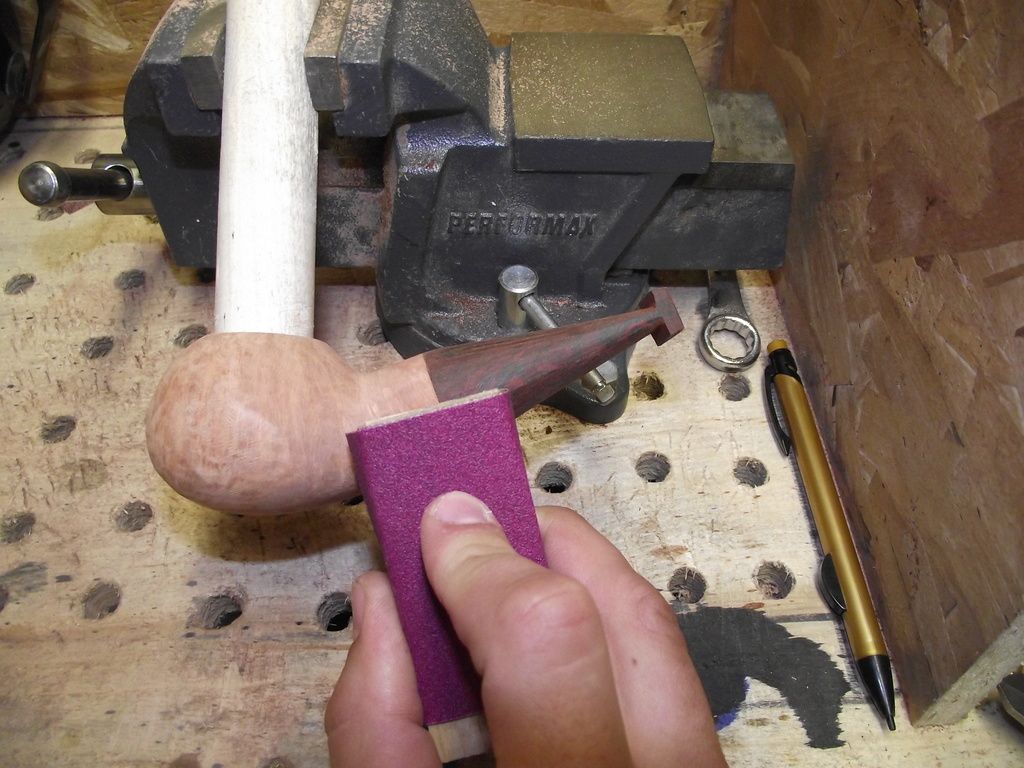
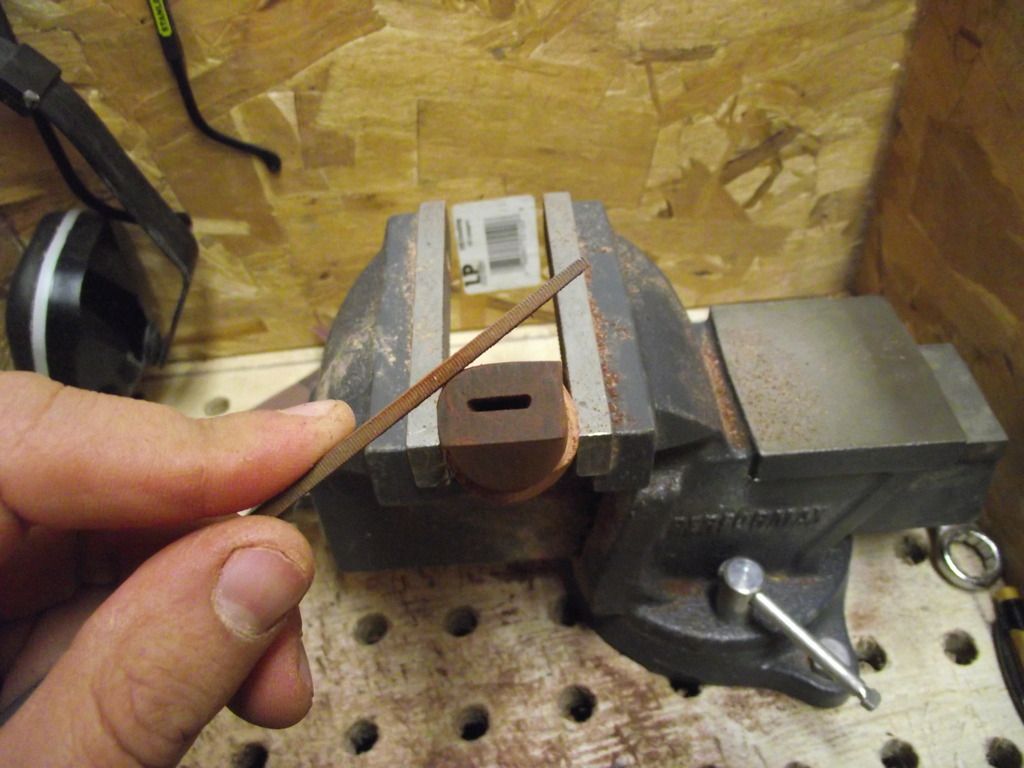
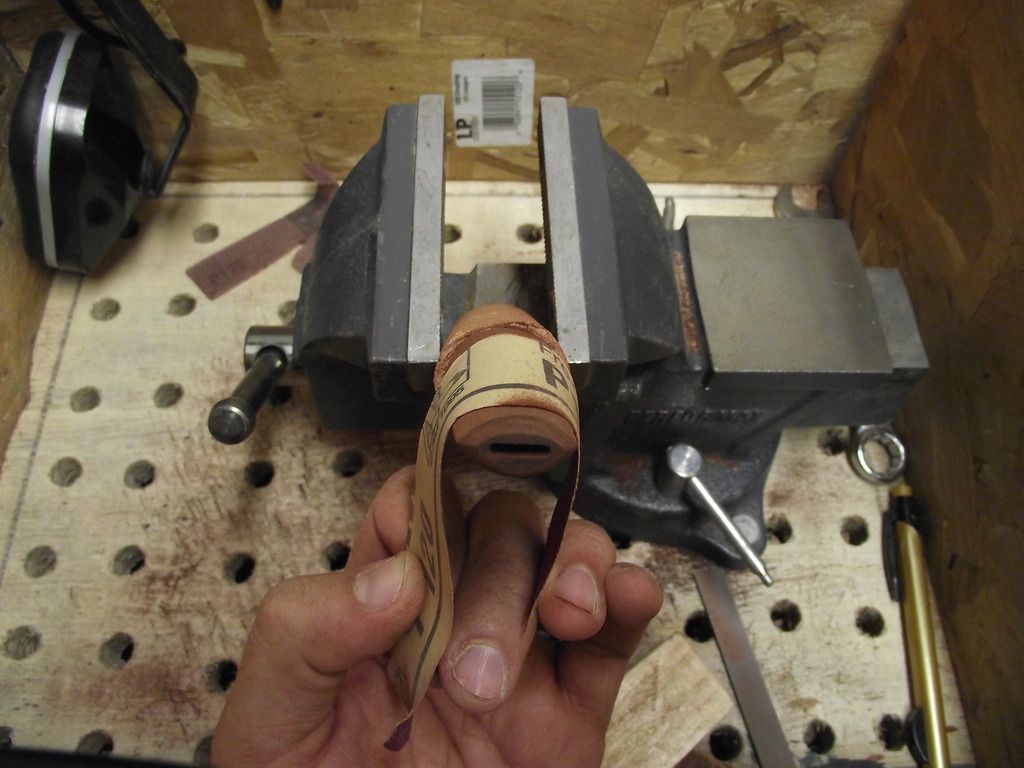
Step 57: Once The sides are cleaned up, I use a strip of 120 grit sandpaper and the "Boot Strap" method to further mend to shank to stem line.
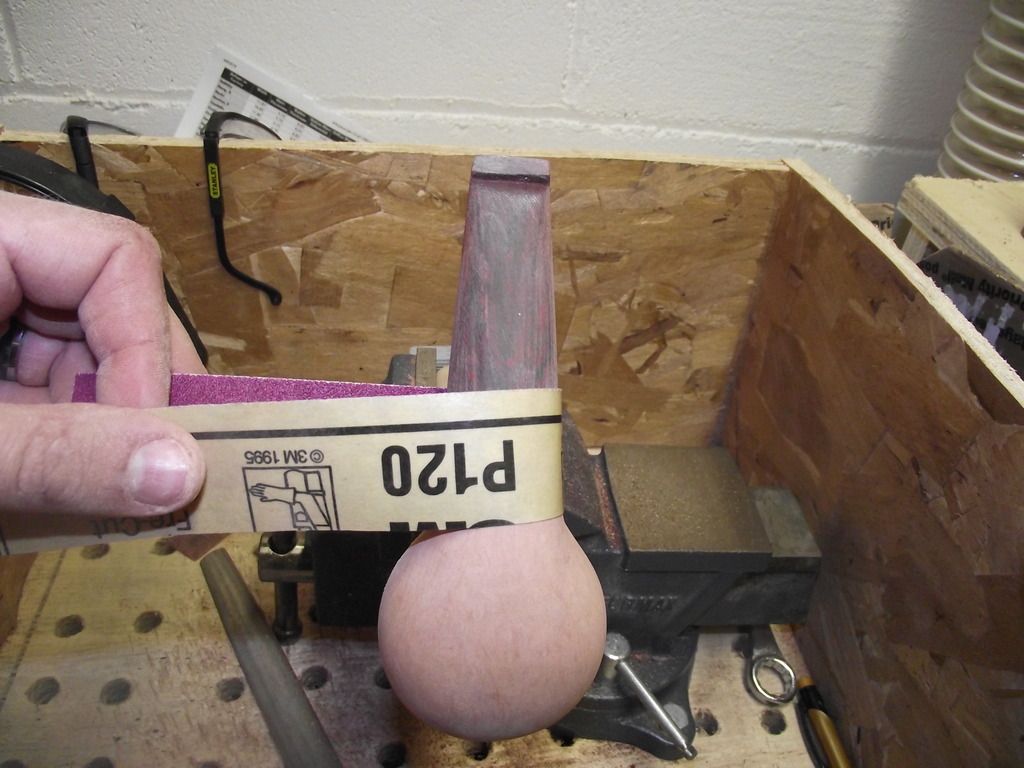
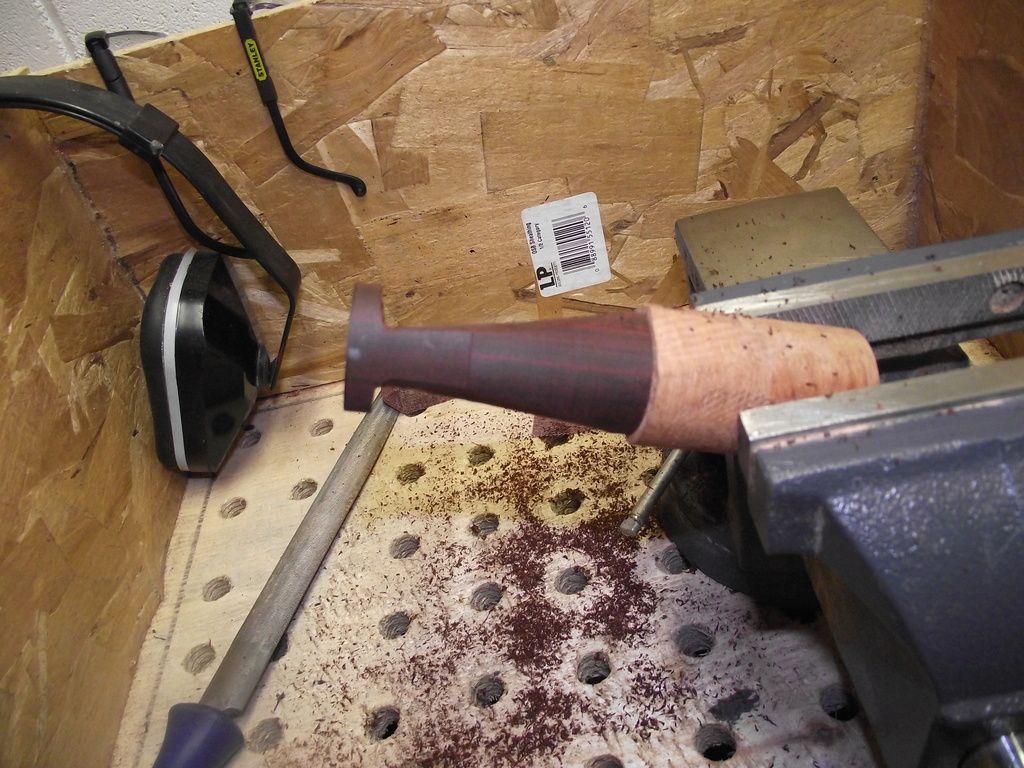
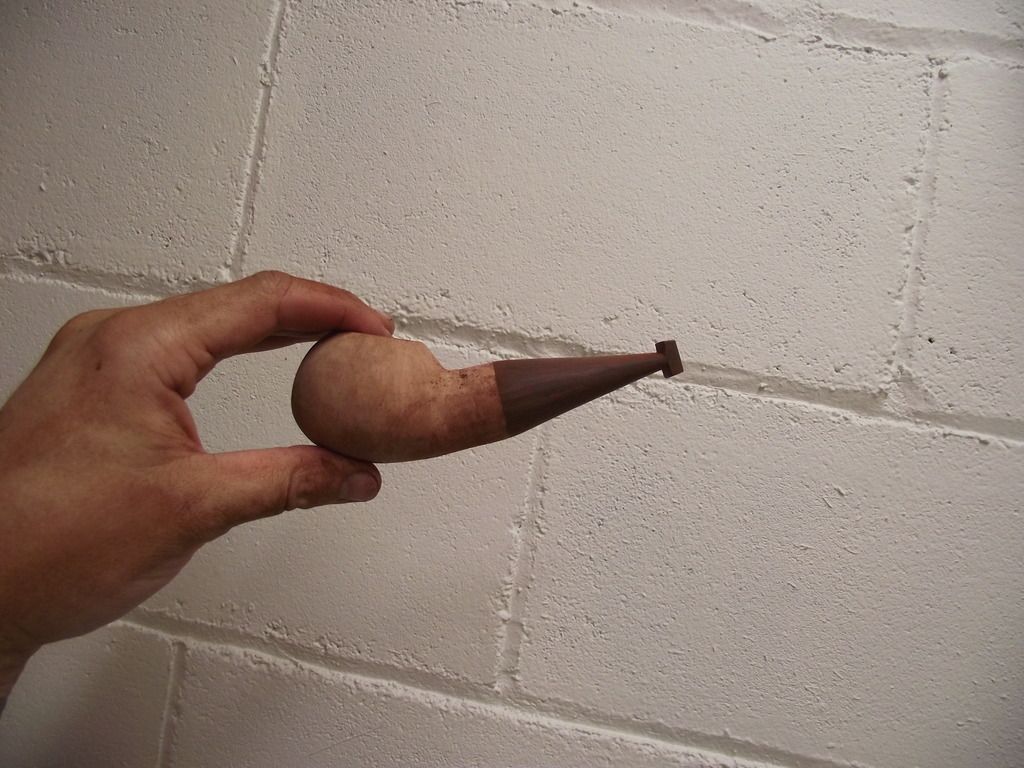
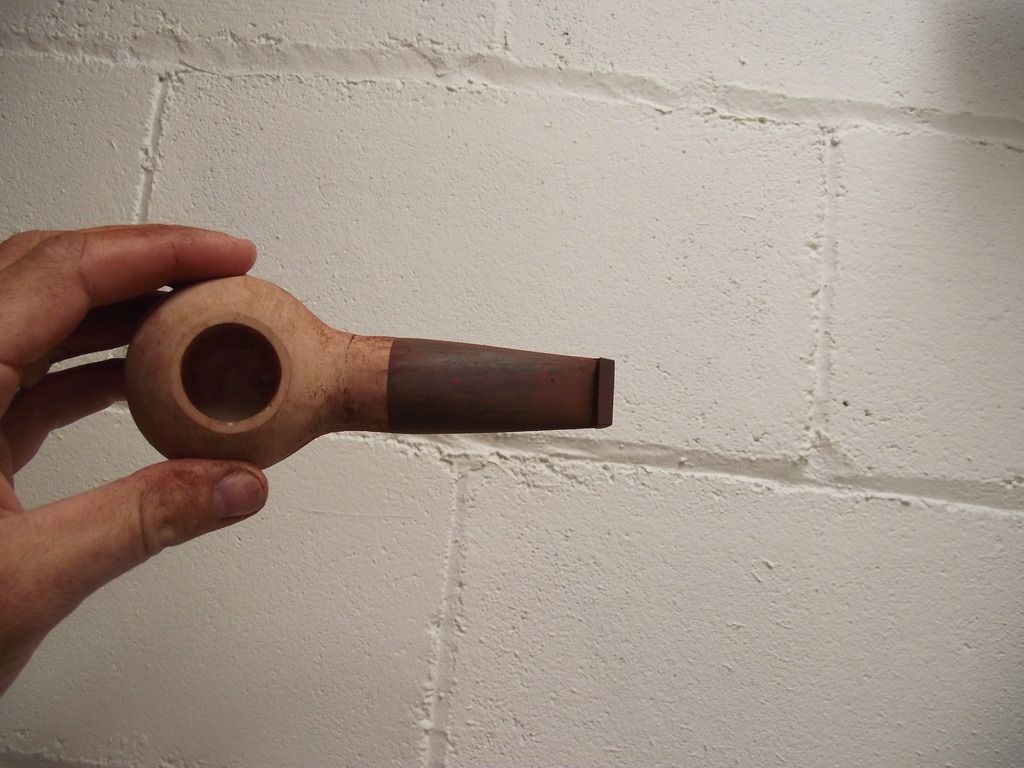
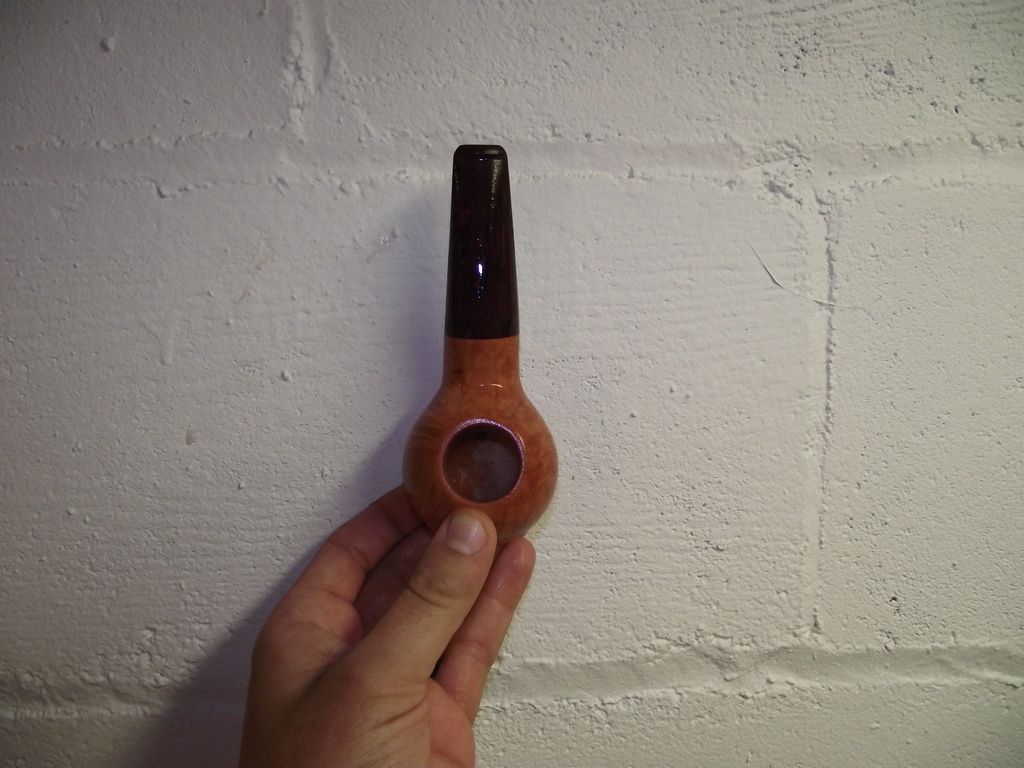
Step 58: A quick peek at the progress so far.
Step 59: When I'm happy with that, I remove the stem from the stummel to further refine it. Since I know that the base of the stem is now shaped to fit the shank, I base all of my tapering off of that shape. I start dialing in the profile with the Micro File.
Step 60: I continue filing and filing and filing . . . Did I mention there is a LOT of filing to be done?
Step 61: I think I have a decent taper now, the bit is a bit thick at the moment, but my hands are sore so I am going to give them a less strenuous task next.
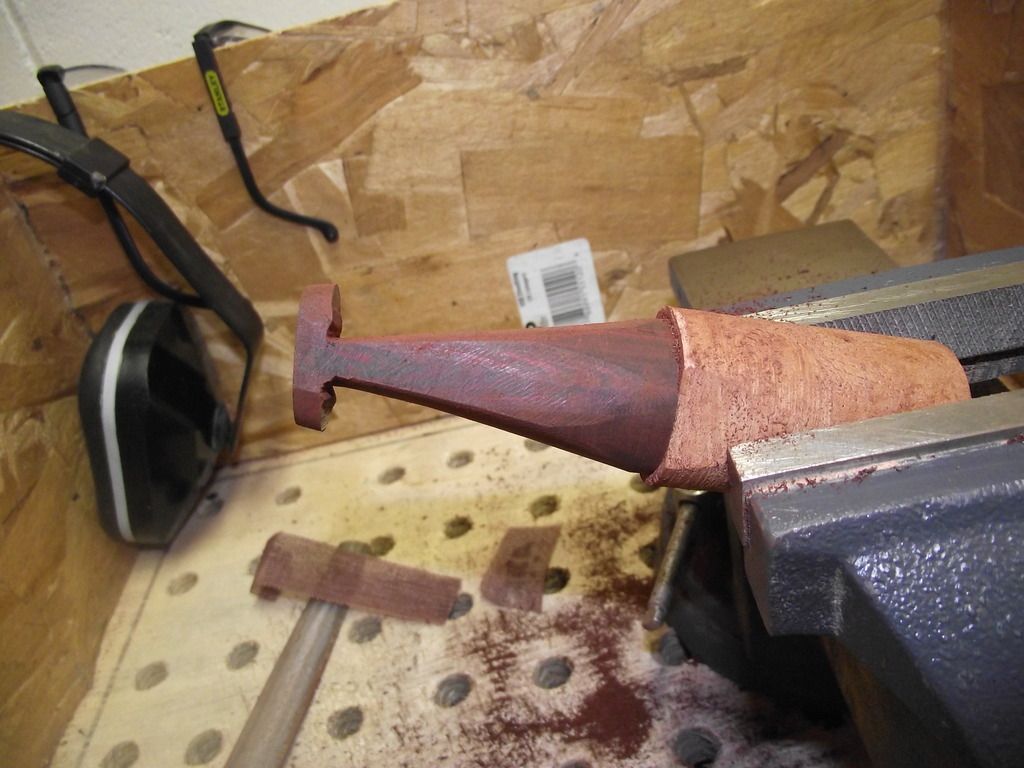
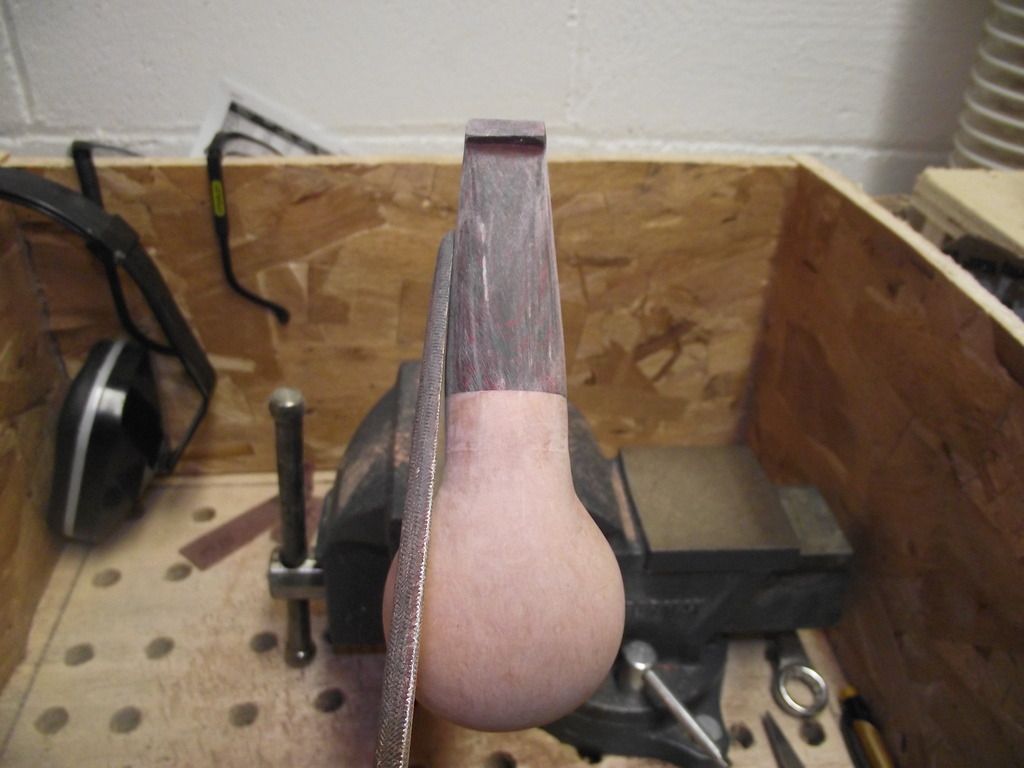
Step 62: It is time to start profiling the button!
Step 63: Gotta do both sides.
Step 64: Dialing in the overall arches of the button and defining the corners.
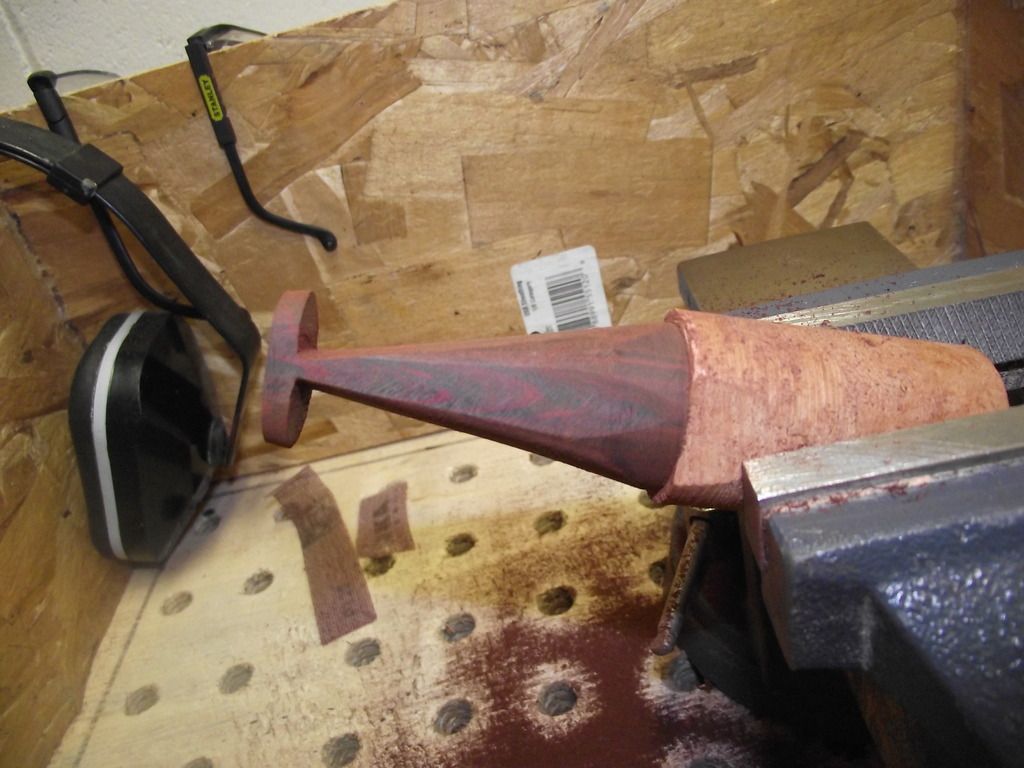
Step 65: Rounding the button profile, still using the micro file. I tend to leave a bit more material on here as ebonite seems to shrink when buffing (I probably press too hard ). It is much easier to remove too much material while buffing ebonite, than it is buffing acrylic.
Step 66: For more comfortable mouth feel, the corners of the button should get tapered.
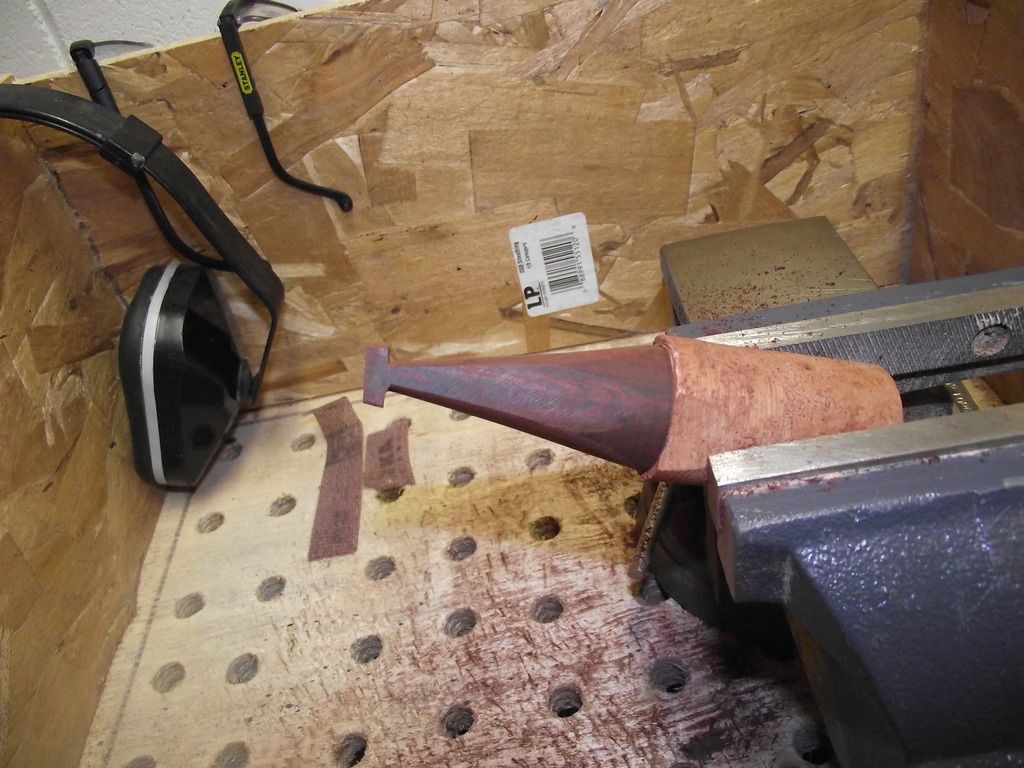
Step 67: I continue to file the bit, right behind the button. I check thickness. I am aiming for 4.14 to 4.17mm. This is still too thick. This is the step I tend to ruin the stems on. I like to take off too much, or thin the corners of the profile too much. After all this work on the stem so far, a fatal error can be heartbreaking.
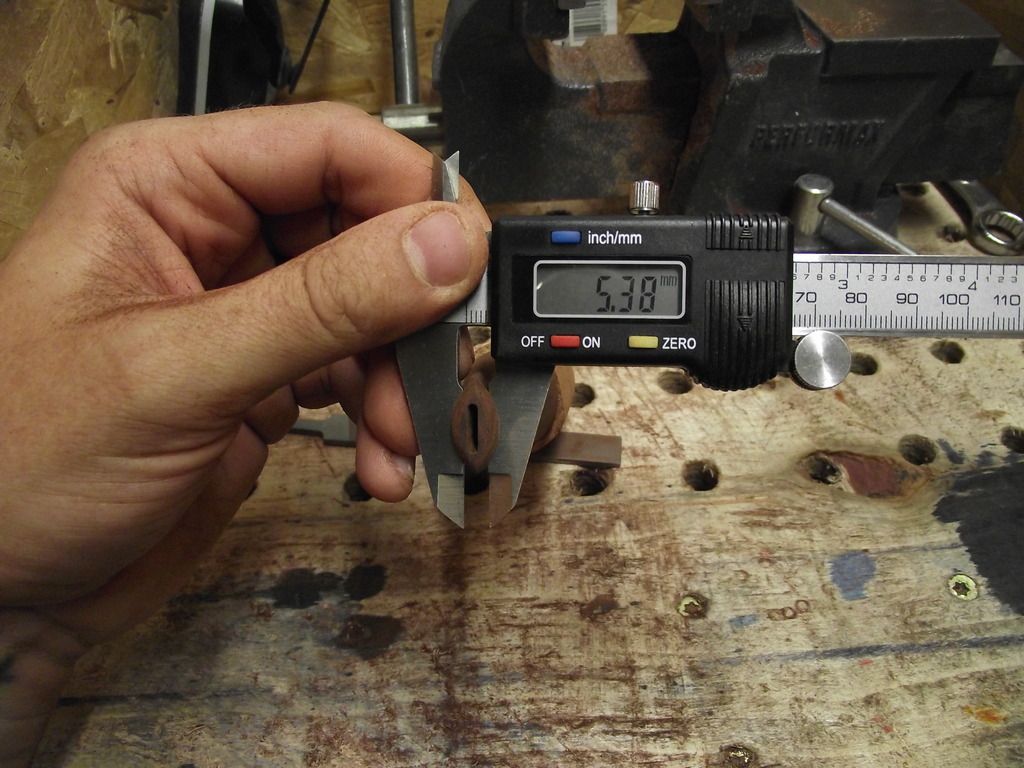
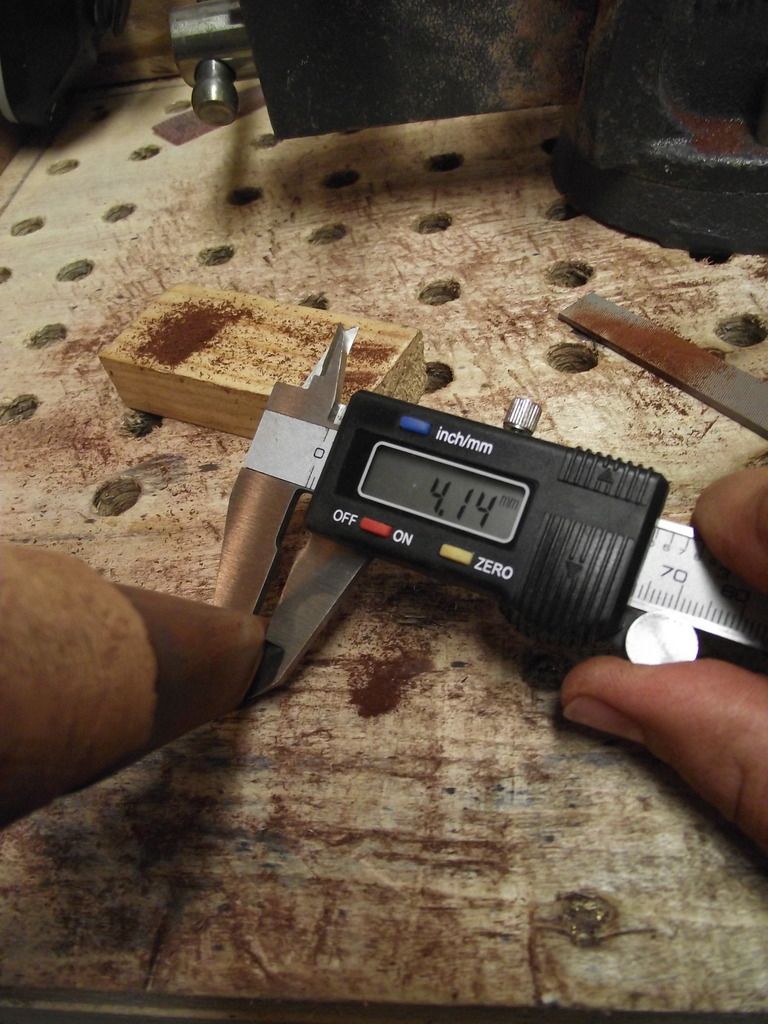
Step 68: More filing, and I finally have my 4.14mm bit thickness. Even though this is a chubby author and some would say this is too thin and prone to bite through, I am leaving the bit fairly wide and the button slightly taller. So unless the owner is a hard clencher, we should be alright.
Step 69: Once the bit thickness and resulting taper profile are complete with the micro file, I remove much of the tooling gouges using 120 grit and the "Boot Strap" method. I am careful to keep the sandpaper away from the base of the stem as it is very easy to round the base or change the shape. Then when you put it back in the stummel, it no longer fits flush all the way around.
Step 70: Coming along nicely. I am stopping here. This set of pictures is about 3 hours of shop time.

TO BE CONTINUED ......
OK, here we go, finish shaping. Very manual, very tedious, very difficult to maintain symmetry ( at least for my current hand skill level)
Step 51: Time to clean up the Stummel, I start by getting into the tighter corners with an Iwasaki 3mm Round File, This thing doesn't look like much of a file, but it tears through briar very quickly!

Step 52: Once I'm done tightening up the corners, I switch to my half round bastard file and start refining the entire profile.

Step 53: When I am happy with the side profile, I work on the front symmetry and overall roundness. This is the part I never seem to be satisfied with and spend a long time on. I wonder if there is ultimately an easier way to attain nice symmetry, but this is how I do it, improving each time, little by little.

Step 54: I notice that my shank line has a janky angle where it flows into the bowl. It is more appealing to try and make this line seamless.

Step 55: Once I am done with the files, I have to remove all tooling marks. I start with 120 grit sandpaper and go over the entire stummel. I put the stem back in for this part. Any work around the shank needs to have the stem in place or you will never keep a seamless appearance of the stem to shank junction.

Step 56: Once I'm happy with getting most of the tooling marks out of the stummel, I start work on finish shaping the stem. I start on the side with the half round bastard file.

Step 57: Once The sides are cleaned up, I use a strip of 120 grit sandpaper and the "Boot Strap" method to further mend to shank to stem line.

Step 58: A quick peek at the progress so far.

Step 59: When I'm happy with that, I remove the stem from the stummel to further refine it. Since I know that the base of the stem is now shaped to fit the shank, I base all of my tapering off of that shape. I start dialing in the profile with the Micro File.

Step 60: I continue filing and filing and filing . . . Did I mention there is a LOT of filing to be done?

Step 61: I think I have a decent taper now, the bit is a bit thick at the moment, but my hands are sore so I am going to give them a less strenuous task next.

Step 62: It is time to start profiling the button!

Step 63: Gotta do both sides.

Step 64: Dialing in the overall arches of the button and defining the corners.

Step 65: Rounding the button profile, still using the micro file. I tend to leave a bit more material on here as ebonite seems to shrink when buffing (I probably press too hard
). It is much easier to remove too much material while buffing ebonite, than it is buffing acrylic.
Step 66: For more comfortable mouth feel, the corners of the button should get tapered.

Step 67: I continue to file the bit, right behind the button. I check thickness. I am aiming for 4.14 to 4.17mm. This is still too thick. This is the step I tend to ruin the stems on. I like to take off too much, or thin the corners of the profile too much. After all this work on the stem so far, a fatal error can be heartbreaking.

Step 68: More filing, and I finally have my 4.14mm bit thickness. Even though this is a chubby author and some would say this is too thin and prone to bite through, I am leaving the bit fairly wide and the button slightly taller. So unless the owner is a hard clencher, we should be alright.

Step 69: Once the bit thickness and resulting taper profile are complete with the micro file, I remove much of the tooling gouges using 120 grit and the "Boot Strap" method. I am careful to keep the sandpaper away from the base of the stem as it is very easy to round the base or change the shape. Then when you put it back in the stummel, it no longer fits flush all the way around.

Step 70: Coming along nicely. I am stopping here. This set of pictures is about 3 hours of shop time.


TO BE CONTINUED ......
Should be some nice ring grain after blasting.
I was blasting pipes in my dreams last night. Seriously! Lol!
I was blasting pipes in my dreams last night. Seriously! Lol!
- Status
- Not open for further replies.